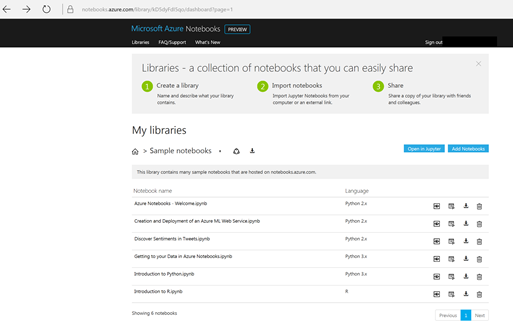
Jupyter notebooks on Azure with Notebooks.azure.com
Notebooks.azure.com provides a FREE Jupyter notebooks the service allows you to use Jupyter notebooks (https://jupyter.org/) and the programming language Python (https://www.python.org/). The Azure Notebook service is a FREE web application at https://notebooks.azure.com that allows you to create and share Juypter documents.
The solution allows you to build interactive notebooks which contain live code, LATEX equations, and graphical visualizations and text which allow you to interactive run experiments and assessments on data and can be used in a varity of situations including data cleaning, data transformation, simulation, statistics, modeling, machine learning and much more with no overhead of server, infrastructure or service management.
Azure notebook service
The Azure notebook service provides cloud-based Jupyter notebook environments at https://notebooks.azure.com/. Dr Harry Strange at the University College London and Dr Garth Wells at the University of Cambridge are two academics, I know who are both are extensively using https://notebooks.azure.com within UG and PG teaching both academics/institutions now operate dedicated Azure Jupyter Notebook for use to their students and courses.
Running and viewing the course material
The way in which the institutions utilise Notebooks is by simply having a dedicated Notebook activities for the course. Students simply click on a notebook to view it. Students then can simply Click 'Clone and Run!' which creates their own copy of the Notebook on Azure and allows them to own a runnable and editable versions of the activity notebooks. This allows students to freely experiment with their own your copy of the activity notebooks and allows them to always return to the master version at any time.
Creating your first Juypter notebook on Notebooks.azure.com
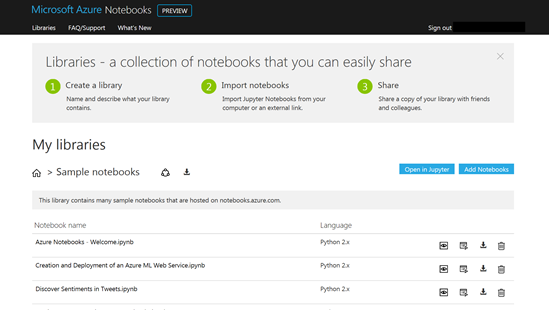
Log into Azure Juypter Notebook server at https://notebooks.azure.com/.
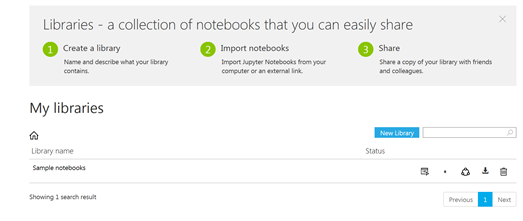
Go to 'Libraries' (top left of the page).
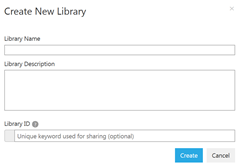
Click 'New Library' to create a library (give it a suitable name, e.g. Python Notebooks.
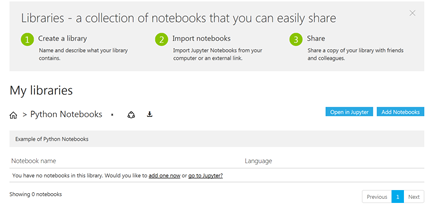
You should now be in your new library. Click 'Open in Jupyter' 'to get a Jupyter environment.
At the top-right of the page, click New -> Python 3. You will now have a new notebook, and you're ready to start working.
You should now see your new Juypter Notebook
By default, the notebook is title is untitled, to rename your notebook simply click on untitled and enter the new name
When you return to Notebooks.azure.com your notebooks are displayed, to open a notebook simply just click on the title.
Running Jupyter locally or Via an Azure Virtual Machine
You can run Jupyter and Python locally on your own computer if you wish or you can use the Data Science VM on Azure which comes with Juypter.
We currently have Juypter Notebooks available on Azure as service
https://notebooks.azure.com
Or you can have Juypter available on a Windows Virtual Machine
Or a Linux Virtual Machine
What I really like about Cambridge and UCL course is that they are fully supporting Azure within teaching and learning and utilising the Azure hosted Juypter Notebooks https://notebooks.azure.com/ environment.
The following are some top Tips for getting started with Notebooks
These following recommendations are from Dr Garth Wells at University of Cambridge who has provided this guidance in his Jupyter Notebooks available at
https://github.com/CambridgeEngineering/PartIA-Computing-Michaelmas or at Notebooks.azure.com here https://notebooks.azure.com/library/CUED-IA-Computing-Michaelmas
The materials and course resources are available under Creative Common’s and MIT licenses and license details available at (https://github.com/CambridgeEngineering/PartIA-Computing-Michaelmas#license-and-copyright).
The following top tips have been adapted from Dr Garth Wells materials to provide a high level insight of how to get started with Juypter Notebooks.
Editing and running notebooks
Jupyter notebooks have text cells and code cells. If you double-click on part of a notebook in a Jupyter environment (see below for creating a Jupyter environment on Azure), the cell will become editable. You will see in the menu bar whether it is a text cell ('Markdown') or a code cell ('Code'). You can use the drop-down box at the top of a notebook to change the cell type. You can use Insert from the menu bar to insert a new cell.
The current cell can be 'run' using shift-return (the current cell is highlighted by a bar on the left-hand side of the page). When run, a text cell will be typeset, and the code in a 'code cell' will be executed. Any output from a code cell will appear below the code.
Often you will want to run all cells from the start of a notebook. You can do this with Kernel -> Restart & Run All from the notebook menu bar. In this case the cells are executed in order (first through to last).
Below is a code cell:
print(2 + 2)
Output
4
Formatting text cells
Text cells are formatted using Markdown, and using LaTeX syntax for mathematics. Make extensive use of text cells to explain what your program does, and how it does it. Use mathematical typesetting to express yourself mathematically.
Markdown
You can find all the details in the Jupyter Markdown documentation. Below is a brief summary.
Headings
Using Markdown, headings are indicated by '#':
 # Top level heading
## Second level heading
### Third level heading
Text style
The Markdown input
 Opening passage

`A passage of text`

*Some more text*
appears as:
Opening passage
A passage of text
Some more text
Lists
You can create bulleted list using:
 - Option A
- Option B
to show
- Option A
- Option B
and enumerated lists using
 1. Old approach
1. New approach
to show
- Old approach
- New approach
Markdown resolves the list number for you.
Code
Code can be typeset using:
 ```python
def f(x):
    return x*x
```
which produces
 def f(x):
    return x*x
You can include images in Jupyter notebooks - see Jupyter Markdown documentation
LaTeX
Markdown cells support LaTeX syntax for typesetting mathematics. LaTex is the leading tool for technical documents and presenting mathematics, and it is free.
To typeset an inline equation, use:
The term of interest in this case is $\exp(-2x) \sin(3 x^{4})$.
which will appear as:
'The term of interest in this case is exp(−2x)sin(αx4)>exp(−2x)sin(αx4) .'
For a displayed equation, from
 We wish to evaluate

$$
f(x) = \beta x^{3} \int_{0}^{2} g(x) \, dx
$$

when $\beta = 4$.
we get:
'We wish to evaluate
f(x)=βx3∫20g(x)dxf(x)=βx3∫02g(x)dx
when β=4β=4 .'
LaTeX commands for different mathematical symbols. If you see an example of mathematical typesetting in a notebook, you can also double-click it in a Jupyter environment to see the syntax.


