Microsoft Azure Dev Test Labs–The perfect solution for your Institution lab environment
Microsoft Azure DevTest Labs gives developers on-demand, self-service, Azure-based test environments.
Academics can quickly create environments and resources in Azure while minimizing waste and controlling cost.
Also, Dev Test labs allows you to create pre-provisioned environments for training and demonstrations so they are the perfect solution for building out classroom and lab resources for teaching, learning and research.
The flexibility of Azure Resource Manager Templates ‘ARM’ allows you to simply build and then script the deployment of the whole environment which means it could be kicked off from your Continuous Intergration pipelines or service management tools, this give you the flexibility of spinning up and shutting down resources based on exact requirements and time scales thus maximizing cost per usage.
With Dev Test labs you can reuse template and standard configuration templates can be created to allow you to develop a portfolio of services for the basis of VMs (they can be either out of the box or created from your own VMs). Further customisation can be achieved through either, what's called, artefacts or Configuration Management tools that kick in after provisioning a base VM. Examples of these tools would be Puppet, Chef or Desired State Configuration (DSC).
Let’s take a look around Dev/Test labs and how to script the creation of resources.
What does DevTest Labs have to offer
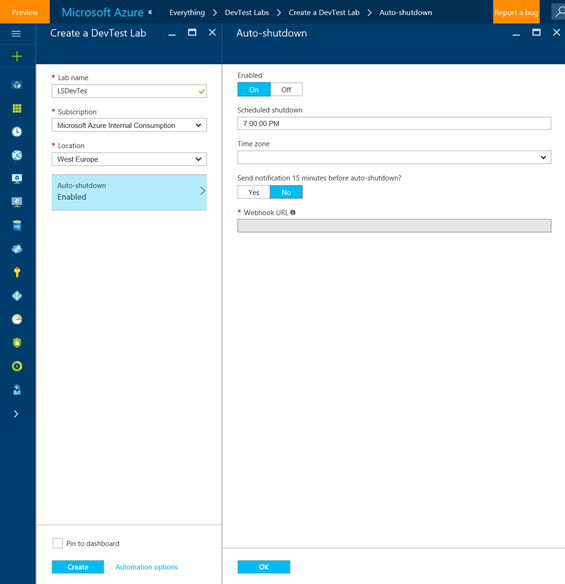
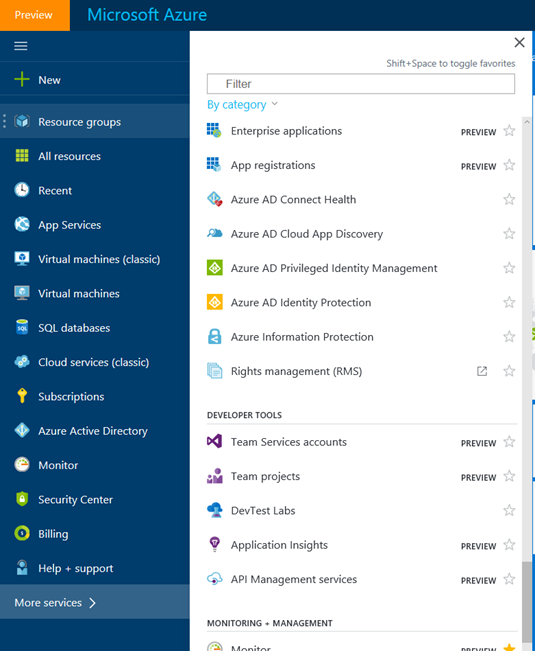
So if we go to the Azure Portal and select new resource, then search for DevTest we’ll see the offering to select and create. We’re then presented with this blade where we get to enter a name for the lab, choose a location, storage type and if we’d like the lab to be automatically started and shut down (a great way to save £ on services).
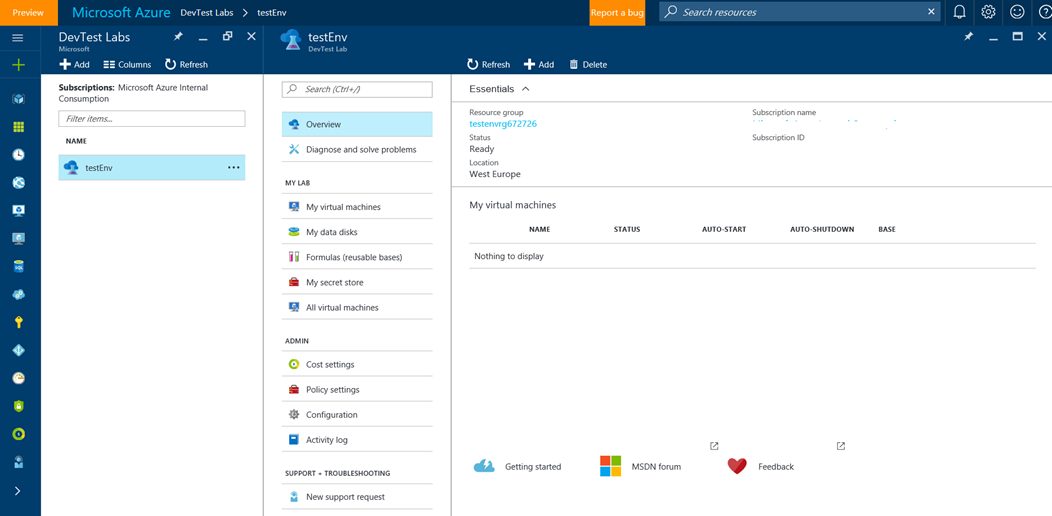
Once created, if you open the new lab and select the “All Settings” link, you’ll be presented with a properties blade to allow you to configure the lab
.
Configurations
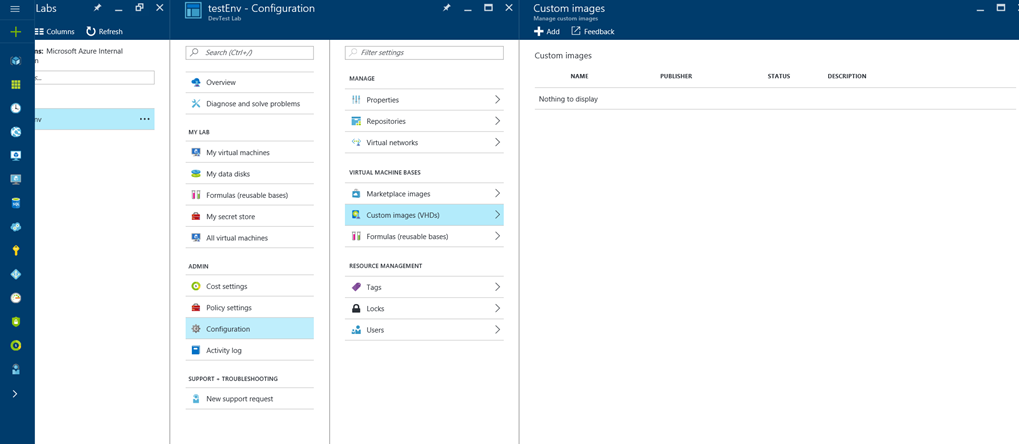
Again this is an interesting area of the offering. Here you can set up templates which can be selected by the team to allow them to quickly provision a new machine. DevTest Labs comes with a number of base VMs templates to choose from such as Windows Server, Windows Server with Visual Studio installed or a Linux distribution. It is also possible to create a new template based on an image you already have in Azure (perhaps you created a VM from a gallery image and then customised it somehow). Also you can create a template straight from a Azure gallery VM by going into the Azure Marketplace option and selecting “Yes” I would like to use the whole gallery as templates.
We’ll go into this in a bit more detail later and I’ll show you how to easily create the template variations using Azure Resource Manager templates.
Policies
Ok so I haven’t shown you much yet that distinguishes this offering from just creating a network of VMs in Azure (except having a nice set of templates to choose from). Policies is what they have added that really helps in a team environment. Students and researchers love to go wild and spin up all sorts of resources. In Azure it is easy to do this without giving a great deal of thought to the cost.
With policies we are able to add some control around
- Expenditure per month
- Number of VMs per user
- Size of the VMs
- Total VMs
- Auto shut down/start up
Costs
This chart shows the estimated cost of the lab using Pay-As-You-Go offer rates and excludes your offer rates, taxes and any discounts.
This table shows the break down of the estimated lab cost by resource for the current calendar month using Pay-As-You-Go offer rates. There is a delay between the time when a resource was actually used and the time when the usage reached the billing system due to which you will notice a delay in reporting the cost in the table.
Let's create an environment
I’m going to walk you through creating a lab containing two VMs (of course it is possible to include PaaS resources as well as IaaS) -
- Windows Azure SDK and Visual Studio Community Development VM based on Windows Server template that comes with DevTest Labs
If you select the resource group the lab lives in you’ll see we already have storage accounts created for us and a network for the VMs to communicate through
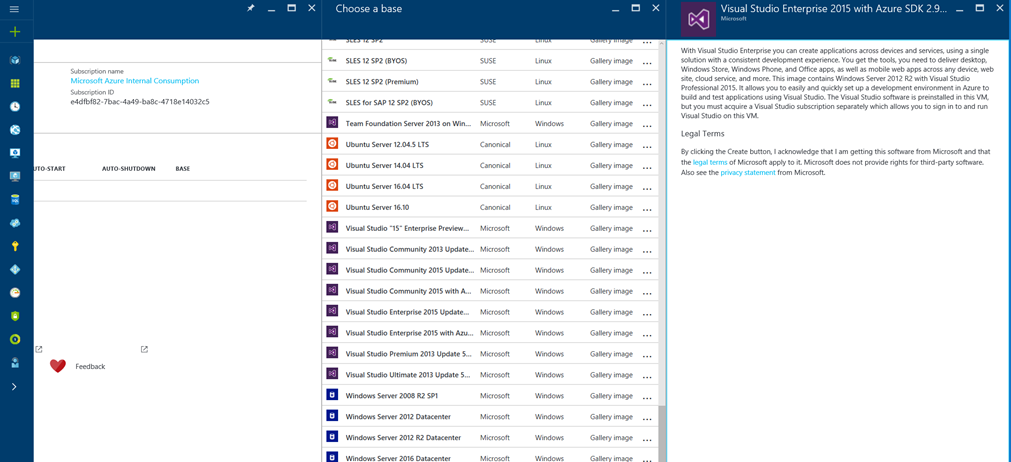
Next click on the Add VMs button you’ll see this blade and you’ll be able to add the development VM by choosing the VS2015 template from the Base option. Any user with permissions to the lab will be able to perform this option, templates makes creating a VM a self service function any user can perform.
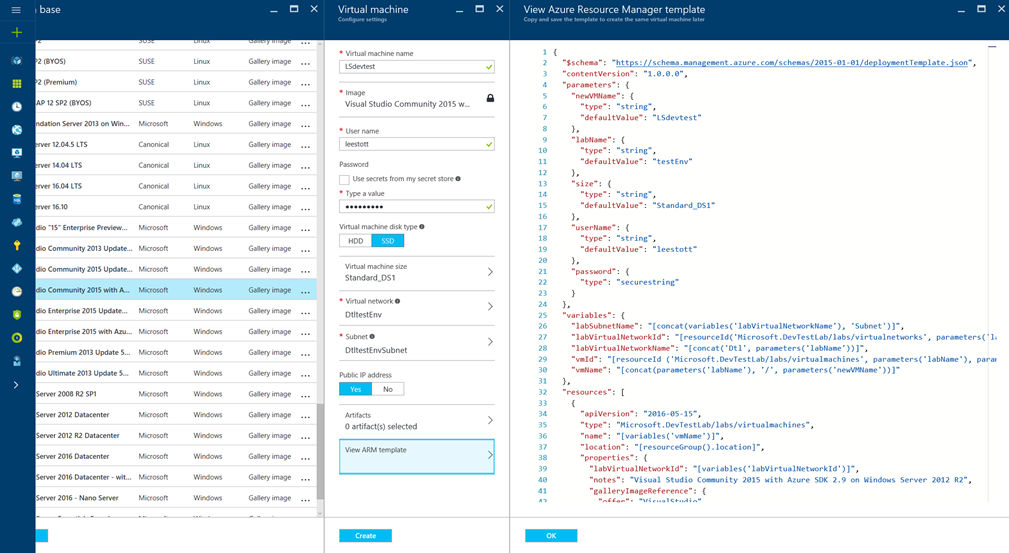
What’s interesting about the VM size option is that only the sizes allowed by the policies will be shown so users can’t go mad and provision whatever they fancy which is perfect for students and more importantly managing budgets again you can get direct access to the JSON ARM Template as shown in the image above allowing you to use CI to deploy future environments.
So we’ve created a VM from a standard template (we could also have selected an image from the Azure gallery or even used a custom VM Imagine from a custom VHD Image).
So now we have deployed our lab or classroom environment, So what we can do now is to convert that VM into a template for others to use
To do this I refer you to the Azure Resource Manager GitHub repository https://github.com/Azure/azure-quickstart-templates where you will find a number of deployment files such as this one which will take a VM and convert it into a template or you can simply copy and paste the JSON template from the previous screen.
Putting it all together
So we have seen I've shown you how to create labs, templates and VMs through the portal UI but as we’ve seen along the way it’s all driven by ARM templates. It’s of course possible to combine all the templates into one template and create your environment in one step.
If you run this json file using the custom deployment method mentioned before then ) and environment will be created for you automatically.
Once your machine and labs are ready you get a very clear dashboard for interfacing with your services and adding additional automation,
Summary
So we’ve talked about the DevTest Labs offering and how it can help your development team by providing a consistent way to spin up new environments per project.
With scripting it also becomes possible to incorporate labs into your CI pipeline and automate your entire lab environment.
Resources
Save time with formulas - Formulas allow you to save all of the settings needed to create a virtual machine (image, size, network, artifacts, etc.) so that you can create identical virtual machines over and over again without re-entering settings. More information
Customize virtual machines with artifacts - Artifacts are used to deploy and configure your application after a virtual machine is provisioned. artifacts can be tools that you want to install on the virtual machine - such as agents, Fiddler, and Visual Studio Code; or, artifacts can be actions that you want to run on the virtual machine - such as cloning a repo More information
Make it yours - Take your lab to the next level by creating custom artifacts shared with your team in a private Git repository.
Add your private Git repository as artifacts repository
Put it to work- Check out these guides for what to do after creating your lab
Set policies to minimize waste and control cost
Create a virtual machine from a base with artifacts
Learn more - Get a jump-start on DevTest Labs in Microsoft Azure.
