Creating a custom Virtual Machine for deployment on Azure
I was speaking at a University this week where they wanted to deploy specific Linux machine for their labs based on specific build of Red Hat Linux. the University already had a custom build for their labs PC but wanted to make this available as an Azure VM.
The team already had PCs on campus which had the base image. The following is a short guide on using Azure ARM CLI. and taking an existing image to Azure a comprehensive guide is available at https://azure.microsoft.com/en-us/documentation/articles/virtual-machines-linux-cli-deploy-templates/
The following is a quick walkthrough of how to get started building and using a Custom VM for Azure
Or Select a existing custom VM at https://azure.microsoft.com/en-us/marketplace/virtual-machines
Step 1 Prepare VM image for Azure
It is very important to follow these pre-configuration steps here for Hyper-V or VMWare here to preconfigure and prepare the image.
You can also covert the VHDX to VHD using a tool here.
Step 2 Install Azure CLI if you haven’t already. The Azure CLI bits are available here.
Step 3 Open command prompt, Terminal, or Bash, etc..
Step 4 Connect to Azure via CLI.
use the command Azure Login Insert your Azure AD credentials. It should return an ‘OK’ if successful.
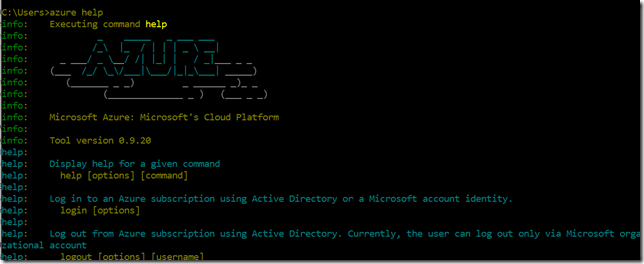
run Azure help to see the CLI version, etc.. see requirements of versions at https://azure.microsoft.com/en-us/documentation/articles/virtual-machines-linux-cli-deploy-templates/
For a full list of the CLI ARM commands see here.
Step 4 Switch to ARM mode config mode arm
View a list of available Azure CLI ARM commands here
Step 5 Prepare Azure for Red Hat VHD upload
Create a Resource Group if needed
azure group create resourcegroupnamelocation
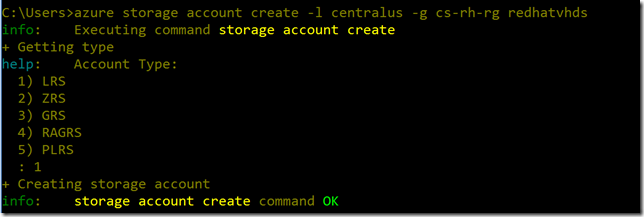
Create a storage group if needed
azure storage account create –l location –g resourcegroupname –type storagetype storageaccountname
Get your storage URI for the VHD upload
Step 6 Upload RedHat VHD to Azure
There are a few ways to accomplish this via Azure CLI or via Storage Explorer. Here is how to upload the VHD via the Azure CLI:
azure storage blob upload “ local path to RHEL vhd ” containername –t page –a storage account name –k storage account key
For more documentation on uploading via CLI see here.
Here is a VHD for CLI tool you can also leverage effectively if your on premises VM has dynamic disks. This tool will convert to fixed which is required for Azure VM uploads.
Step 7 Create new Azure VM based on Red Hat VHD image
azure group deployment create resourcegroupname deploymentname – –template-file path to local JSON file
Here is a sample JSON template I used:
{
“$schema”: “ https://schema.management.azure.com/schemas/2015-01-01/deploymentTemplate.json#” ,
“contentVersion”: “1.0.0.0”,
“parameters”: {
“customVmName”: {
“type”: “string”,
“metadata”: {
“description”: “This is the name of the your Red Hat VM”
}
},
“userImageStorageAccountName”: {
“type”: “string”,
“metadata”: {
“description”: “This is the name of the your storage account of the RHEL vhd location”
}
},
“osDiskVhdUri”: {
“type”: “string”,
“metadata”: {
“description”: “Uri path to the uploaded Red Hat VHD image”
}
},
“dnsLabelPrefix”: {
“type”: “string”,
“metadata”: {
“description”: “DNS Label for the Public IP. Must be lowercase. It should match with the following regular expression: ^[a-z][a-z0-9-]{1,61}[a-z0-9]$ or it will raise an error.”
}
},
“adminUserName”: {
“type”: “string”,
“metadata”: {
“description”: “User Name for the Red Hat Virtual Machine”
}
},
“adminPassword”: {
“type”: “securestring”,
“metadata”: {
“description”: “Password for the Red Hat Virtual Machine”
}
},
“osType”: {
“type”: “string”,
“allowedValues”: [
“Linux”
],
“metadata”: {
“description”: “Red Hat OS”
}
},
“vmSize”: {
“type”: “string”,
“metadata”: {
“description”: “This is the size of your VM e.g. Standard_A9”
}
},
“newOrExistingVnet”: {
“allowedValues”: [ “new”, “existing” ],
“type”: “string”,
“metadata”: {
“description”: “Select if this template needs a new VNet or will reference an existing VNet”
}
},
“newOrExistingVnetName”: {
“type”: “string”,
“defaultValue”: “”,
“metadata”: {
“description”: “New or Existing VNet Name”
}
},
“newOrExistingSubnetName”: {
“type”: “string”,
“defaultValue”: “Subnet1”,
“metadata”: {
“description”: “Subnet Name”
}
}
},
“variables”: {
“publicIPAddressName”: “userImagePublicIP”,
“vmName”: “[parameters(‘customVmName’)]”,
“nicName”: “[concat(parameters(‘customVmName’),’Nic’)]”,
“publicIPAddressType”: “Dynamic”,
“apiVersion”: “2015-06-15”,
“templatelink”: “[concat(‘ https://raw.githubusercontent.com/azure/azure-quickstart-templates/master/101-vm-from-user-image/’,parameters(‘newOrExistingVnet’),’vnet.json’)]”
},
“resources”: [
{
“apiVersion”: “2015-01-01”,
“name”: “vnet-template”,
“type”: “Microsoft.Resources/deployments”,
“properties”: {
“mode”: “incremental”,
“templateLink”: {
“uri”: “[variables(‘templatelink’)]”,
“contentVersion”: “1.0.0.0”
},
“parameters”: {
“virtualNetworkName”: {
“value”: “[parameters(‘newOrExistingVnetName’)]”
},
“subnetName”: {
“value”: “[parameters(‘newOrExistingSubnetName’)]”
}
}
}
},
{
“apiVersion”: “[variables(‘apiVersion’)]”,
“type”: “Microsoft.Network/publicIPAddresses”,
“name”: “[variables(‘publicIPAddressName’)]”,
“location”: “[resourceGroup().location]”,
“properties”: {
“publicIPAllocationMethod”: “[variables(‘publicIPAddressType’)]”,
“dnsSettings”: {
“domainNameLabel”: “[parameters(‘dnsLabelPrefix’)]”
}
}
},
{
“apiVersion”: “2016-03-30”,
“type”: “Microsoft.Network/networkInterfaces”,
“name”: “[variables(‘nicName’)]”,
“location”: “[resourceGroup().location]”,
“dependsOn”: [
“[concat(‘Microsoft.Network/publicIPAddresses/’, variables(‘publicIPAddressName’))]”,
“Microsoft.Resources/deployments/vnet-template”
],
“properties”: {
“ipConfigurations”: [
{
“name”: “ipconfig1”,
“properties”: {
“privateIPAllocationMethod”: “Dynamic”,
“publicIPAddress”: {
“id”: “[resourceId(‘Microsoft.Network/publicIPAddresses’,variables(‘publicIPAddressName’))]”
},
“subnet”: {
“id”: “[reference(‘vnet-template’).outputs.subnet1Ref.value]”
}
}
}
]
}
},
{
“apiVersion”: “[variables(‘apiVersion’)]”,
“type”: “Microsoft.Compute/virtualMachines”,
“name”: “[variables(‘vmName’)]”,
“location”: “[resourceGroup().location]”,
“dependsOn”: [
“[concat(‘Microsoft.Network/networkInterfaces/’, variables(‘nicName’))]”
],
“properties”: {
“hardwareProfile”: {
“vmSize”: “[parameters(‘vmSize’)]”
},
“osProfile”: {
“computerName”: “[variables(‘vmName’)]”,
“adminUsername”: “[parameters(‘adminUsername’)]”,
“adminPassword”: “[parameters(‘adminPassword’)]”
},
“storageProfile”: {
“osDisk”: {
“name”: “[concat(variables(‘vmName’),’-osDisk’)]”,
“osType”: “[parameters(‘osType’)]”,
“caching”: “ReadWrite”,
“createOption”: “FromImage”,
“image”: {
“uri”: “[parameters(‘osDiskVhdUri’)]”
},
“vhd”: {
“uri”: “[concat(reference(concat(‘Microsoft.Storage/storageAccounts/’, parameters(‘userImageStorageAccountName’)), variables(‘apiVersion’)).primaryEndpoints.blob, ‘vhds/’,variables(‘vmName’), uniquestring(resourceGroup().id), ‘osDisk.vhd’)]”
}
}
},
“networkProfile”: {
“networkInterfaces”: [
{
“id”: “[resourceId(‘Microsoft.Network/networkInterfaces’,variables(‘nicName’))]”
}
]
},
“diagnosticsProfile”: {
“bootDiagnostics”: {
“enabled”: “true”,
“storageUri”: “[concat(reference(concat(‘Microsoft.Storage/storageAccounts/’, parameters(‘userImageStorageAccountName’)), variables(‘apiVersion’)).primaryEndpoints.blob)]”
}
}
}
}
]
}
Sample of running the script with the JSON above:
For more on deploying JSON templates via CLI see here.
Step 8 – Verify RHEL image worked properly
Use SSH to connect to the RHEL VM running in Azure for verification:


