Storage Services - Hands on getting started teaching Microsoft Azure Storage Services
Microsoft Azure Storage is a set of services that allows you to store large volumes of data in a cost-effective manner and in a way that makes the data readily and reliably available to services and applications that consume it.
Data committed to Azure Storage can be stored in blobs, tables, queues, or files.

Azure blobs are ideal for storing images, videos, and other other unstructured data, and are frequently used to provide input to and capture output from other Azure services such as Azure Machine Learning and Azure Stream Analytics.
Azure tables provide NoSQL storage for semi-structured data.
Azure queues support queued message transfers between applications (or parts of applications) and can be used to make applications more scalable and robust by eliminating hard dependencies between them.
Azure Files, which are currently in preview, use the Server Message Block (SMB) 2.1 protocol to share files in the cloud.
Data stored in Microsoft Azure Storage can be accessed over HTTP or HTTPS using straightforward REST APIs, or it can be accessed using rich client libraries available for many popular languages and platforms, including .NET, Java, Android, Node.js, PHP, Ruby, and Python.
The Azure Portal offers partial support for Azure Storage, but richer functionality is available from third-party tools, many of which are free and some of which work cross-platform.
In this blog, you'll learn how to work with Azure storage accounts, storage containers, and storage blobs.
You'll also get familiar with some of the tools used to manage them, including the Microsoft Azure Storage Explorer, a free tool from Microsoft that runs on Windows and OS X. The knowledge you gain will be used in later labs featuring Azure services that rely on blob storage for input and output.
This blog will cover the following aspects of Azure Storage:
- Create storage accounts using the Azure Portal
- Create storage containers using the Microsoft Azure Storage Explorer
- Upload blobs to storage using the Microsoft Azure Storage Explorer
- Download blobs from storage using the Azure Portal
- Delete storage accounts using the Azure Resource Manager
Prerequisites
The following is required to complete the tasks
Registering for an Azure Educator Grant https://aka.ms/azureforeducation
The Educator Grant is a programme designed specifically to provide access to Microsoft Azure to college and university professors teaching advanced courses. As part of the programme, lecturers teaching Azure in their curricula are awarded subscriptions to support their course.
The Microsoft Educator Grant Program provides access to Azure for use in the classroom by university students and their professor.
Faculty will receive a 12 month, $250/month account
Students will receive a 6 month, $100/month accountEligibility Requirements:
-
- Requester must be a faculty member of an accredited university
- Passes must be used for a specific class
- Multiple classes should have multiple requests
- Multiple sections of same class may use one request
- Passes must be used by students
- Faculty must provide all information requested
- If you are unable to provide any of the requests, please attach a document explaining reason for omission, and another method to verify,
Application is for Educators/Faculty only.
Step by Step
Step 1: Use the Azure Portal to create a storage account
Step 2: Install the Microsoft Azure Storage Explorer
Step 3: Use Storage Explorer to create a container and upload a blob
Step 4: Use the Azure Portal to download a blob
Step 5: Delete the resource group
Estimated time to complete this lab: 45 minutes.
Step 1: Use the Azure Portal to create a storage account
The Azure Portal allows you to perform basic storage operations such as creating storage accounts, viewing what's stored under those accounts, and managing the access keys associated with the accounts. In this exercise, you'll use the portal to create a storage account.
Go to the Azure Portal and sign in using the Microsoft credentials associated with your subscription.
The first step in using Azure Storage is to create one or more storage accounts. To create a storage account, click + NEW in the ribbon on the left. Then click Data + Storage, followed by Storage account.
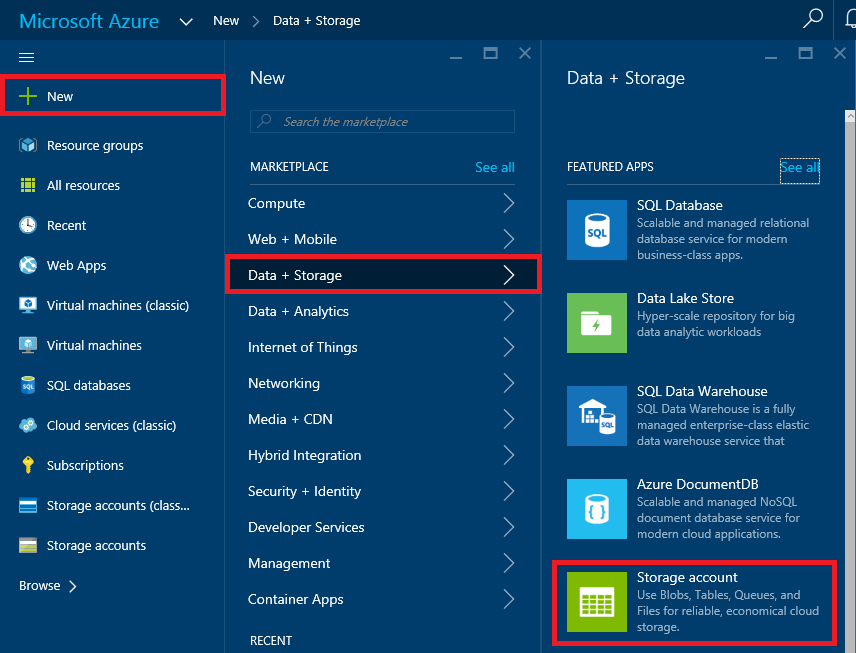
Creating a storage account
Select Resource Manager in the drop-down list under Select a deployment model, and then click the Create button.
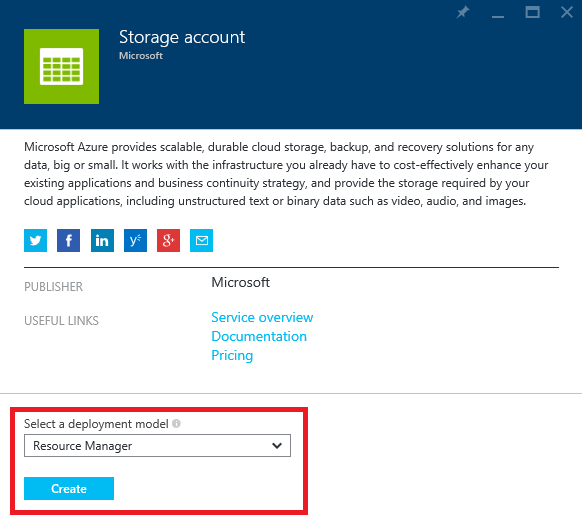
Selecting a deployment model
Specify Resource Manager as the deployment model provides you with more flexibility later on by ensuring that the account is explicitly added to a resource group, and it makes the storage account a first-class citizen in the Azure environment. For more information, see Understanding Resource Manager deployment and classic deployment.
Resource groups are a relatively recent addition to Azure and are a powerful construct for grouping resources such as storage accounts, databases together so that they can be managed as a group. Imagine that you created a complex application consisting of multiple storage accounts, a cluster of VMs, a SQL database, and perhaps a Stream Analytics solution and a pair of event hubs. Now you want to create a new instance of the application using a different account. By assembling all these resources into a resource group, you can take advantage of Azure deployment templates to script the creation of the entire application. In addition, you can use role-based security to restrict access to resources in a resource group, and you can delete the application — and all the resources that comprise it — by deleting the resource group.
Enter a name for the new storage account in Name field. The name is important, because it forms one part of the URL through which storage items created under this account will be accessed. Storage account names can be 3 to 24 characters in length and can only contain numbers and lowercase letters. In addition, the name you enter must be unique within Azure; if someone else has chosen the same name, you'll be notified that the name isn't available.
Once you have a name that Azure will accept (as indicated by the green check mark in the text field), type "A4R-Labs" (without quotation marks) into the Resource group field, and click Location and choose the region nearest you. Then click the Create button to create the new storage account.
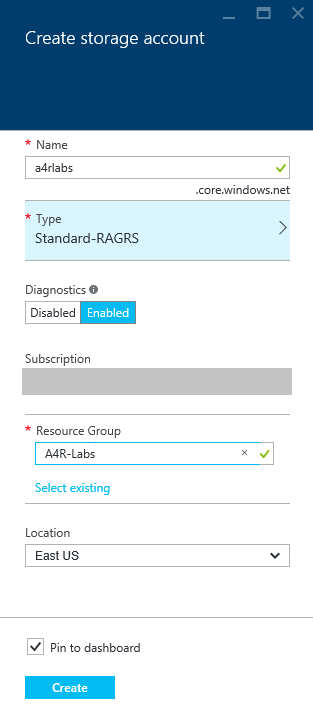
Specifying parameters for a new storage account
After a few moments (it generally takes just a few seconds, but can sometimes take several minutes), a tile representing the new storage account will appear on your dashboard. Click the tile to open a blade for the storage account.
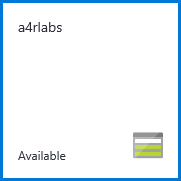
Tile representing the new storage account
In the blade for the storage account, click Blobs to view a list of containers associated with this account.
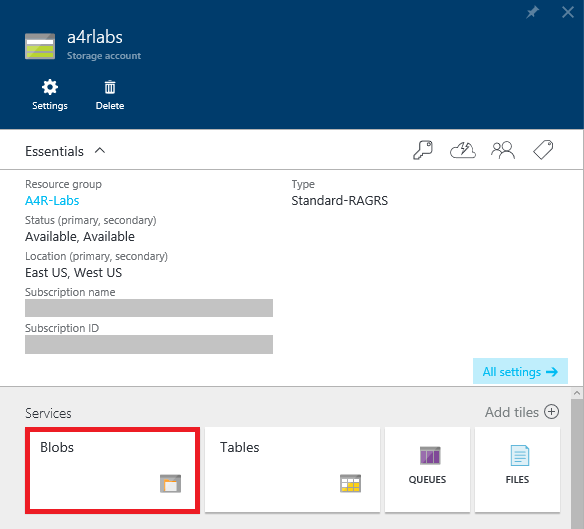
Viewing storage containers
The storage account currently has no containers. Before you create a blob, you must create a container to store it in. You can create containers in the Azure Portal, but you can't create blobs. In Exercise 2, you will create containers and blobs with the Microsoft Azure Storage Explorer.
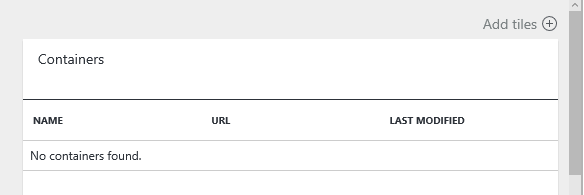
The empty storage account
Step 2: Install the Microsoft Azure Storage Explorer
The Microsoft Azure Storage Explorer is a free tool that provides a graphical interface for working with Azure Storage on PCs running Windows and OS X. It provides most of the same functionality as the Azure Portal. It also offers features the portal does not, such as the ability to upload blobs to Azure Storage. In this section, you will install and configure the Microsoft Azure Storage Explorer.
Open your browser and go to https://storageexplorer.com/.
Click the Download for Windows or Download for Mac button, depending on which type of computer you're using.
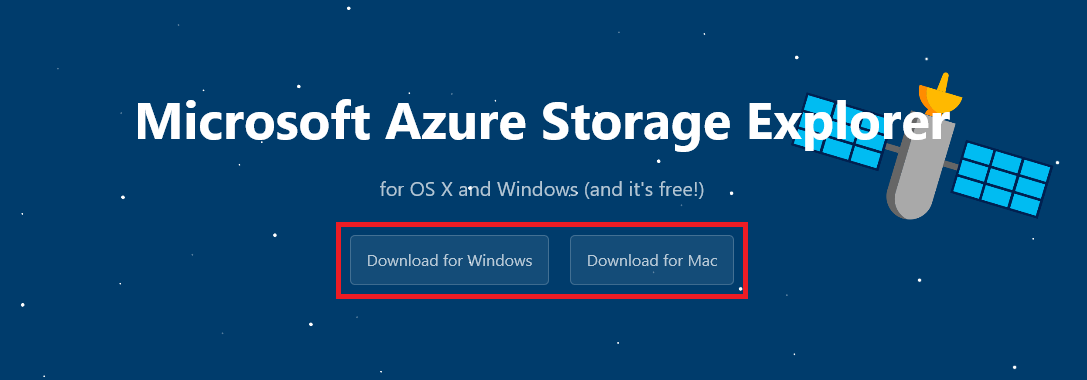
Downloading the Microsoft Azure Storage Explorer
Once the download completes, run the downloaded installer (or simply open the downloaded zip file if you're a Mac user) and start the Microsoft Azure Storage Explorer.
If you're using a Mac, you might be warned that "Your security preferences allow installation of only apps from the Mac App Store and identified developers." If this happens to you, go to System Preferences under the Apple menu, click Security & Privacy, go to the General tab, and set Allow apps downloaded from to Anywhere. You might still be prompted for confirmation the first time you run the app.
In the Storage Explorer window, click Connect to Microsoft Azure.
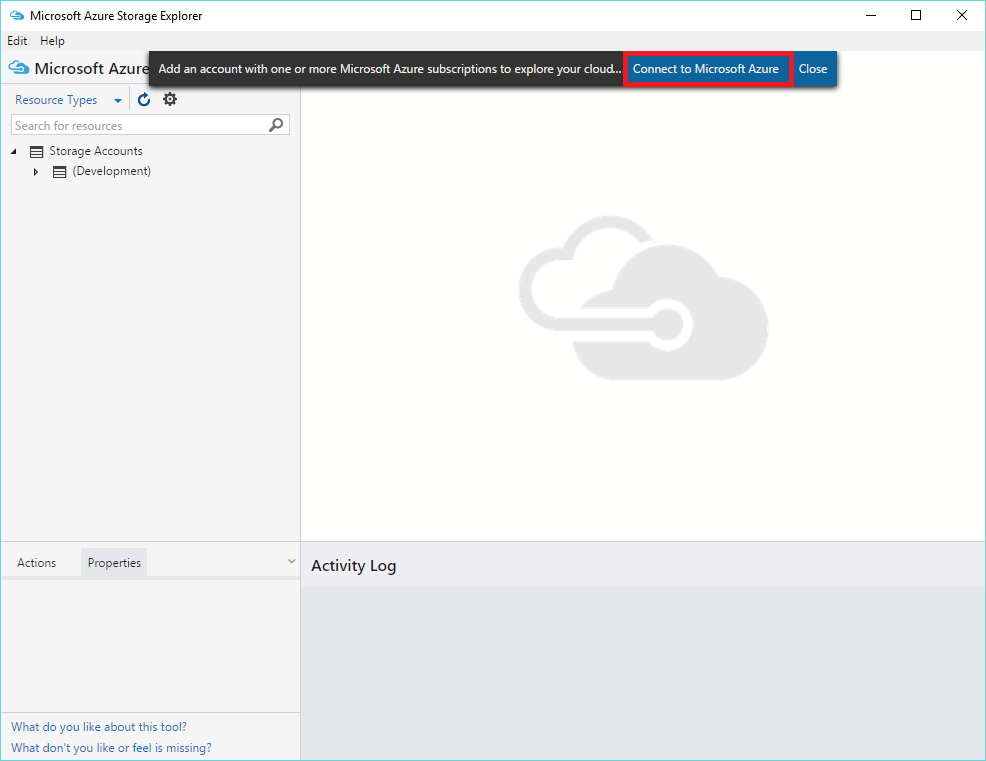
Connecting Storage Explorer to Azure
Enter the e-mail address that you used to create your Azure Pass account. Then click Continue.
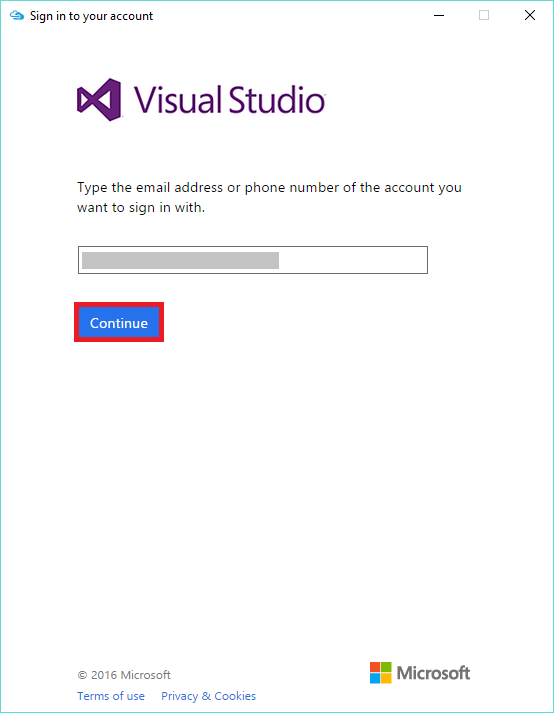
Entering your e-mail address
Enter the Microsoft credentials associated with your subscription. Check the box labeled Keep me signed in. Then click the Sign in button.
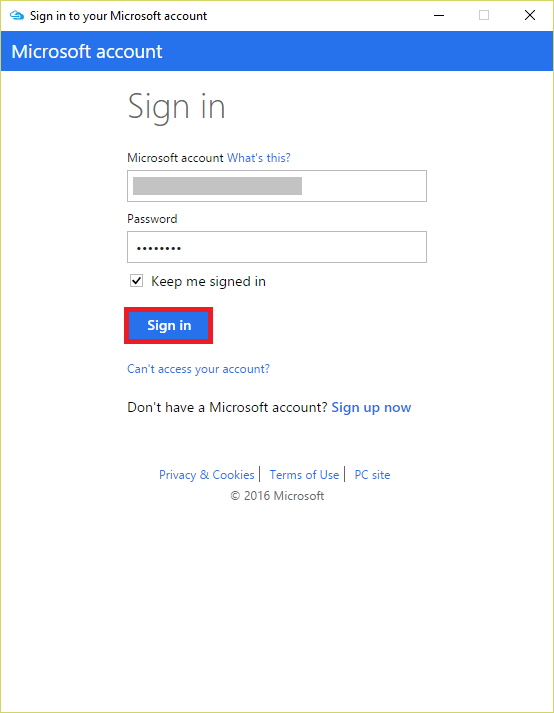
Signing in to Storage Explorer
Confirm that the storage account you created in Exercise 1 appears in the list of storage accounts shown in Storage Explorer. Then click the small arrow next to the storage account to display its contents.
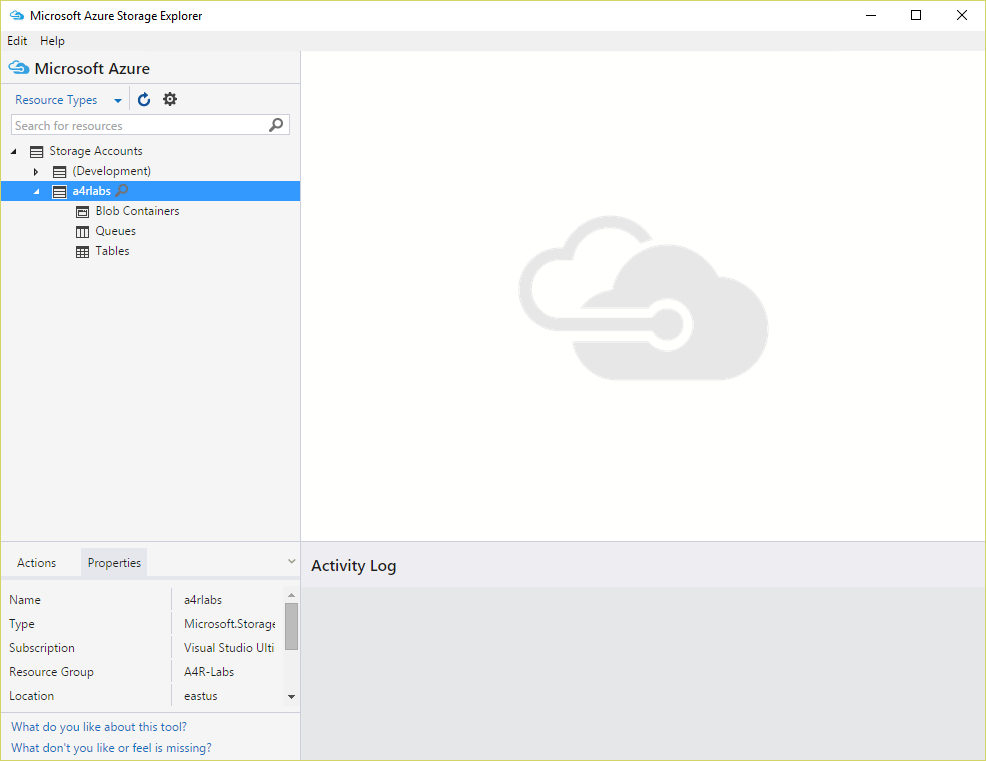
The Microsoft Azure Storage Explorer
The Microsoft Azure Storage Explorer is now installed and ready to go. Let's put it work with your new storage account.
Step 3: Use Storage Explorer to create a container and upload a blob
Before you can create a blob, you must create a container to store it in. A container is similar to a folder in a file system. A storage account can have an unlimited number of containers, and a container can store an unlimited number of blobs. Container names must be from 3 to 63 characters in length and may contain numbers, dashes, and lowercase letters. Dashes cannot be consecutive, and a container name cannot start with a dash. The following diagram illustrates the blob storage schema:
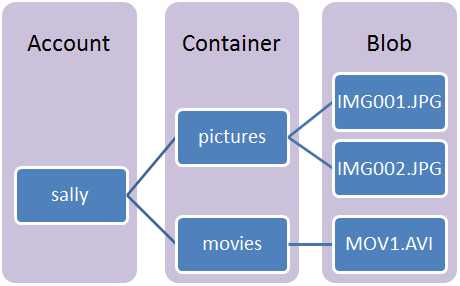
Blob storage schema
In this section, you will create a container named "images" in the storage account you created in Step 1. Then you will upload a blob to it and learn about container access levels, which determine whether the blobs in a container are public or private.
In the Microsoft Azure Storage Explorer, right-click Blob Containers (on a Mac, Control-click instead) under the storage account you created in Exercise 1 and select Create Blob Container from the context menu.
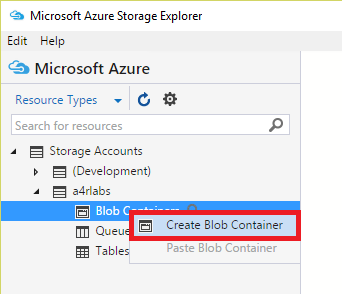
Creating a container
Type "images" (without the quotation marks) into the box that appears under Blob Containers. Then press Enter to create a new container named "images."
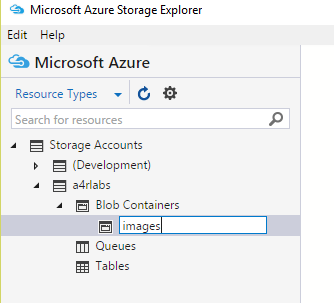
Creating an "images" container
Double-click the "images" container to display its contents. (It is currently empty.)
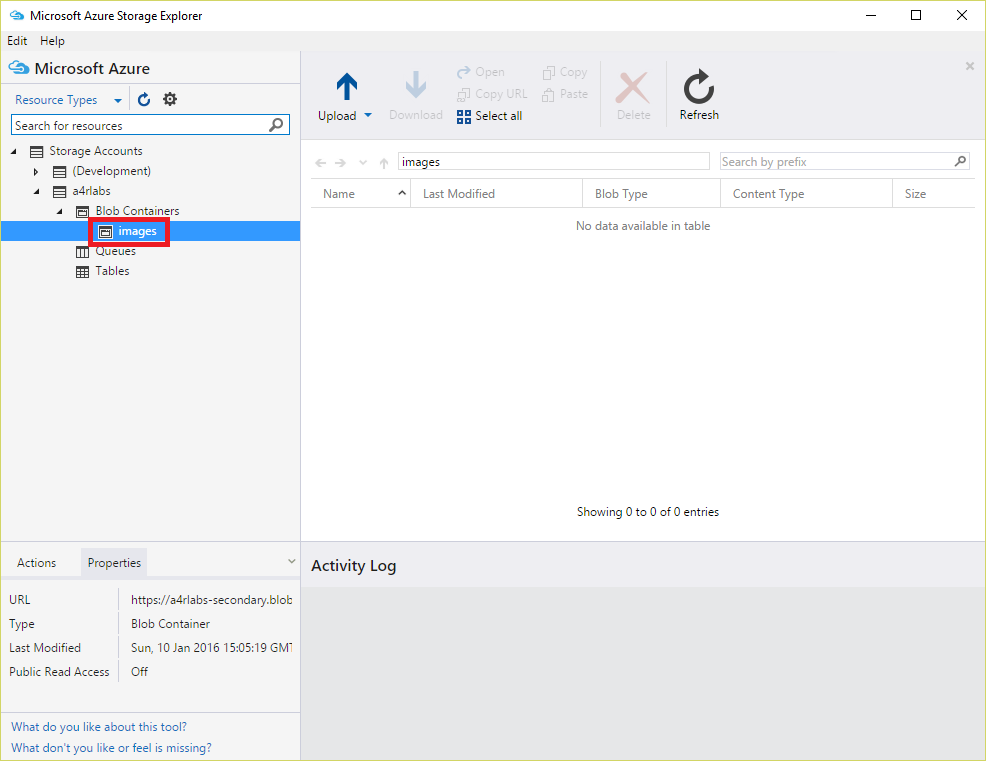
Opening the "images" container
The next step is to create a blob by uploading a file to the "images" container. The file you will upload is named azure-banner.jpg and is provided for you in the "resources" subdirectory of this lab. Click the Upload button in the Storage Explorer. Then select Upload Files... from the menu.
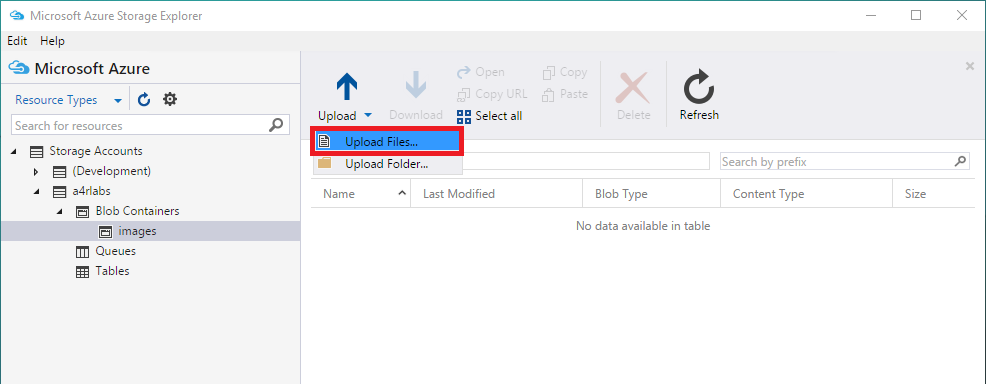
Uploading files to the "images" container
Click the ... button to the right of the field labelled "Files." In the ensuing dialog, navigate to this lab's "resources" subdirectory and select the file named azure-banner.jpg. Then close the dialog, verify that azure-banner.jpg appears in the "Files" field, and click the Upload button.
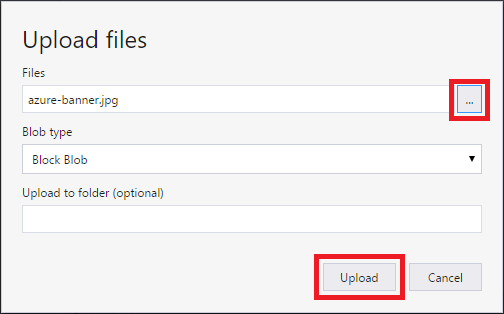
Uploading a file to blob storage
Each container that you create is assigned an access level that determines whether its contents are public or private. The default is private, which means that only you (or someone to whom you have provided an access key) can access the container's contents. To demonstrate, open your browser and enter the following URL to attempt to fetch the image you just uploaded using HTTP. Replace accountname in the URL with the name of your storage account:
https://accountname.blob.core.windows.net/images/azure-banner.jpgHere's what you'll see in your browser. The exact output will depend on which browser you're using, of course.
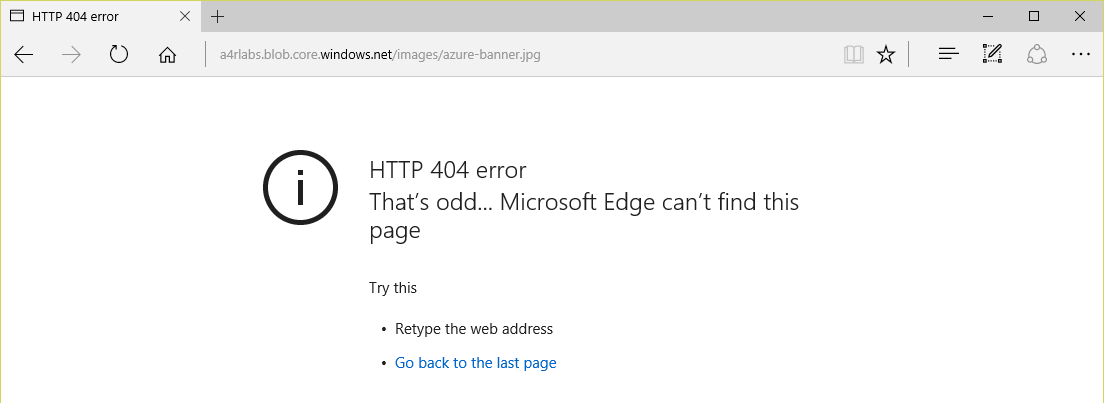
404 error
Return to Storage Explorer, right-click (or Control-click) the "images" container and select Set Public Access Level... .
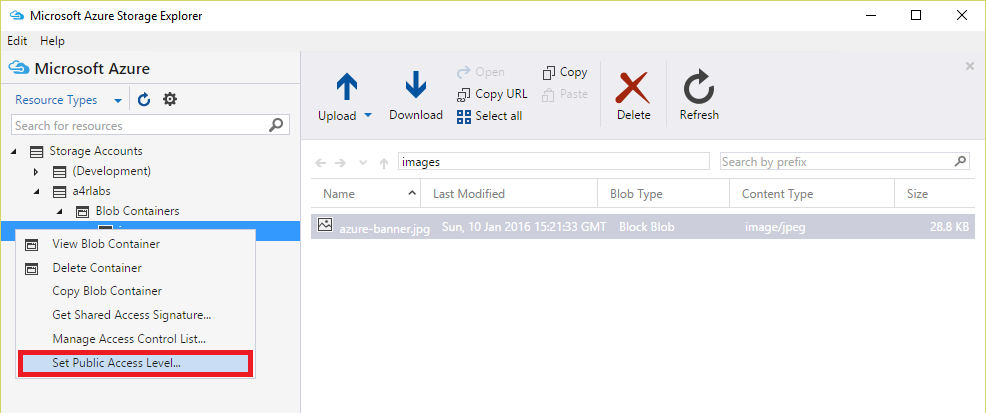
Changing the container's access level
Select Public read access for blobs only. Then click the Apply button.
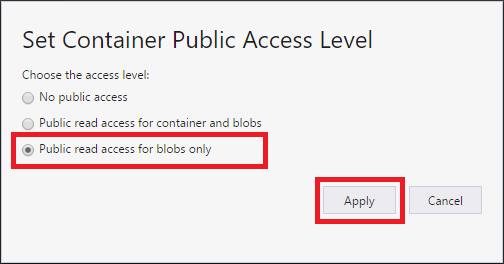
Setting the access level to public
The difference between Public read access for blobs only and Public read access for container and blobs is that the latter allows the blobs in a container to be enumerated, while the former does not. Public read access for blobs only offers slightly more security because it prevents people from discovering other blobs in the container. To fetch the blob, they must know the blob's name.
Now return to your browser and enter the same URL you entered before. Confirm that azure-banner.jpg appears in your browser:
Image blob downloaded from Azure Storage
You only uploaded one blob in this section, but Storage Explorer allows you to upload several blobs at once. It also allows you to download blobs. Feel free to upload additional images to the "images" container (this lab's "resources" subdirectory contains several that you can upload) and play with the Microsoft Azure Storage Explorer to familiarize yourself with its features.
Step 4: Use the Azure Portal to download a blob
Once a blob is uploaded to a storage container, it can be seen in — and downloaded from — the Azure Portal. In this exercise, you'll use the portal to download the blob you uploaded in the previous exercise.
To view the blob in the portal, return to the Azure Portal in your browser. Click Storage accounts in the ribbon on the left. Then click the storage account you created in Step1. (If Storage accounts doesn't appear in the ribbon, click Resource groups instead and navigate to the storage account through the "A4R-Labs" resource group.)
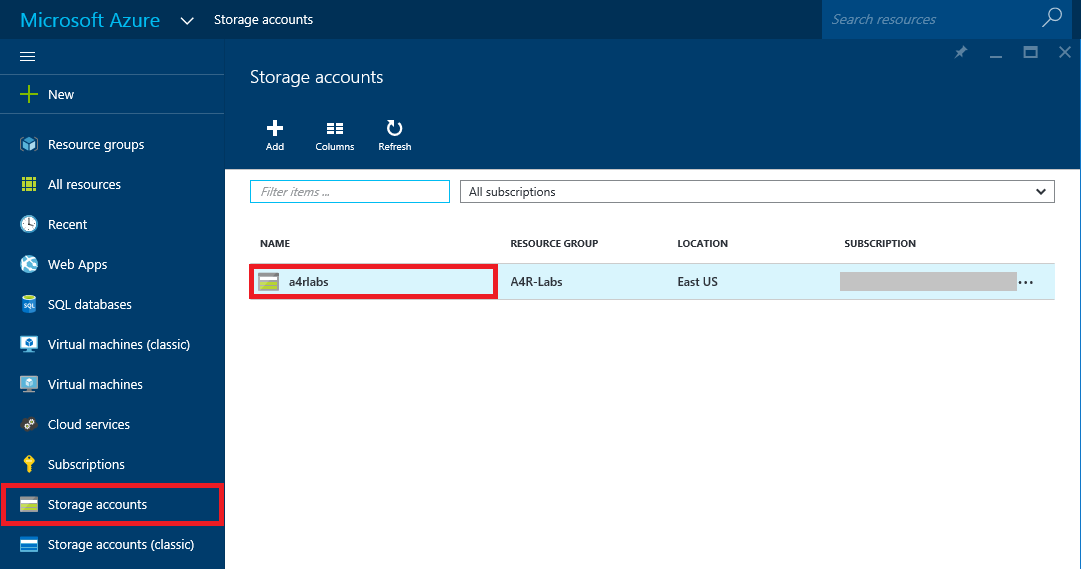
Viewing storage accounts
Click Blobs to view the containers in this storage account.
Viewing storage containers
Click the "images" container to view its contents.
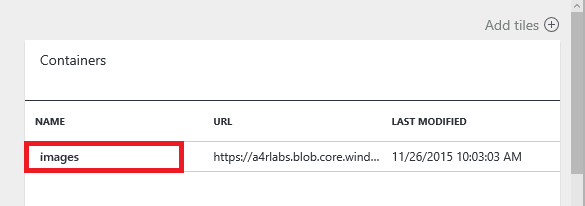
Viewing the blobs in the "images" container
Verify that azure-banner.jpg appears in the list of blobs. Then click it to open the "Blob properties" blade.
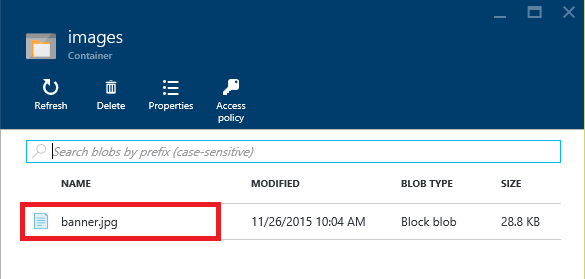
Image blob uploaded to Azure storage
Click the Download button at the top of the blade to download and open azure-banner.jpg. Confirm that you see the same image you saw before.
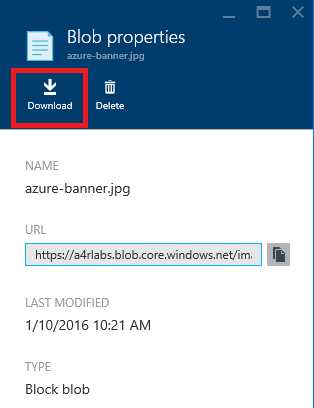
Downloading a blob
Step 5: Delete the resource group
When you created a storage account in Step 1, you made it part of a resource group named "A4R-Labs." One of the benefits of using resource groups is that deleting a resource group deletes all the resources inside it, including storage accounts and blobs. Deleting a resource group is a convenient way to delete complex Azure deployments without having to delete individual resources one by one.
In this section, you'll use the Azure Portal to delete the storage account you created in Step 1, and along with it the container and blob you created in Step 3.
Open the Azure Portal in your browser and click Resource groups in the ribbon on the left. Then, in the "Resource groups" blade, click the resource group you wish to delete ("A4R-Labs"). Finally, click Delete in the blade for the resource group.

Deleting a resource group
Because deleting a resource group is a permanent action that can't be undone, you must confirm that you want to delete it. Do so by typing the name of the resource group into the box labeled TYPE THE RESOURCE GROUP NAME. Then click Delete to delete the resource group and everything inside it.
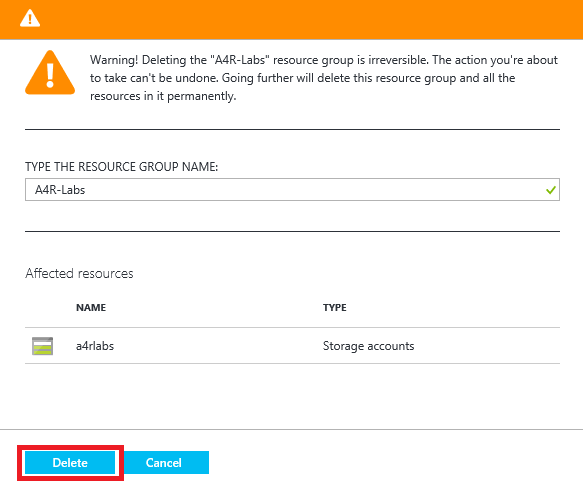
Confirming resource-group deletion
After a few minutes, you will be notified that the resource group was deleted. If the deleted resource group still appears in the "Resource groups" blade, click that blade's Refresh button to update the list of resource groups. The deleted resource group should go away.
Summary
Here's a quick summary of the important concepts that were discussed in the blog:
- Azure Storage is a set of services for storing data durably and reliably
- The Azure Portal enables you to perform basic storage operations, such as creating storage accounts and viewing blobs and containers
- Azure Storage blobs can contain any type of data, just like files in a file system
- The Microsoft Azure Storage Explorer runs on Windows and OS X and supports many features the Azure Portal does not, such as the ability to upload blobs
- Storage accounts and other resources that are placed inside a resource group can easily be deleted by deleting the resource group itself
Additional resources
Free learning resources at https://mva.microsoft.com
More information about Azure Storage https://azure.microsoft.com/en-gb/documentation/services/storage/