Ask Learn
Preview
Please sign in to use this experience.
Sign inThis browser is no longer supported.
Upgrade to Microsoft Edge to take advantage of the latest features, security updates, and technical support.
Note
Access to this page requires authorization. You can try signing in or changing directories.
Access to this page requires authorization. You can try changing directories.
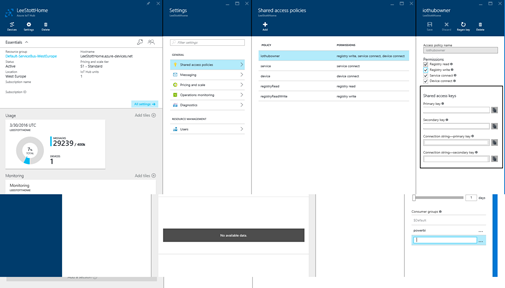
In order to allow several consumer applications to read data from the IoT Hub independently at their own pace a Consumer Group must be configured for each one. If all of the consumer applications (the Device Explorer, Stream Analytics / Power BI, the Web site you will configure in the next section) read the data from the default consumer group, one application will block the others.
To create a new Consumer Group for the IoT Hub that will be used by the Stream Analytics job you are about to configure, follow these steps:
The website needs two different consumer groups:
Also take note of the Event Hub-compatible name and Event Hub-compatible endpoint values in the Messaging blade
Browse to the Assets/WebSite folder and open the Web Site project (ConnectTheDotsWebSite.sln) in Visual Studio.
Edit the Web.config file and add the corresponding values for the following keys:
Microsoft.ServiceBus.EventHubDevices: Event hub-compatible name.
Microsoft.ServiceBus.ConnectionStringDevices: Event hub-compatible connection string which is composed by the Event hub-compatible endpoint and the iothubowner Shared access policy Primary Key


Microsoft.Storage.ConnectionString: Storage account endpoint, in this case use the storage account name and storage account primary key to complete the endpoint.
Deploy the website to an Azure Web Site. To do this, perform the following steps.
In Visual Studio, right-click on the project name and select Publish.
Select Microsoft Azure Web Apps.
Selecting Publish target
Click New and use the following configuration.
Click Create. After some time the website will be created in Azure.
Creating a new Web App on Microsoft Azure
Click Publish.
Note: You might need to install WebDeploy extension if you are having an error stating that the Web deployment task failed. You can find WebDeploy here.
After you deployed the site, it is required that you enable Web sockets. To do this, perform the following steps:
Browse to https://portal.azure.com and select your _Azure Web App.
Click All settings.
Click Applicattion settings
Then set Web sockets to On and click Save.
Enabling Web Sockets in your website
Browse to your recently deployed Web Application. You will see something like in the following screenshot. There will be 2 real-time graphics representing the values read from the temperature and light sensors. Take into account that the Universal app must be running and sending information to the IoT Hub in order to see the graphics.
Web Site Consuming the IoT Hub data
Note: At the bottom of the page you should see “Connected.”. If you see “ERROR undefined” you likely didn’t enable WebSockets for the Azure Web Site.
check step 5
If your interested in learning more about IOT Hub and Raspberry head over to https://github.com/MsftImagine and there are number of Repos which contain IOT resources.
Please sign in to use this experience.
Sign in