Creating your first game with TouchDevelop in 15 steps
I get lots of questions from school students about the best tools to start building their first game.
The following blog is a getting started guide to building your first game with Microsoft TouchDevelop.com. This blog has been written from the basis of a student having zero experience of coding.
The blog has been designed as walk through to show you the step by step instructions of creating your first game.
So what is TouchDevelop.com
Touch Develop is a browser based development environment created by Microsoft Research.
Step 1. Launch Touch Develop and start creating a game
Launch Touch develop by navigating to www.touchdevelop.com
Select the Launch Touch Develop button
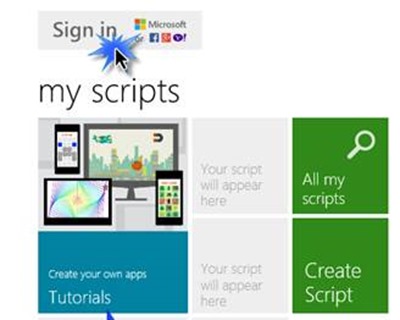
You can build a game with Touch develop without signing in. But, if you want to be able to save your game, and you want the ability to create your own custom graphics to the game you will need to sign in. You can sign in with a Microsoft, Facebook, Gmail, or Yahoo account.
Select Sign in to sign in with an account
Let’s create our first game!
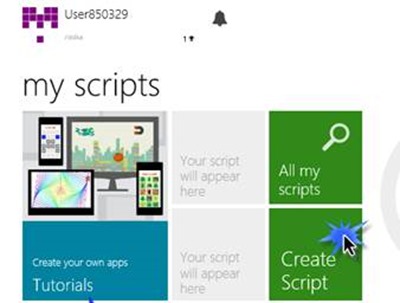
Select the Create Script tile
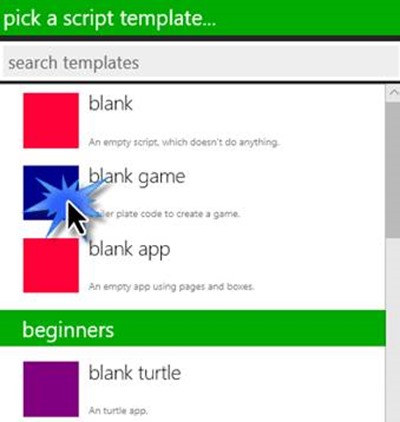
Select the blank game template
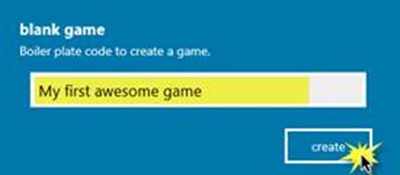
Give your game a name and select create
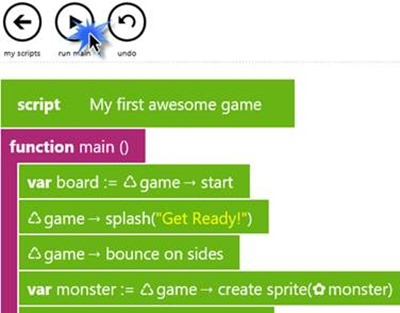
You will see a screen with some default code on it that creates the beginning of a game. Don’t worry about the code just yet, for now let’s just try running the game to see what happens.
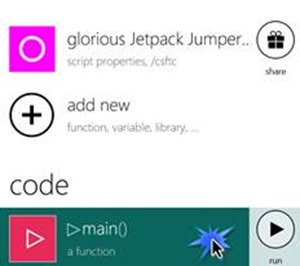
Select the run main button to run your game
Step 2. Understanding game objects
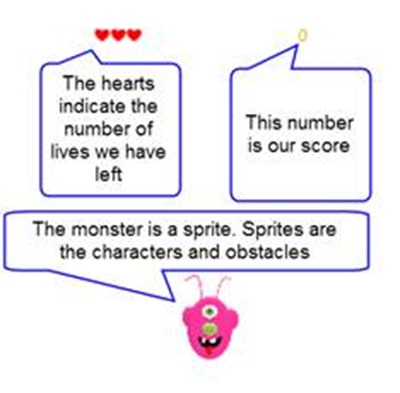
So what can you see when the game runs?
If you click or tap on the screen the monster head moves higher.
The game also contains a Game object and a Board object which you can’t see but affect what happens in the game
These objects make up the elements that allow our video game to work. All programming languages have the concept of objects. The button you clicked on to create a game is an object, a web page is an object, the text box where you typed in a name for the game is an object.
Step 3. Game object properties
All objects have properties that affect how they appear and how they work. For example, a button has properties that control its size, colour, and what text is displayed on the button. A text box has properties that control its font, the text displayed in the text box, and whether it is read only.
Let’s look at the properties of some of the objects in our game
Game properties
score – controls the score in the game
lives – controls how many lives you have left in the game
Board properties
width – controls the width of the game playing area
height – controls the height of the game playing area
background – controls the background of your game playing area
Sprite properties
artwork – controls the appearance of your sprite character or obstacle
speed – controls the speed at which your sprite moves
height – controls the height of your sprite
width – controls the width of your sprite
Position – controls where the sprite appears on the screen
Game object functions
If we want to change the value of a property, we usually call a function. Functions are programs we can call that do something for us. In this case, the functions change the value of a property for us. To change the value of a score we call set score, to change a width we call set width. You get the idea… Although sometimes the function names are a little different, for example to change the position you call set pos.
Game functions
set score – change the score
set life – changes the number of lives
Board functions
set width – changes the width
set height – changes the height
set background – allows you to change the background colour
set background picture – allows you to display a picture as a background
Sprite functions
set speed – changes the speed of the sprite
set height – changes the size of your sprite
set width – changes the size of your sprite
set pos – changes where on the screen your sprite is displayed
Passing values to functions
When we call a function to change a property to a new value, somehow we have to be able to tell the function what value we want the property to have. If you want to set the speed to 100, you have to pass the value of 100, if you want to set the score to 500, you have to pass in the value 500. We do this using parameters. Many functions accept parameters, these are the values we pass to the functions so they do what we want them to do.
For example, if I want to change the number of lives in the game:
I will work with the game object, since lives is a property of the game object
The set life function can be used to change the number of lives
I want to set the number of lives to 1000
The code will look like this:
game-> set life(1000)
It’s one thing to read about it it’s another thing to try it! Let’s go to our code and try a few changes
Change the number of lives in our game
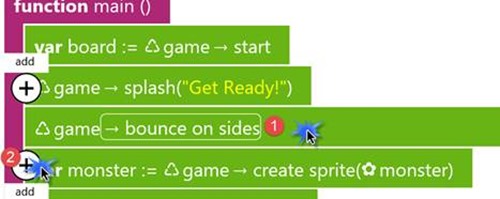
On the screen with your code, select the line of code that says game->bounce on sides then select the + symbol underneath that to add a new line of code
In the command tray beneath the code select the game tile  . Then select the set life tile
  If you don’t see the set life tile displayed after you click game, select the more tile
  to get more tiles.
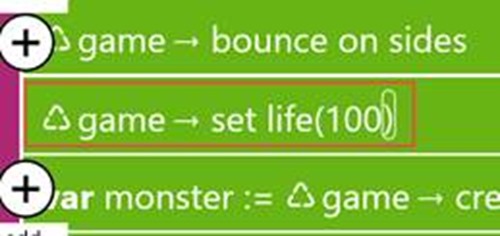
Replace the 0 with 100 to set the number of lives to 100.
When you are finished, your code should look something like this:
Test your chances by selecting run main  to launch your game. You should have 100 lives!
EXPERT TIP! Every time you change something in your game, run the game to test your change and see how it affects the game. That way, if you make a mistake, it is easier to fix. If you make 10 changes and then run the game and it doesn’t work, it is much harder to figure out where you made a mistake!
Step 4. Change the size of your character
What if we want to change the size of our monster?
I want to do something to the sprite object
The set width function can be used to change the number of lives
I want to set the width to 50
The code will look something like this:
spritename-> set width(50)
Because we will have multiple sprites in our game (most games have multiple characters and obstacles each of which is a different sprite) we give each sprite a name. Giving each sprite a unique name allows us to control the size, position and speed of each individual character. In our game, the sprite with the monster is called monster (when you write code it is a good idea to give your sprites names that make it easy to remember which is which! Monster is a great name for our monster sprite). So to change the size of our monster, our code would look something like this:
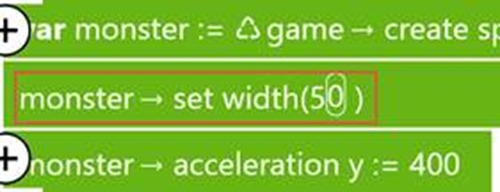
monster-> set width(50)
Try it! Add a new line of code under the line that says var monster := game->create sprite(monster)
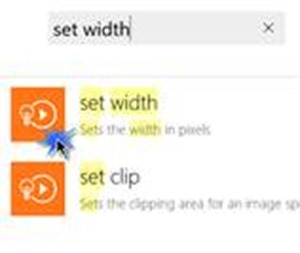
For the new line of code select the monster tile  , and the set width tile. Remember you can click on the more button if you don’t see the tile listed. If it doesn’t show up when you click more, then click the more button with the search icon
  then search for and select the tile you want
Set the width to a value of 50 (or any other value you want to try, it’s okay to experiment, in fact I encourage it, it’s a great way to learn!)
Your code should look something like this
Run your game again, your monster has changed size!
Change the background colour
What if we want to change the background colour of our game?
I want to do something to the board object
The set background function can be used to change the background colour
I want to set the colour to a particular value
The code will look something like this
board->set background(colours->red)
Let’s try it! Add a new line of code under the line var board:= game->start
Select board | set background from the tray
By default it has a parameter of colours-> random . This will randomly select a background colour whenever you run the game. If you prefer to select a specific colour, delete the word random and select a specific colour tile instead.
When you are done your code should look something like this
Run the game, and you should see your new background! If you chose random, then each time you stop and restart the game, it will use a different random colour.
Step 5. Changing and adding art
The art you use in your game affects the mood and tone of the game. A game can change from silly and funny to dark and sinister simply by changing the artwork
Let’s learn how to add new art to our game. The first step is to add new picture resources to our game. Once we have the picture resources we want, we can use those picture resources in our game.
Add new art from the Touch Develop art library
At the moment the only artwork available for your game is the monster head. Let’s add some new artwork to our picture resources.
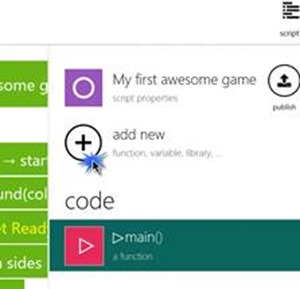
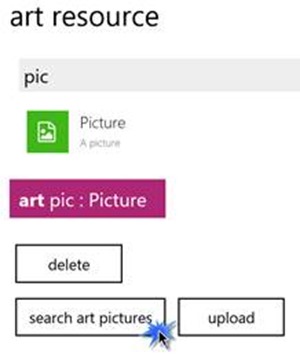
Select the script button in the top corner of your code editor
Select + add new
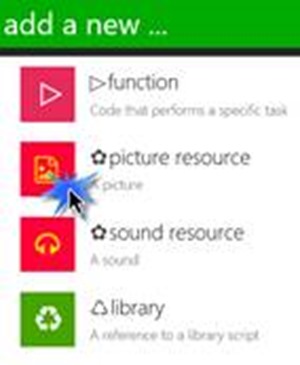
Select picture resource
You can pick a picture that someone else has uploaded to the Touch Develop server by choosing search art pictures.
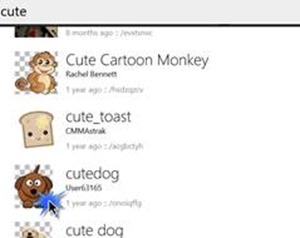
Now type in a keyword to search for artwork, for example unicorn, ninja, cat, puppy and select the image you like. I have selected a cute dog that I would like to use instead of the monster head
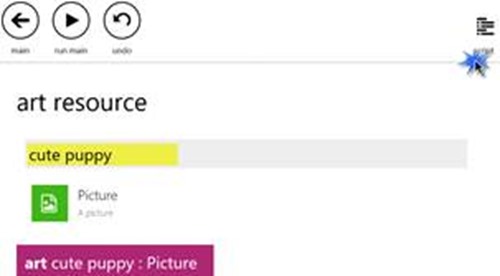
After you select the dog, you will be brought back to the art resource page. You can change the name of your art work if you want. I renamed my picture to cute puppy.
Uploading your own artwork
This option is only available if you have signed in to Touch Develop with an account.
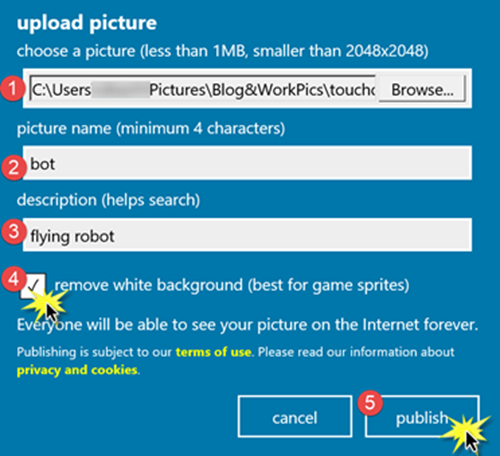
To upload your own artwork, follow the same steps as before, but instead of choosing search art pictures, choose upload.
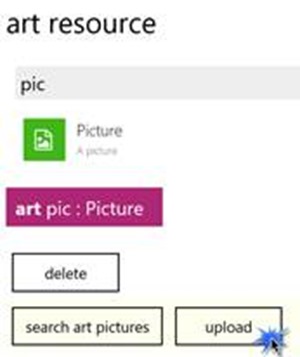
1. Browse to the file you want to use as artwork (this could be a picture you drew using a tool such as MS Paint, or an image you already have on your computer)
2. Give your picture a name
3. Provide a description of your picture, so others will be able to use it. Your art is being added to the Touch Develop art library.
4. If your image has a white background, you likely want to select the remove white background checkbox, this way you don’t see a white box around the sprite on the screen.
5. Select publish to add your artwork to your library and the Touch Develop art library.
Your image is now available as a picture resource
Returning to your code after adding new art to the library
Sometimes it is a little confusing figuring out how to navigate back to the code after you add new art to a library.
To get back to your code, select script
The main code for your program is called main() so anytime you want to go back to your code select main() from your scripts.
Step 6. Changing the background to display a picture
Instead of displaying a solid colour for a background, you may want to display an image. You could display a city scape, a jungle, a cloudy sky, whatever fits the look and feel you want for your game.
Add a new picture resource using the steps described above for the background art you want to display.
We want to change the background to display a picture
I want to call a function on the board object
The set background picture function can be used to display an image in the background
I need to specify one of my picture resources as the image to display for a background
The code will look something like this:
board-> set background picture(my selected picture)
Instead of calling the set background function which can only change the colour of the background, we call the set background picture function which can change the background to a picture.
Delete the line of code that sets the colour of your background : board -> set background(colours->…)
Add a new line of code after the line of code that says game-> splash(“Get ready”)
Select board  , select set background picture
  , select art
  , anselect the tile for the picture resource you want to use as your background
Your finished code will look something like this
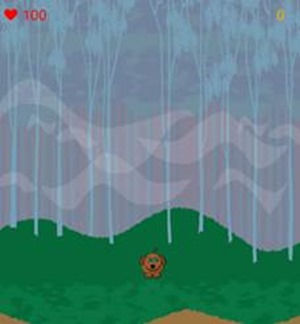
Run your game and you should see your image as a background
Step 7. Creating a scrolling background
You can create the illusion of movement in your game by simply scrolling the background image, so it looks like your character is travelling through your created world. To make a scrolling background we have to call a different function. The function we need is not available on the board object, it is a function on the game object.
So, if we want a scrolling background
1. I want to call a function that is part of the game object
2.The set background scene function can be used to display a scrolling image as a background
3. I need to specify if I want the background to scroll horizontally or vertically
4. I need to specify which of my picture resources to display in the background
The code will look something like this:
game-> set background scene(“horizontal”, my selected picture)
Delete the line of code that sets the picture of your background : board-> set background picture(my selected picture)
Add a new line of code after the line of code that says game-> splash(“Get ready”)
Select game | set background scene | art , and select the tile for the picture resource you want to use as your background.
When you are finished your code should look something like this
Run your game, the scrolling background creates the illusion that your character is travelling through your world. Feel free to experiment and change the scrolling to vertical. As you learn these new functions, it’s a great idea to try entering different parameters to see what happens. You can always change it back if you don’t like it! But remember to test after each change, so if you don’t like it or you break the game you remember how to change it back!
Step 8. Changing the artwork for a sprite
Select the line of code that creates your monster sprite.
Put the cursor inside the parentheses and delete the word monster
To choose artwork for your sprite select art 
You should see all the picture resources you added.
Select the tile for your new artwork 
Your code should look something like this:
Run the game, the monster should be replaced by your chosen artwork
Step 9. Adding a sprite
At the moment our game only has one character, a monster head that bounces up and down. Typically, games have a main character (like our monster) as well as a series of obstacles or enemies.
Each obstacle, power up, enemy, or character is created by adding a sprite. When you add a sprite you get to choose the artwork used to represent your sprite on the screen (e.g. a robot, a ninja, a unicorn)
Look through the code and see if you can find the line of code that creates our monster. (HINT: It’s the line that calls the function create sprite.)
To add a sprite to the game we have to
1. Use the game object
2. Call the create sprite function
3. Specify the artwork for the sprite as a parameter
The code would look something like this:
game->create sprite(unicorn)
Creating the sprite
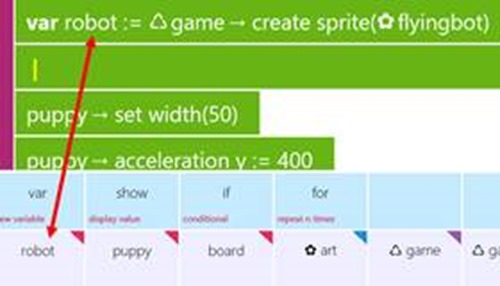
Add a new line of code under the line of code that creates your existing sprite (var monster := game->create sprite(monster))
Select game  and create sprite
  .
.
Select art  and select the tile for your new artwork
Your code should look something like this:
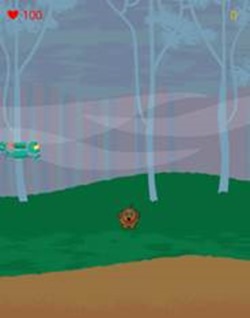
Run the game, you will see your new sprite appear in the middle of the screen. We will learn how to change where it appears in the next section.
Step 10. Giving your sprite a name
In order to edit the properties of your sprite, such as it’s size and width, you need to give it a name.
Select the line of code that creates your sprite and select the tile store in var 
This will store your sprite in a variable called sprite
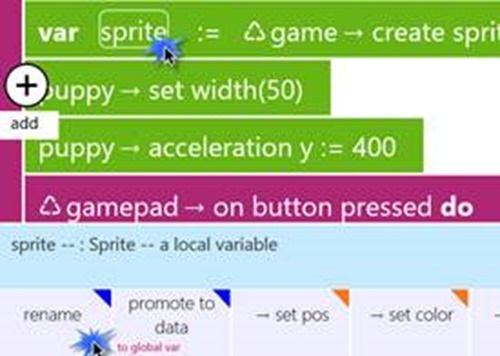
I am going to rename my variable to something more meaningful. If I select the variable name sprite and select the rename tile, I can change the variable name to robot.
Step 11. Renaming an existing sprite
Hmmm, if we look at our code we have a cute puppy in a sprite called monster… You can keep that if you want, but I like the names of my sprites to reflect their characters to avoid confusion
If you want to rename your sprite, you can select the line of code
Then click on the variable name monster. You will see a rounded rectangle appear around the word monster when it is selected.
Now click on the rename tile  and type in a new name for your sprite.
One of the really great things about renaming a sprite, is that everywhere else in the code there was a reference to the monster sprite has now been changed to use the new variable name “puppy”. You will notice that the code that set the width of our sprite now says puppy->set width. So you don’t need to worry about updating existing code when you change the name of a sprite.
Congratulations! You have now added new artwork to your game and you now have two sprites! Your artwork and your sprite names may be different from mine, but you should have a couple of lines of code that look something like this
Step 12. Setting the position of your sprite
When you add a sprite to the screen, by default it appears in the middle of the screen and it doesn’t move.
There are functions you can call to change the position of a sprite
set x
set y
pos( x , y )
x and y refer to the x and y coordinates of the sprite on your screen.
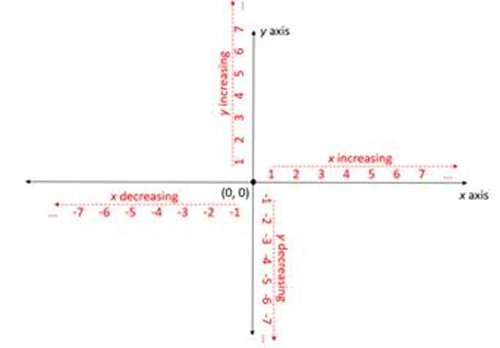
You are probably used to an x,y co-ordinate system like this
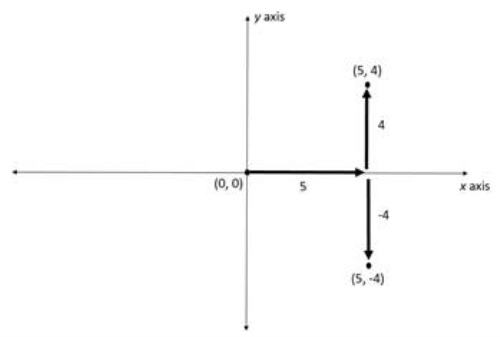
In school we were taught to plot points on the grid as x,y pairs
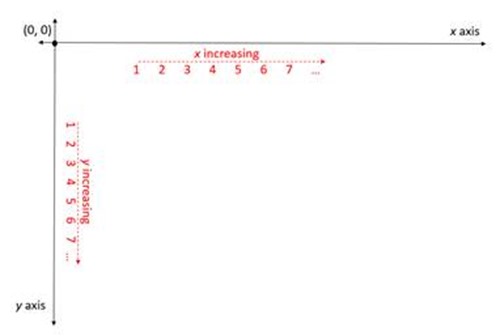
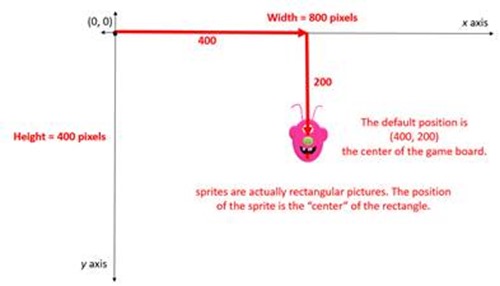
In Touch Develop, the top left corner of the screen is the 0,0 position. As you move to the right X increases, as you move down y increases. This can be a bit confusing at first, because you might have expected Y to increase as you move up, but in Touch Develop y increases as you move down.
The board is 800 pixels wide, and 400 pixels high. When we put a sprite on the board by default it appears in the middle of the game board at (400,200)
Use the set x, set y, or set pos functions to specify new x or y coordinates to reposition a sprite
To change the position of a sprite we need to
Use our sprite object
Call the set pos function
Specify the x and y coordinates for the sprite as parameters
The code would look something like this:
Mysprite->set pos(50,400)
Let’s do it! Add a new line of code underneath the line where you created your new sprite
Notice there is a tile in the command tray for your sprite! This allows you to change the properties of your sprite.
Select the tile for your sprite (mine is called robot). Select set pos, and then enter x and y coordinates such as 50,400 for your sprite position.
Your code will look something like this
Run your game, you will see the position of your sprite has changed
FUN TIP: Instead of specifying a particular x or y coordinate, you can select the math | random tile and specify a range of values to generate a random value for your position. For example, you could specify a random height between 0 and 400 so the player never knows where the sprite will appear.
Step 13. Making a sprite move
We have changed the position of our sprite but it still isn’t moving. In order to make it move we have to give it a speed.
We can change the speed using any of the following functions
set speed x( vx ) – to make the sprite move horizontally (along the x axis)
set speed y( vy ) – to make the sprite move vertically (along the y axis)
set speed( vx , vy) – to make the sprite move diagonally
Let’s get our sprite to move around the screen so it can collide with our main character
To make our sprite move we need toq.
1. Use our sprite object
2. Call the set speed function
3. Specify the x and y velocity for the sprite as parameters
The code would look something like this:
Mysprite->set speed(200,100)
Add a new line of code after you set the position of your sprite.
Select the tile for your sprite. Select set speed, and enter an x (horizontal) velocity, and a y (vertical) velocity.
Your code should look something like this

Run your game and watch your sprite move around the screen. Experiment with different values for the x and y speed until you are happy with the final effect.
FUN TIP: You may have noticed that when your sprite hits the edge of the screen it bounces back. That is due to this line of code
If you delete that line of code then a character will go off the screen when it reaches the edge. This allows you to create different styles of games. Instead of having a character bouncing around, you could create a game that adds new sprites which fly across the screen for your character to dodge.
Congratulations! You now have added a sprite and are able to control its position and movement on the screen.
Step 14. Handling collisions between sprites
We have two characters on the screen, but nothing happens when they collide! Collisions usually are the key component that determines game play. Do we get a point for hitting the other character or do we lose a life? You could have different sprites that cause different effects. What if there was a sprite that shrinks the character when we hit it and another character that makes our character get bigger?
Regardless of what you want to happen when the two characters collide, you need to write code to detect when the two characters hit each other.
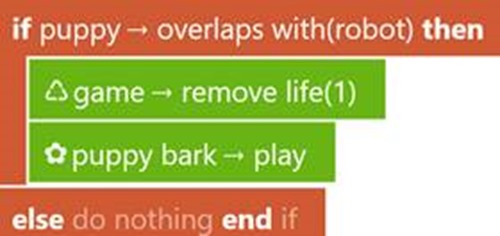
This is called collision detection, and with many tools it can be one of the most difficult aspects of video game design. Luckily, Touch Develop makes it relatively easy. We just need to add an If statement to ask if the two characters overlap.
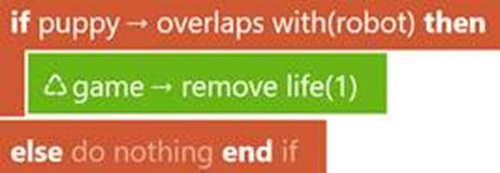
When we are done the code will look something like this
To add this code, add a new line underneath the code where you declared your sprite
Select if  from the command tray.
Delete the word true from the command and then select your sprite name from the command tray
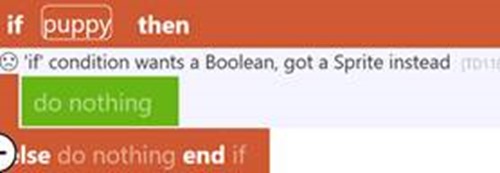
Don’t worry about the error message, it will disappear when we finish the command.
Now select overlaps with  from the command tray. If it isn’t listed, remember you can search for commands using the more
  button.
Finally, specify the other sprite in the parentheses. When you are done your code should look something like this:
If you look closely your code now says if the puppy overlaps with the robot do nothing!
Now comes the fun part, what do we want to happen when they collide? This is a great time to experiment. How about
Game-> remove life (1) – to take away one life
Game-> add score(1) – to add one to my score
Puppy->set width(puppy->width/2) – to shrink the sprite to half it’s current size
FUN TIP: You can add a sound resource to your art library (follow the same process you did to add artwork, but select add a sound resource instead of add picture resource) and then select the sound resource from your art library and use the play function to make a noise whenever they collide!
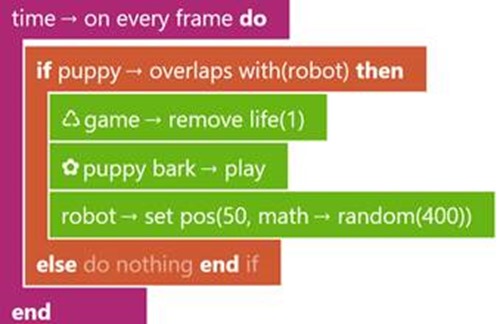
I have decided in my game, to remove a life and play a barking noise (following the instructions from the tip above) whenever my sprites collide. When I am done, my code looks like this
Run your game, make the two sprites crash into each other…
Nothing happens! You didn’t do anything wrong, I expected this… there is one more thing we have to do before the collisions will work correctly
Step 15. Dealing with frames
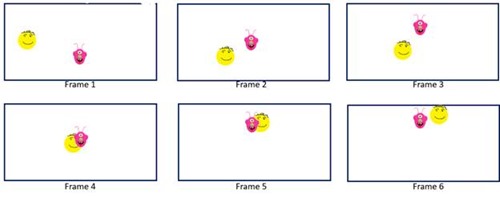
When you watch an animated movie, it’s actually made up of a series of still frames that are played one after the other very quickly to create the illusion of animation. Video games work the same way. Our game is actually made up of a series of frames. On each frame our sprites appear in a different spot on the screen.
When we wrote the code to detect a collision it only checked for a collision on the very first frame. In the first frame our sprites are not touching each other, so the if statement did not run our code because the sprites do not overlap.
We need to modify our code so it runs on every frame of the game. This tells the video game that if they overlap at any time during the game we want this code to run!
Add a new line of code just before your if statement
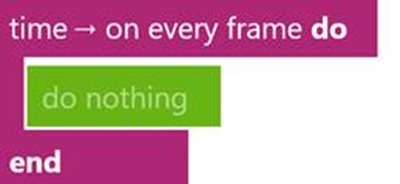
Select time | on every frame
You should end up with code that looks something like this
Of course we don’t want our code to do nothing on every frame, we want to run our if statement on every frame to see if our sprites overlap.
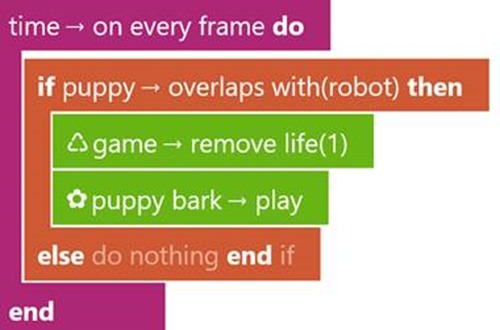
You need to drag and drop your if statement into the middle of the time-> on every frame statement. When you are done it should look like this:
Run your game, now when the two sprites collide you should lose a life, hear a noise, or whatever action you chose to happen when they crash!
EXPERT TIP! You might notice that if you lose multiple lives or get multiple points when there is a collision. That’s because the two sprites overlap for multiple frames in a row. If you don’t like that behavior, you can add code inside your if statement to move the sprite after they collide. I moved my robot and had it randomly appear somewhere else on the left hand side of the screen after a collision.
Congratulations! You have a working video game!
Sharing your game
Now that you have a working game, you may want to share it with others!
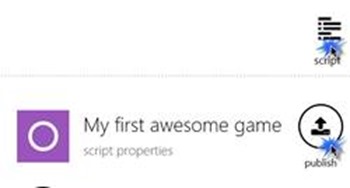
Select script and then select publish
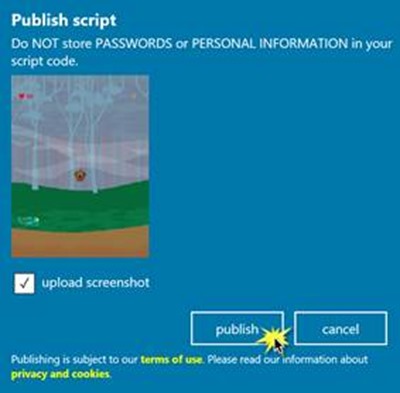
On the publish screen select publish.
After a few seconds a page will appear with a URL you can share with your friends so they can try your game! or share it with friends.
What next?
There are number of teaching and learning resources available for Microsoft TouchDevelop and these are a great next step after completing this blog https://imagine,microsoft.com under the create section.
You can also complete the following Microsoft Virtual Academy training courses
Learn to code with CODExist: the Birth of Bot: this course teaches you how to build a video game from scratch using Touch Develop. It’s a more complete version of the tutorial you saw here.
Learn to Code with CODExist: Bot Levels Up: this course teaches you how to add new elements to your video game
aka.ms/learn2code has other beginner coding tutorials
imagine.microsoft.com to find contests and other great resources for students who are interested in coding using Touch Develop or other tools.
The tutorials at www.touchdevelop.com , there are lots of different guided tutorials you can try.
Find royalty free art assets you can use in your game here
The most important thing is keep coding, share what you learn with others and have fun!
