Building a WebGL game for Windows 8 Store
Install Visual Studio 2013
To build a Windows 8.1 app for the Windows Store, you’ll need.
1. Windows 8.1
2. Visual Studio 2013 to package your code.
3. Windows Store and Developer account.
Simply follow the procedure described here: Get started - Download the tools . You can install the free version: Visual Studio 2013 Express for Windows 8 or if your a student you can head over to www.dreamspark.com and install Visual Studio Professional or Ultimate for FREE.
If your a student you get a FREE developer account via https://www.dreamspark.com/Student/Windows-8-App-Development.aspx
Taking your WebGL Browser to an app
1. Select a third party engine for this we will be using babylon.js OpenSource engine.
Babylon.js is a WebGL engine described in my previous post. However it doesn't matter if you use three.js or any other engine the concepts described remain exactly the same.
My key rule of thumb is Babylon.js is perfect if starting from scratch. If you already have browser and WebGL implemented three.js is a good starting point
Building a simple BabylonJS sample
- Download BabylonJS on Github: https://github.com/BabylonJS/Babylon.js . Take the complete package embedding our sample scenes. We’re going to use the Espilit scene.
- Download also our Hand.js polyfill: https://handjs.codeplex.com/
- Create a web project using your favorite tools. Copy babylon.js & hand.js into a “scripts” folder and copy the “Espilit” scene from github into an “Espilit” folder.- On your web server, add support for the .babylon & .babylonmeshdata MIME types. If you’re using IIS, add this block definition into your web.config:
 <system.webServer>
  <staticContent>
    <mimeMap fileExtension=".fx" mimeType="application/fx" />
    <mimeMap fileExtension=".babylon" mimeType="application/babylon" />
    <mimeMap fileExtension=".babylonmeshdata" mimeType="application/babylonmeshdata" />
  </staticContent>
</system.webServer>
- Create a HTML page with this code and name it “index.html”:
 <!DOCTYPE html>
<html>
<head>
    <title>BabylonJS - Espilit demo</title>
    <script src="scripts/hand.minified-1.1.3.js"></script>
    <script src="scripts/babylon.js"></script>
    <script src="scripts/main.js"></script>
    <style>
        html, body {
            width: 100%; height: 100%;
            padding: 0; margin: 0;
            overflow: hidden;
        }
        #renderCanvas {
            width: 100%; height: 100%;
            touch-action: none; -ms-touch-action: none;
        }
    </style>
    </head>
    <body>
        <canvas id="renderCanvas"></canvas>
    </body>
</html>
- Create a “main.js” file into the “scripts” folder with this code:
 document.addEventListener("DOMContentLoaded", startGame, false);
function startGame() {
    if (BABYLON.Engine.isSupported()) {
        var canvas = document.getElementById("renderCanvas");
        var engine = new BABYLON.Engine(canvas, true);
        BABYLON.SceneLoader.Load("Espilit/", "Espilit.babylon", engine, function (newScene) {
            // Wait for textures and shaders to be ready
            newScene.executeWhenReady(function () {
                // Attach camera to canvas inputs
                newScene.activeCamera.attachControl(canvas);
                // Once the scene is loaded, just register a render loop to render it
                engine.runRenderLoop(function () {
                    newScene.render();
                });
            });
        }, function (progress) {
            // To do: give progress feedback to user
        });
    }
}
And we’re done! We’ve rebuilt in a few lines of code the very same demo as this one: https://www.babylonjs.com/index.html?ESPILIT.
Creating a Windows 8 Store App
1. Copy/pasting into a Windows Store App project
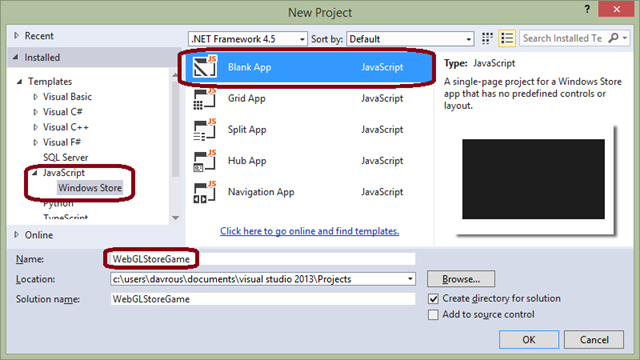
- Open Visual Studio 2013 and create a “JavaScript” –> “Windows Store” new project. Name it “WebGLStoreGame”:
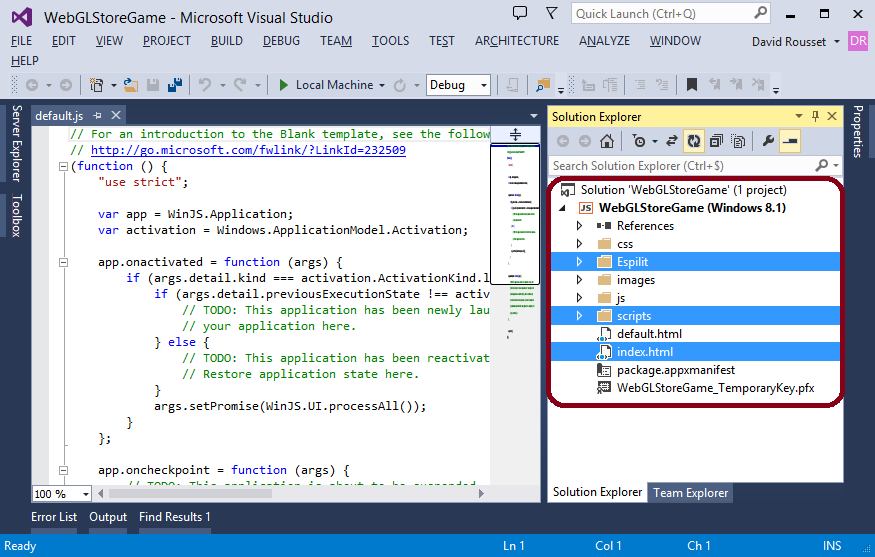
- Copy/paste the index.html file as well as the 2 “Espilit” & “scripts” folders into the Windows Store App project:
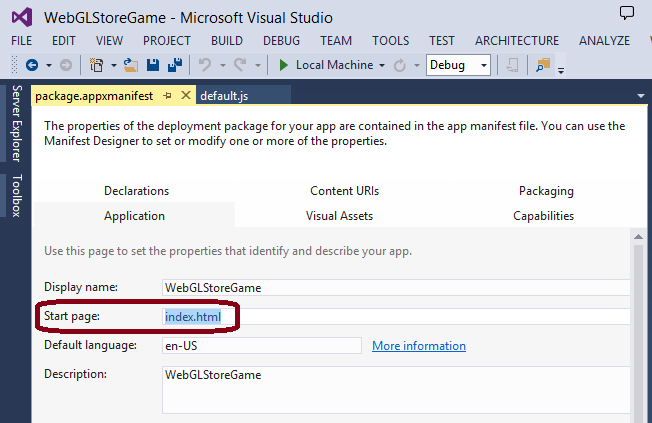
- by default, a Windows Store HTML5 project starts by loading “default.html”. Let change that. Double-click on “package.appxmanifest” to open the properties page & change the start page by “index.html”:
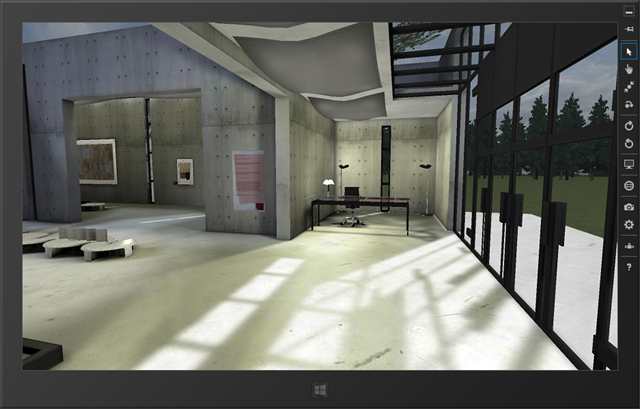
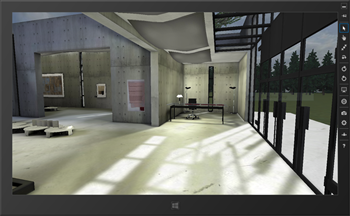
That’s it! You’ve just finished migrating the code into a Windows Store application! Press CTRL+F5 or the play button to launch the game:
You now need to add Windows 8 feature such as snap and charms
Updating your Windows 8 game to embrace the Windows 8.1 platform
First article you have to read as a game developer is that one: Designing a great game for Windows. It will briefly explain you how to embrace the Windows 8.1 platform & its design considerations: live tiles and notifications, share contracts, app bar, support for a variety of form factors and screen sizes, snap view, etc.
For JavaScript developers, download this good simple sample to start with: JavaScript and HTML5 touch game sample. You’ll find the code to create an app bar & a settings flyout panel for instance. I’ve used this sample project to modify the one we’ve created together.
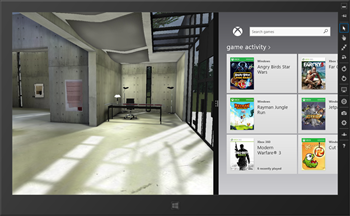
Handling multiple views of a Windows Store app, Snap/Full
You really have 2 choices:
1 – Preserve the full screen rendering with its aspect ratio by adding black bars. There is an easy solution based on CSS3 look at this detailed article: Modernizing your HTML5 Canvas games Part 1: hardware scaling & CSS3
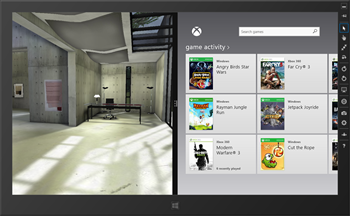
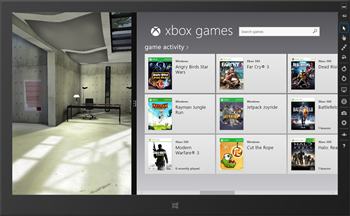
2 – Simply change what the camera is now viewing. For that, you just have to listen to the onresize event and change the size of the canvas. The BabylonJS engine will automatically reflect the changes for you.
In my case, I’ve decided to implement the 2nd solution for this tutorial:
To understand how it works, simply have a look to the code in the Visual Studio solution available to download at the end of this article.
The game now support Keyboard and Touch inputs
Adding Xbox Controller input
As this is web based game there is currently no exposed API to allow me to use an Xbox Controller as input inside the IE11 JavaScript engine. However, DirectX and more particularly XInput expose the API to get the data from an Xbox Controller. Read more about that here: Getting Started With XInput
The idea is then simply to build a WinRT component in C++ wrapping those API for the JavaScript world.
What is excellent is that this sample has already been written and available among the Windows Store Apps samples: XInput and JavaScript controller sketch sample as we know controllers are desired control mechanism for most gamers.
Adding XInput Control
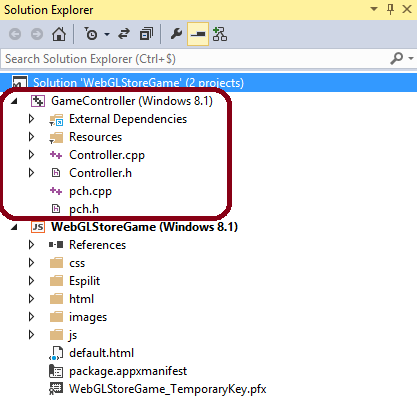
1. Download the XInput and JavaScript controller sketch sample sample and copy the C++ project into your “WebGLStoreGame” Visual Studio solution:
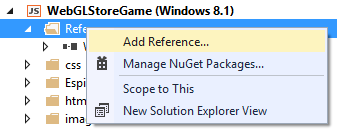
2. Add a reference to this project into the “WebGLStoreGame” JavaScript project. For that, right-click on “References” and “Add Reference… ” :
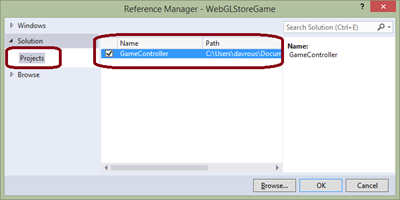
3. Select “Projects” and “GameController” :
4. Calling the C++ logic directly from your JavaScript code. Here is the code to control the camera function with a controller- BabylonJS camera. :
 // babylon.xboxControllerCamera.js
var BABYLON = BABYLON || {};
(function () {
    BABYLON.XboxControllerCamera = function (name, position, scene) {
        BABYLON.FreeCamera.call(this, name, position, scene);
        // You need first to referance the WinRT C++ component from the Windows SDK samples
        if (GameController) {
            // Although the API supports up to 4 controllers per machine,
            // this sample only works with a single controller.
            this.controller = new GameController.Controller(0);
        }
    };
    // We're mainly based on the logic defined into the FreeCamera code
    BABYLON.XboxControllerCamera.prototype = Object.create(BABYLON.FreeCamera.prototype);
    BABYLON.XboxControllerCamera.prototype.angularSensibility = 8000000.0;
    BABYLON.XboxControllerCamera.prototype.moveSensibility = 20000.0;
    BABYLON.XboxControllerCamera.prototype._checkInputs = function () {
        var offsetLeftX, offsetLeftY, offsetRightX, offsetRightY;
        var state = this.controller.getState();
        if (!state.connected) {
            return;
        }
        // Gamepad thumbstick values are between -32768 and 32767.
        // Drawing position is moved incrementally if
        // the thumbstick value exceeds a deadzone value of 6500.
        offsetLeftX = Math.abs(state.leftThumbX) > 6500 ? 0 + state.leftThumbX : 0;
        offsetLeftY = -(Math.abs(state.leftThumbY) > 6500 ? 0 - state.leftThumbY : 0);
        offsetRightX = Math.abs(state.rightThumbX) > 6500 ? 0 + state.rightThumbX : 0;
        offsetRightY = -(Math.abs(state.rightThumbY) > 6500 ? 0 - state.rightThumbY : 0);
        this.cameraRotation.y += offsetRightX / this.angularSensibility;
        this.cameraRotation.x += -offsetRightY / this.angularSensibility;
        var speed = this._computeLocalCameraSpeed();
        var direction = new BABYLON.Vector3(speed * offsetLeftX / this.moveSensibility, 0,
                                            speed * offsetLeftY / this.moveSensibility);
        BABYLON.Matrix.RotationYawPitchRollToRef(this.rotation.y, this.rotation.x, 0,
                                                 this._cameraRotationMatrix);
        this.cameraDirection.addInPlace(BABYLON.Vector3.TransformCoordinates(direction,
                                                 this._cameraRotationMatrix));
    };
})();
It’s pretty straight-forward. The X axis on the left analogic joystick is “strafing” left/right and the Y axis is moving forward/backward in the direction of the camera.
The right analog joystick is controlling the orientation of the camera.
You could even go further by sending vibration data to the controller during your game when the player will be touched by the enemies for instance.
Getting your game ready for Store
1. Passing the WACK test
The first thing you need to do before submitting your app to the Windows Store is running the WACK (Windows App Certification Kit) tool. It will run automatic tests against your app to ensure you have the minimum quality bar (decent launch time, no crash, etc.).
You’ll find interesting details on what’s the tool is doing there: Using the Windows App Certification Kit and how to use it.
To be sure to pass this WACK test using this tutorial, you need to do a last specific task for JavaScript. All JS files must be saved as UTF-8. This is explained here: Windows App Certification Kit tests : “HTML, CSS, and JavaScript files must be encoded in UTF-8 form with a corresponding byte-order mark (BOM) to benefit from bytecode caching and avoid certain runtime error conditions. ”
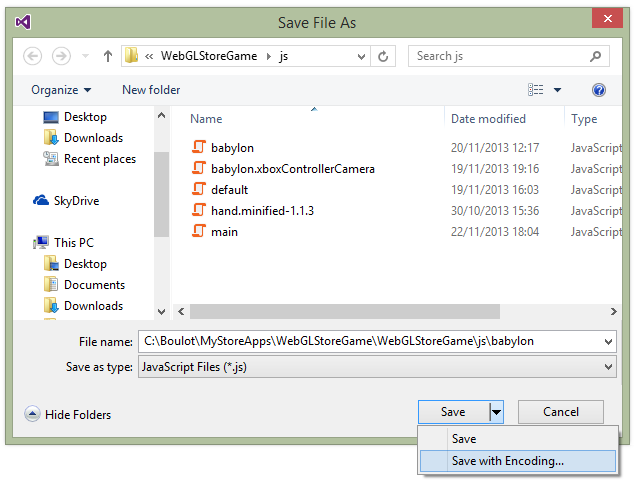
In conclusion, check that all files are UTF-8 encoded. For instance, “babylon.js” could be using another encoding type. To change that, open the “babylon.js” file and select Save As from the File menu in Visual Studio. Select the drop-down control next to the Save button and select Save with Encoding. From the Advanced save options dialog, choose the Unicode (UTF-8 with signature) option and click OK.
Download the Visual Studio solution
If you’d like to review the complete solution, feel free to download David Cathue fill solution here

