How antispoofing protection works in Office 365
Update: This blog post is being deprecated and information has been moved to docs.microsoft.com: Antispoofing protection in Office 365
Exchange Online Protection (EOP), the email filtering component of Office 365, is rolling out, or has already rolled out, full antispoof protection for all of its customers. Most of our customers already have this protection, and now we are preparing to roll it out to everyone else.
[tzink 2016.11.03 - This is rolled out for everyone]
What is the spoofing problem EOP is solving?
Over the past several months, EOP (along with the rest of the industry) has seen a massive increase in targeted spear phishing attacks where the attacker spoofs an employee high up in the organization such as the CEO, and emails another high ranking employee such as the CFO, asking them to perform a wire transfer, or similar behavior. There are no attachments or links in the message, only regular language instructions asking the target to comply with the demands.
For example:
 From:  Rudy Bosive (the CEO) <rudy@woodgrovebank.com>
 To:  Tom Amtir (the CFO) <tom@woodgrovebank.com>
 Subject:  Can you make this wire transfer for me?

Tom, we just closed on an acquisition of a new service but we’re trying to keep it quiet.
Could you wire over $50,000 to them? The account number is below and we need to get this
taken care of today.

Thanks.

Rudy

Sent from Outlook for iPhone
These types of messages are sent in low volume, and contain language that is grammatically correct without spelling errors, but are fraudulent. They also can cause a lot of financial damage to an organization if the targeted recipient is not aware that the message is malicious.
EOP already has antispoofing technology including SPF, DKIM, and DMARC [1]. However, many organizations don’t have either the expertise or resources needed to set these up or maintain them. Yet, they still need antispoofing protection – these types of messages must be detected and users protected even if you don’t have the required authentication records published.
This Exact DomainSpear Phishing Protection (aka, Business Email Compromise) is the new feature that EOP has rolled out for many of its existing customers, and will roll out for the rest over the next few weeks – the detection of spoofing for your domain even without the standard SPF, DKIM, or DMARC records.
You don’t have to do anything to receive this protection, you get it for free automatically. Furthermore, you can customize it to make it more or less strict by permitting others to send on your behalf.
How is EOP solving it?
First, EOP checks to see if the message is destined to your organization and comes from any of your provisioned domains, or a subdomain of any of your provisioned domains. For example, any of these may be potential spoofs:
 From:  Rudy Bosive (the CEO) <rudy@woodgrovebank.com>
To:  Tom Amtir (the CFO) <tom@woodgrovebank.com>

From:  Rudy Bosive (the CEO) <rudy@foo.woodgrovebank.com>
To:  Tom Amtir (the CFO) <tom@woodgrovebank.com>

From:  Rudy Bosive (the CEO) <rudy@woodgrovebank.com>
To:  Tom Amtir (the CFO) <tom@bar.woodgrovebank.com>

From:  Rudy Bosive (the CEO) <rudy@foo.woodgrovebank.com>
To:  Tom Amtir (the CFO) <tom@bar.woodgrovebank.com>
If the From and To domains align, EOP checks to see if the message is legitimate. Is it a message that originated internally within the organization? That’s okay. Are they authorized to send email on your behalf? That’s also okay. Is it a known good bulk sender? That’s okay. EOP also uses the sending domain reputation (or lack of reputation), sending IP reputation, recipient reputation (how many messages do you receive from this sender? how is your email routed through the EOP service?), and also makes use of machine learning.
EOP uses of all of this data to make sure that the service marks malicious email as spoofs, and not any legitimate email. 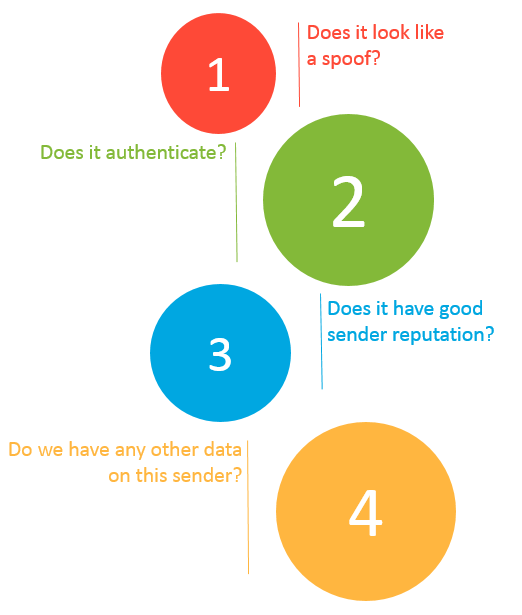
How to tell if EOP thinks a message is a spoof
When EOP thinks a message “from” your domain to any of your domains is a spoof, it marks it as spam and adds the following header:
X-Microsoft-Antispam: …;SFTY:9.5
The X-Microsoft-Antispam header is already used by EOP to indicate various other spam filtering components. The SFTY:9.5 or SFTY:9.11 refers to the Safety Level of a message. This header property has other values but are reserved for internal use by EOP.
You can double check this by looking at the From: address and the To: address. Both domains will be the same, subdomains of each other, or part of your Accepted-Domains.
By the end of the second quarter of 2016, EOP will start adding Safety Tips to the message. Safety Tips are visual indicators letting you know that the message is fraudulent or may be a phishing scam. These Safety Tips are viewable when using Outlook on the web to view your email. 
How much email will be marked as spam because of this change?
Note: This is an upcoming feature and is not yet available as of Feb 22, 2016
In order to view how much email this feature marks as spam, EOP will also give you the ability to see who is sending email with your domain in the 5322.From header (the one that shows up in the email client) to your organization’s domains. For example, suppose you had all of the following domains provisioned:
contoso.com
fabrikam.com
woodgrovebank.com
This report would tell you all combinations of:
| From: | To: |
| contoso.com | contoso.com |
| contoso.com | foo.contoso.com |
| contoso.com | fabrikam.com |
| foo.contoso.com | bar.woodgrovebank.com |
And so forth.
To view this report using Powershell (note: the *-PhishFilterPolicycmdlets are only available if you have purchased the E5 license or the Advanced Threat Protection license):
Run the following cmdlet:Get-PhishFilterPolicy –SpoofAllowBlockList | Export-CSV "SpoofingSenders.csv" Or, to get more details:
Get-PhishFilterPolicy –SpoofAllowBlockList –Detailed | Export-CSV "DetailedSpoofingSenders.csv"This cmdlet will export all data sending to your organization over the past 30 days.
Open and review the downloaded *.csv file. The column names are detailed below, with the ones that will be marked as spam bolded in purple:
Column Description PSComputerName Used internally by EOP RunspaceId Used internally by EOP PsShowComputerName Used internally by EOP True Sender The organizational domain of the PTR record of the sending IP address that is spoofing your organization. If no domain is found, the sender IP is shown. Mail Volume Number of messages sent to your organization from this sender in the past 30 days User Complaints Number of junk submissions from your users corresponding to this sender in the past 30 days Allowed to Spoof Indicates whether this entity is allowed to spoof your organization. There are 3 possible values:Yes: All spoofed addresses from this spoofing sender will be allowed to spoof your organizationNo: No spoofed addresses from this spoofing sender will be allowed to spoof your organization. Messages from this sender will be marked as spam when the feature is enabled. Partial: Some spoofed addresses from this spoofing sender will be allowed to spoof your organization, the rest will be marked as spam. Add –Detailed parameter to see the specific addresses. Spoofed Sender(only included with–Detailed parameter) The visible spoofed sender that the message appears to be sent from (in the From: address in your email client, also known has the header.from) Authentication Result (only included with –Detailed parameter) This shows Passed if the sender passed EOP sender authentication checks (such as SPF or DKIM), Failed if the sender failed EOP sender authentication checks, or Unknown if the result is not known Source of Allowed to Spoof (only included with –Detailed parameter) Indicates if the Allowed to Spoof verdict was automatically determined by the phish filter or set by the administrator.
Integration with the Office 365 Admin Portal is not available at this time, but will be by the end of Q2 2016. When that occurs, this blog post will be updated.
How can you exclude certain senders from being marked as spam?
Even though EOP attempts to exclude all legitimate senders from being marked as spam, it is possible that the service does not have enough history to make that determination. This can happen if a new sender starts sending email as you, or the volume of email is too small to generate a positive reputation, or the sender comes a set of IPs that are known to send spam or phish. EOP does self-correct in cases where it has enough data to make a decision, but other corner cases may continue to be marked as spam.
To eliminate the chance of false positives, we recommend administrators use one of the following four options to exclude senders from being marked spam by our antispoofing filter:
1. Add the sender’s IP addresses to your SPF record, or have them authenticate with DKIM
You can use either SPF or DKIM to have a 3rd party send email on your behalf (see note [2] at the end of this blog post for examples). However, it's not sufficient for a message to simply pass SPF or DKIM; the domain in the From: address must align with the domain that passed SPF or DKIM (either be an exact match, or be a sub-domain).
Whichever method you choose, or ideally picking both methods, this will allow EOP to authenticate emails from these 3rd party services sending as your domain to your domain.
However, it also allows others (for example, Yahoo, Gmail, Comcast, and so forth) to verify email to them sending as you. This is beneficial because it allows your customers to build trust with your domain no matter where their mailbox is located, and at the same time EOP will not mark a message a spam due to spoofing because it passes authentication of your domain.
Advanced users: For more information on getting SPF records to work around the 10 DNS lookup limit, and automating your SPF records, see the blog post Email authentication should work out of the box and we should not rely upon domain owners to do it themselves.
2. Use the spoof policy in Powershell or UX in the Exchange Admin Center to exclude the sending IP address from Antispoofing enforcement
This functionality is not yet available as of Feb 22, 2016 but will be released by the end of Q2 2016.
Alternatively, if you want to permit various senders to send email on your behalf to your domain (but still undergo spam filtering), you can explicitly set this up.
To allow a specific IP address to send email as your domain to your domains using Powershell (this is only available if you have an E5 license or you have purchased an Advanced Threat Protection license):
a) Connect to Exchange Online using Powershell
b) Download the spoofed senders list, as above, with either basic or detailed view.
Get-PhishFilterPolicy –SpoofAllowBlockList | Export-CSV "SpoofingSenders.csv"
Or
Get-PhishFilterPolicy –SpoofAllowBlockList –Detailed | Export-CSV "SpoofingSenders.csv"
c) Open up your favorite text editor (such as Notepad or Notepad++) and look for the IPs you want to specify overrides and type either Yes or No in the Allowed to Spoof column.
- Specifying ‘Yes’ in the Standard view will allow all detected sender addresses from that IP address to send as your domain. Specifying ‘No’ will prevent it (that is, if EOP may believe it is a good sender but you can override it). Future sender addresses detected by the phish filter may or may not be blocked or allowed
- Specifying ‘Yes’ or ‘No’ in the Detailed view will allow or block the detected sender address from the true sender sender spoofing your domain.
- If there are spoofing senders you would like to proactively allow or block that do not currently appear in the Detailed view, you can specify the “True Sender”, “Spoofed Sender”, and the “Allowed to Spoof” verdict.
Save the file with a new name UpdatedSpoofingSenders.csv.
d) Update the changes you made in the "Allowed to Spoof" column by running the following two commands in this order:
$UpdatedSpoofingSenders=Get-Content -Raw UpdatedSpoofingSenders.csv
Set-PhishFilterPolicy –SpoofAllowBlockList $UpdatedSpoofingSenders
Senders who you did not allow will be blocked.
e) To verify your changes:
Get-PhishFilterPolicy –SpoofAllowBlockList
Or
Get-PhishFilterPolicy –SpoofAllowBlockList –Detailed
Integration with the Office 365 Admin Portal is not available at this time, but will be later on in 2016. When that occurs, this blog post will be updated.
Bonus: Office 365 is planning to give you insights into Intelligence Data. This encompasses a whole range of signals from our various platforms. These spoofing senders – many of whom are malicious – will in this Intelligence Data set. It is not the only set of signals we will provide, but is an important one. This Intelligence Data will be available later this year (2016).
3. Add the sender’s IP address to an IP Allow List in the Exchange Admin Center
Alternatively, if you don’t want to add the sender’s IP addresses to your SPF record but also don’t want email to be marked as spam due to spoofing, you can add the IP or IPs to your IP Allow List. This will skip any spam filtering from these IP addresses and mark the message as SCL –1, which delivers the message to your inbox unless an Exchange Transport Rule (ETR) deletes or quarantines the message.
If a message bypasses filtering due to an IP Allow list entry, you will see the following properties inserted into a header in the message:
X-Forefront-Antispam-Report: IPV:CAL;…SFV:SKN;…SCL:-1
The IPV:CAL means “IP Filtering Verdict: Customer Allow List”.
For more information on managing IP Allow lists, see Configuring the connection filter policy in EOP.
4. Add the sender’s IP addresses plus sending domain to an Exchange Transport Rule (ETR) which bypasses filtering
Alternatively, if you don’t want to skip filtering on all email from a specific set of IP addresses into your organization because those IPs are shared by more than just your domain, you can create an ETR. The ETR should look for a combination of sending IP addresses and a sending domain. You should never create an ETR that only looks for your domain because this can be easily exploited by spammers.
The ETR syntax should be:
 Name: Antispoofing Allow rule to bypass filtering

If the message…
 sender ip addresses belong to one of these ranges: ‘1.2.3.0/24’
 and sender’s address domain portion belongs to any of these domains: ‘contoso.com’

Do the following…
 Set the spam confidence level (SCL) to ‘-1’
 and set the header ‘X-ETR’ with the value ‘Antispoofing allow rule set SCL –1’
You can add as many IP addresses as you want to the rule, you can add other domains to protect, you can modify the text of the header to stamp to make it more descriptive, and you can even specify Exceptions to the rule.
The result is that email from these IP ranges sending email as your domain will bypass spam filtering and get delivered to your users’ inboxes except if the user has the sender on their personal Blocked Sender list, and there are not other ETRs running at higher priority than this rule that take action on the message (for example, a rule that sends email to the Admin Quarantine).
If a message bypasses filtering due to an ETR like the above, you will see the following header inserted into the message:
X-Forefront-Antispam-Report: SFV:SKN;…SCL:-1
X-ETR: Antispoofing allow rule set SCL -1
For more information on ETRs, see
Once the Allow/Block functionality above is released, you don’t need to do this ETR and instead should use that.
Remember – is important to never, ever allow only your domain in an ETR by itself with no other criteria. If you do, a spammer can spoof your domain and it will get a free pass to the inbox.
Can antispoofing protection be turned off?
No, antispoofing protection cannot be disabled.
Instead, if you get false positives, you should use any of the workarounds above to bypass filtering for these senders. This ensures that rather than leaving you exposed to phishing messages, you instead block the most dangerous types of spoofs and allow in only authorized senders.
EOP has done a great job at minimizing potential false positives and so this change will cause minimal disruption to legitimate mailflow.
Is there anything else I should know about?
Yes.
- In order to get full antispoofing protection, your domain’s MX record must point to EOP as its primary MX record. If it does not, antispoof protection will not be implemented for your domain.
. - Antispoof protection does not override IP Allow rules, ETR allow rules, or end user safe senders, all of which bypass spam filtering. This may change in the future.
What about mailing lists?
Mailing lists are the instances where you are most likely to see false positives. This is because of the way the message is routed:
Office 365 customer (on-prem or fully hosted) -> Office 365 -> out to mailing list (passes SPF, DKIM, DMARC) -> back to Office 365 (passes SPF, but original DKIM fails, and DMARC would fail, too)
When the message is replayed back to Office 365, if the message has been modified in transit (e.g., the subject line has been changed to put [Topic] in it, or a footer has been added with unsubscribe information), this will pass SPF (because the list's SPF check passes) but fail our antispoofing checks. This is a known problem with mailing lists even with DMARC.
The industry solution is a new standard called the Authentication Received Chain, or ARC. This is a way to pass authentication results securely between mail servers. However, ARC is still a few months away.
For customers, you should do the following:
a) Make sure you are signing with DKIM -> this will fix issues where email is not modified, but not where email is intentionally modified
b) Use one of the above workarounds - either an IP allow for the mailing list, or an ETR allow based upon the sending IP + sending domain OR an ETR based upon the sending domain (of the mailing list) + 'Authentication-Results' header contains 'spf=pass'
c) You can also open up a support ticket with us. We're working on inventorying mailing lists to exclude them from antispoofing checks. If you do that, you won't need to do (b). When ARC is released, and if you control the mail server, it will also help in delivery.
Conclusion
These changes to EOP’s spam filtering will help protect your organization from some of the most malicious phishing messages that we see today. The feature is intended to minimize any false positives while also giving you the ability override the filter decisions when necessary.
As always, let us know how it works for you so we can continue to improve it!
Footnotes
[1] EOP supports DMARC for inbound email, which is a technology to stop spoofing of the From: domain. The main difference between DMARC and EOP’s Antispoofing solution is that DMARC requires certain DNS records to be published, whereas EOP’s Antispoofing solution does not. The second difference is that DMARC sends failure reports back to the forensic and aggregate reporting email addresses, whereas for EOP’s Antispoofing that information is only available via Powershell or through the Exchange Admin Center.
For more information, see these blog posts:
- Using DMARC in Office 365
- Best practices for Exchange Online customers to align with DMARC
- What is the best combination for your SPF, DKIM, and DMARC record?
[2] For setting up 3rd party services to send on your behalf (as your domain) and have it authenticate using the regular antispam authentication methods:
a) SPF Authentication
If you are sending from an on-premise mail server, or a cloud-hosted service, and you have a dedicated IP address, you should add them to your SPF record. For example, before updating your SPF record, it might look like this:
contoso.com IN TXT "v=spf1 include:spf.protection.outlook.com –all"
After adding the dedicated IP address (or CIDR address range), your SPF record might look like this:
contoso.com IN TXT "v=spf1 include:spf.protection.outlook.com ip4:1.2.3.4 –all"
If you are using a larger service like a bulk email service provider or software-as-a-service provider, they may ask you to include all of their servers which is much more manageable:
contoso.com IN TXT "v=spf1 include:spf.protection.outlook.com ip4:1.2.3.4 include:bulkEmailProvider.com –all"
If you do this, your email that sends as you from this service will now authenticate with SPF.
For more information:
- Customize an SPF record to validate outbound email sent from your domain in Office 365
- Common errors in SPF records
b) DKIM authentication
Some bulk email service providers, or software-as-a-service providers, let you set up DKIM keys for email originating out of their service. This requires co-ordination between yourself and them to set up the necessary DNS records, and it is dependent on the organization. This is also a useful method for email authentication.
The message might look like the following:
Return-Path: <communication@bulkemailprovider.com>
From: <sender@contoso.com>
DKIM-Signature: s=s1024; d=contoso.com
Subject: Here is a message from Bulk Email Provider’s infrastructure, but with a DKIM signature authorized by contoso.com
In this example, Bulk Email Provider gave Contoso a public DKIM key to publish in their DNS record, and then signs with the corresponding private key when sending email and putting the resultant DKIM signature into the message. Third parties can then authenticate against the DKIM d= domain and compare it to the domain in the From: address.
For more information:
* * * * * *
With either SPF or DKIM, when sending to EOP, a header is inserted into the message with the authentication results, and either the smtp.mailfrom or the header.d should match the domain in the header.from. In this case, contoso.com in the header.d in the DKIM-Signature header aligns with the domain in the From: address. In the absence of a DMARC record, EOP stamps dmarc=bestguesspass.
Authentication-Results: spf=pass (sender IP is 1.2.3.4)
smtp.mailfrom=bulkemailprovider.com; contoso.com; dkim=pass
(signature was verified) header.d=contoso.com; dmarc=bestguesspass
action=none header.from=contoso.com;