Accessing/Updating Azure Web App Settings from VSTS using Azure PowerShell.
There are a lot of features on VSTS and Azure that help seamless integration/working between them, albeit not direct.
In this article, I will show you one such scenario that may help in your design-release process.
One of the common queries we get is the possibility of updating the web app settings on the release run so the application can use them post release. This might be as simple as the new Release Version of the app or using the Release Name in some manner.
As a reference we have the following environment variables for Release (also see Build Environment Variables), that could be used on other task(s) or within a PowerShell script on the task(s).
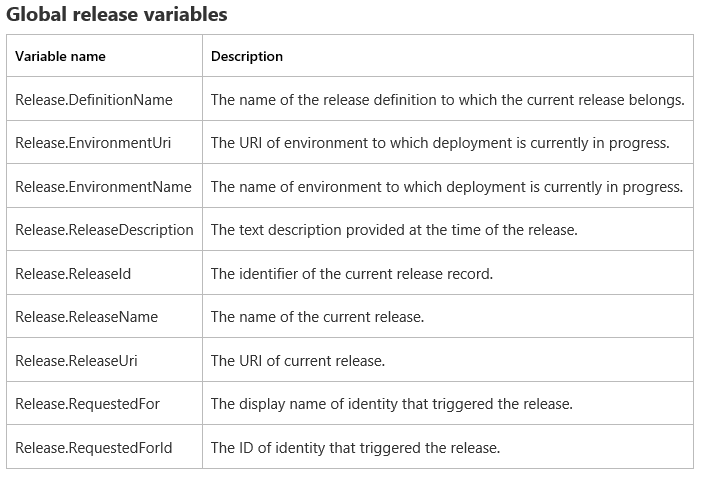
We could use any of these System Environment Variables that get populated upon a build or release by using the syntax $Env:EnvironmentVariable in PowerShell (More info).
For instance, $Env:Release_ReleaseName will get the Release Name of the release.
Notice that in PS, use “_” instead of “.”
In case you want them to be referenced with-in a task, you must use “.” If you are ever confused, we have a hint on the deploy log.

So, on PowerShell, it’s $Env:Release_ReleaseName. On Tasks, it’s $Env:Release.ReleaseName or simply $Release_ReleaseName
Let’s see this with a demo.
Say we want to set up a Release from build: We have a web app ready for deploy, but we want to change the behavior of our app using the App Settings key value pair in Azure, we could do this.
Since the norm of deployment to Azure using our task is through a Web Deploy package for now, we must find a way to add our PowerShell script files to a source that Release Tasks can get to, without having to download the entire repository.
One of the efficient ways to do this would be to create a folder in source control (called Scripts, maybe?) and add it as a “Build Artifact” that “Release” can get to.

I have placed the below script (AzureAppSet.ps1) that gives you an example of pushing environment variables of Release to App Settings in azure. (Thanks Dan!)
$myResourceGroup = 'ResourceGP'
$mySite = 'siteName'
$webApp = Get-AzureRMWebAppSlot -ResourceGroupName $myResourceGroup -Name $mySite -Slot production
$appSettingList = $webApp.SiteConfig.AppSettings
$hash = @{}
ForEach ($kvp in $appSettingList) {
$hash[$kvp.Name] = $kvp.Value
}
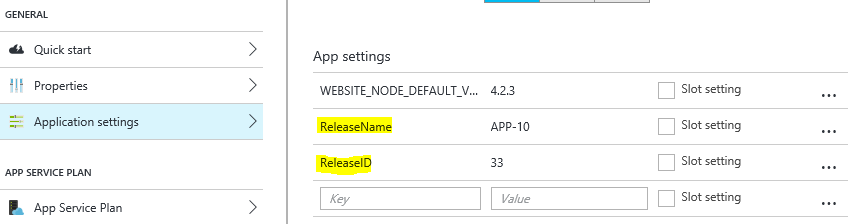
$hash['ReleaseID'] = "$Env:Release_ReleaseId"
$hash['ReleaseName']= "$Env:Release_ReleaseName"
Set-AzureRMWebAppSlot -ResourceGroupName $myResourceGroup -Name $mySite -AppSettings $hash -Slot production
Write-Host "Done!"
Note: Modify the highlighted lines to suit your needs.
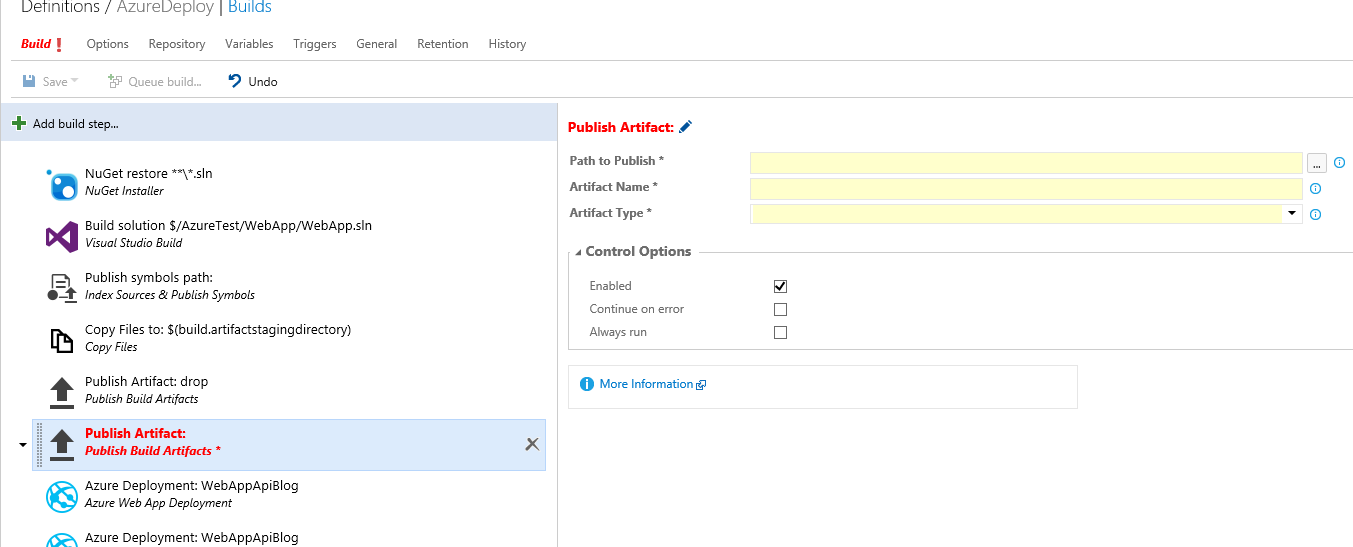
Add a Publish Artifact Step specifically to publish the scripts separately.
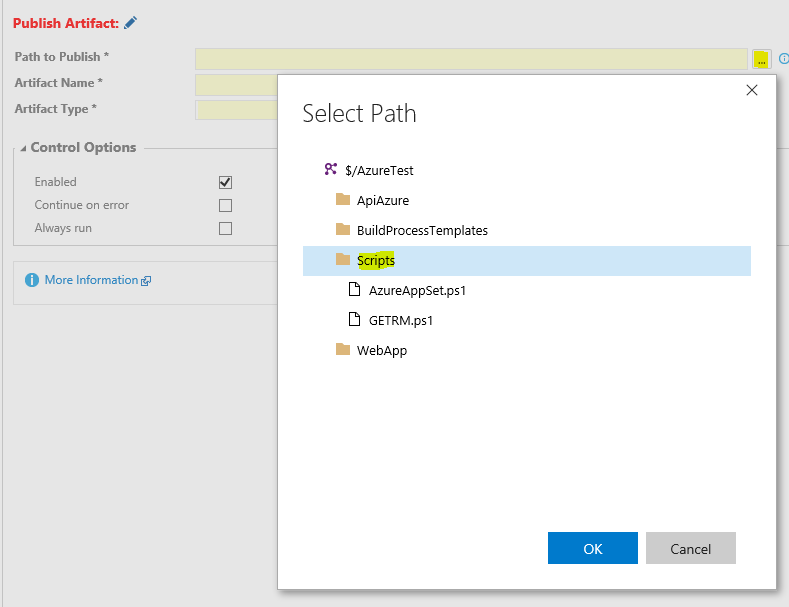
In the Path to Publish field, select the “Scripts” Folder from Source Control.
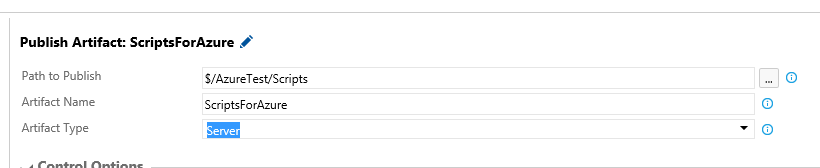
Finishing up the content of the task,
In the Release Definition, let’s create an Azure PowerShell deployment task,
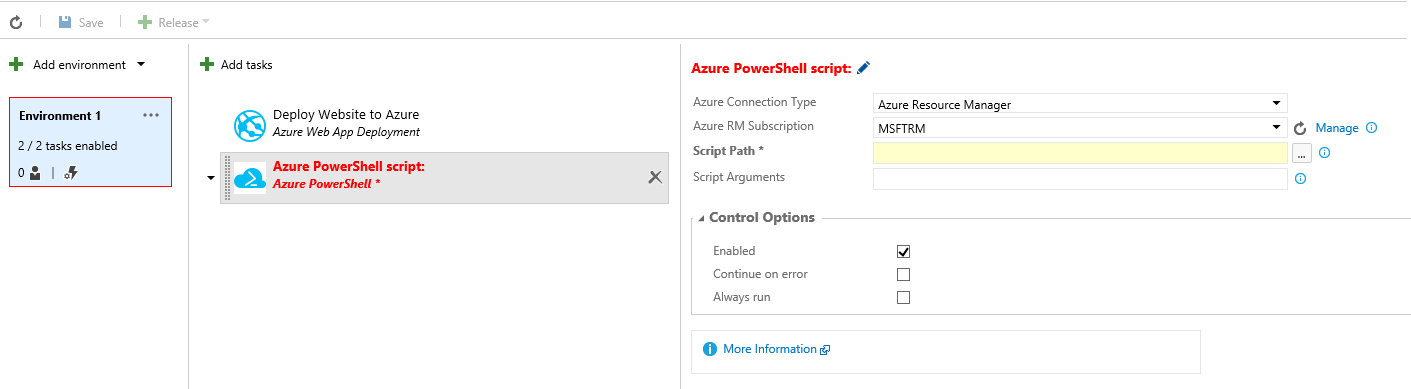
Note: The PS Script I’m using needs Azure Resource Manager, that said, if you don’t have an endpoint created, create it now.
In the script path, you should be able to select the script from the build artifact,
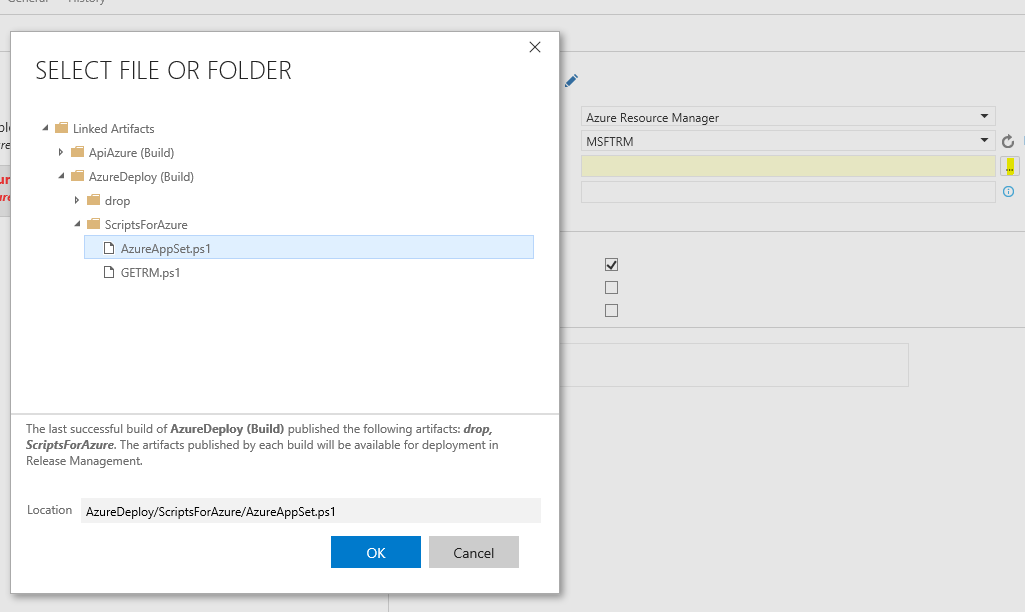
If you don’t see it here, however, check under the Artifacts to ensure it’s linked, by clicking on the “Link an artifact source”
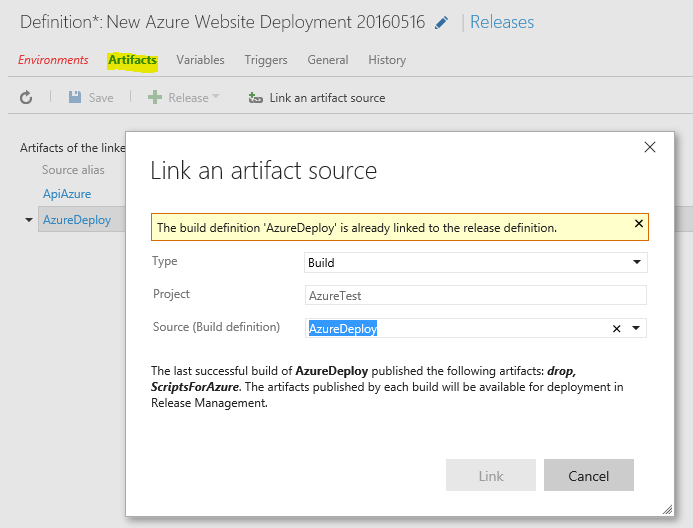
Note: Whatever artifacts to link here will be downloaded by default. Keep that in mind.
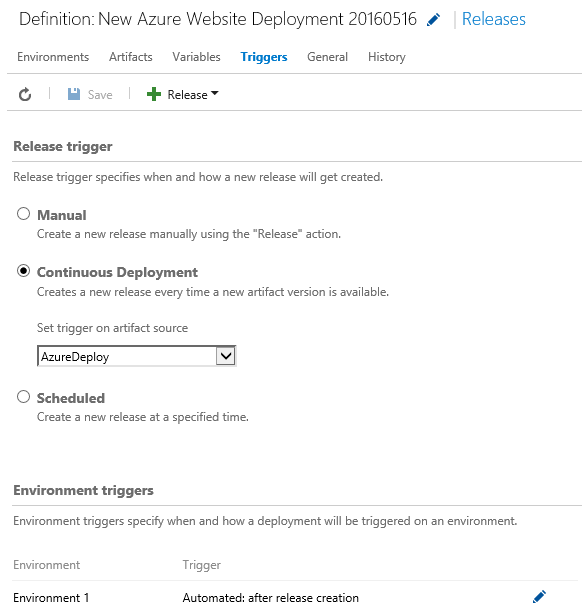
In release, you could manually trigger a release or set up a trigger, this will trigger every time our build executes and publishes the artifacts.
Build we shall,
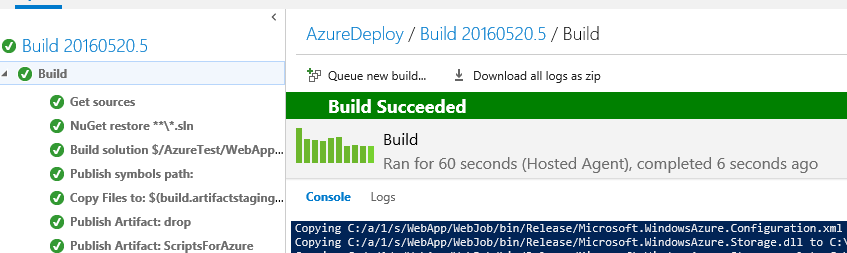
Release it will,

And would have successfully added/updated the app settings on the web app, which you can read within your app.
Hope this helps! Cheers!
Content: Manigandan Balachandran
Reviewer: Sinjith Haridasan Reeja