Build and Deploy Azure Web Apps using Team Foundation Server/Services vNext Builds.
At Microsoft, we are constantly trying to improve the cloud services and integration to make it more productive and simple to accomplish complex tasks.
Here’s a walkthrough on creating, publishing, building and deploying an Azure Web App using Visual Studio Team Services vNext builds.
To keep this rudimentary, we will use the general template from Visual Studio for an ASP.Net Web Application.
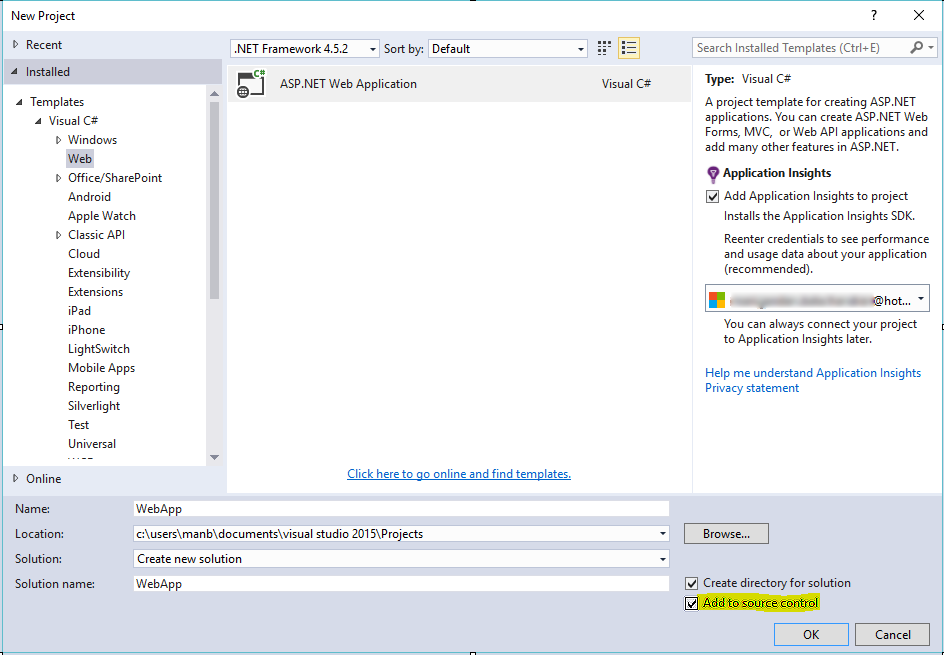
Create a ASP.Net Web Application from Visual Studio, and add it to source control.
I have my Visual Studio connected to my VSTS Team Project called AzureTest. It is using Team Foundation Version Control as the Source Control Repo.
Let’s create a simple ASP.NET Web App, and add it to source control.
You could select any of the templates, it does not matter, as long as it’s going to be hosted as an Azure Web App.
Note: You would have to install Visual Studio Azure Tools and SDK 2.8+ (I have 2.9 installed) to see the latest templates.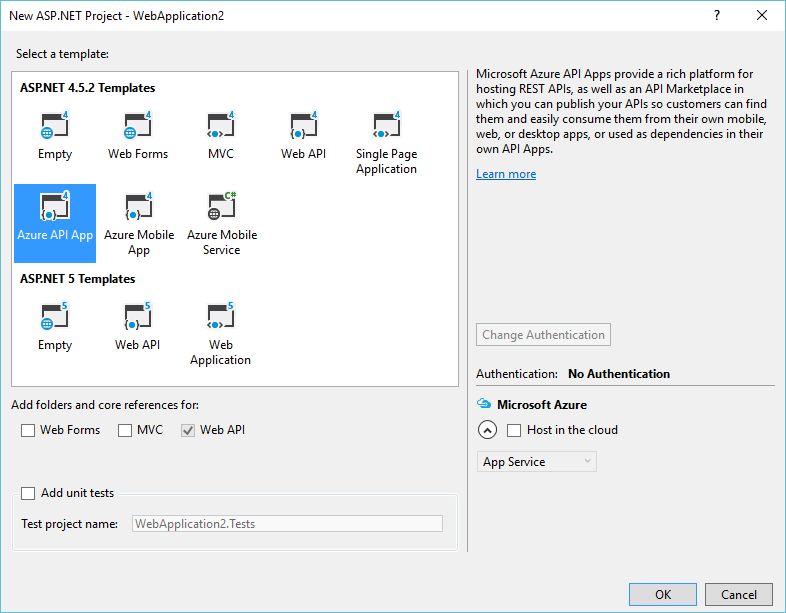
We’ll now create a folder in our Source control tree to place these files.
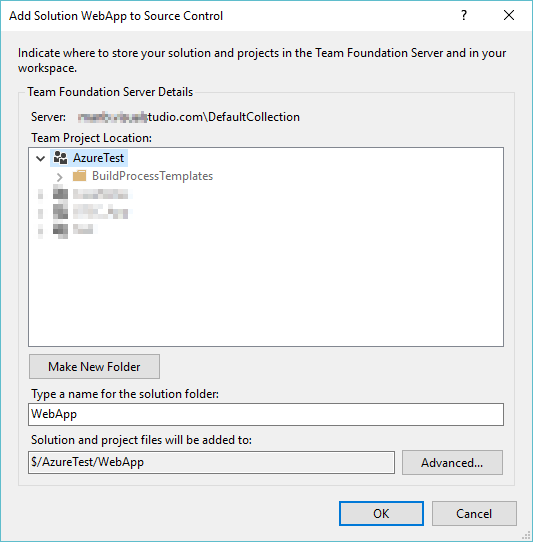
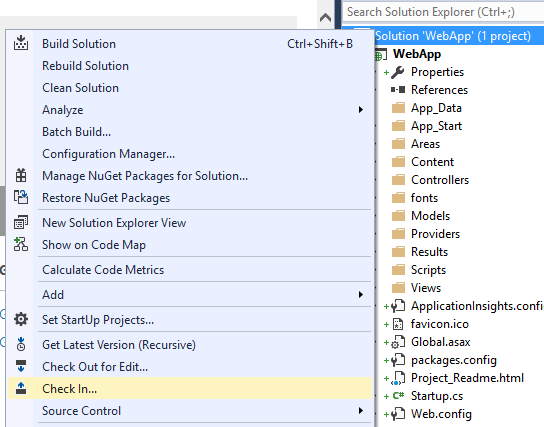
We then check-in the solution to source control.
Publish the application to Azure.
You can do the initial publish using Visual Studio, or manually create the container in Azure and have VSTS Publish.
· Deploy using Visual Studio.
It’s much simpler to create a Web App container and publish the application from Visual Studio itself.
All we need to do is create a publish profile for Azure, enter the parameters. This will do a Web Deploy to publish the app to Azure.
Right-Click on the project, select Publish.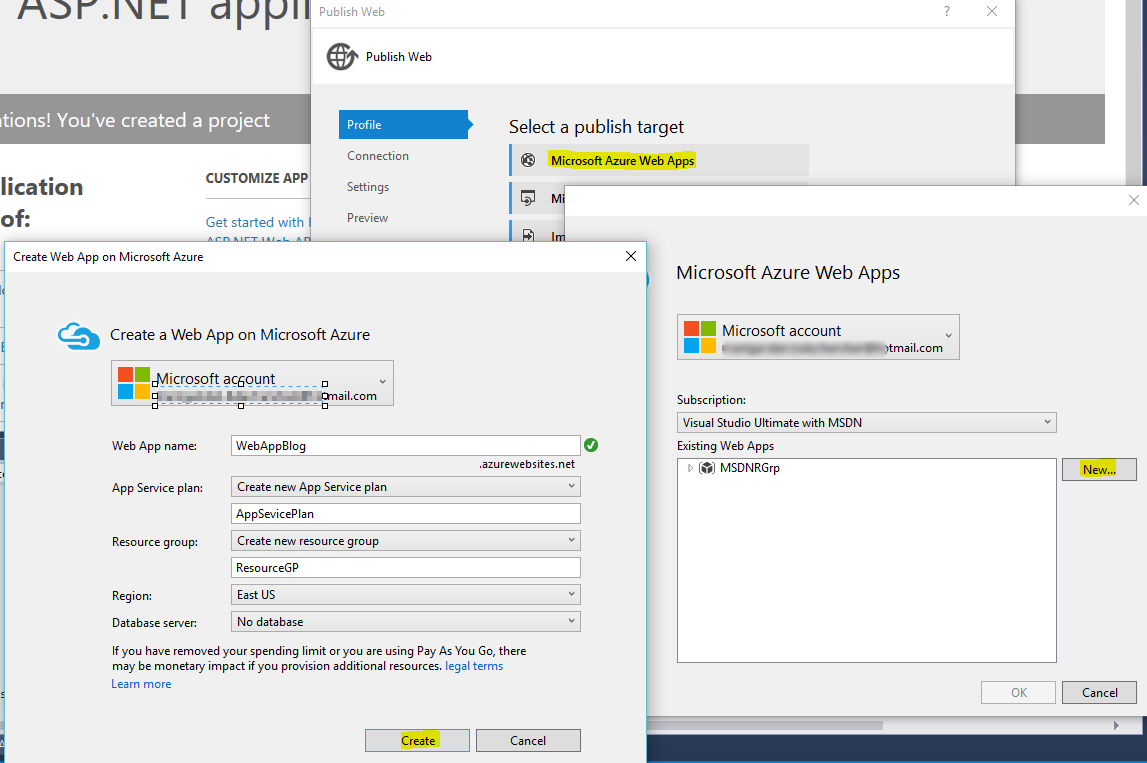
· Or Create a Web App in Azure.
You also can Manually create the Web App in Azure, and have TFS Deploy it as part of the build. We’ll take this route as well so we cover the manual steps for creation.
Go to https://portal.azure.com/ and sign in with the credentials that has the subscription you want to use and create the Web App under.
Once you are at the home page, click on App Services -> Add
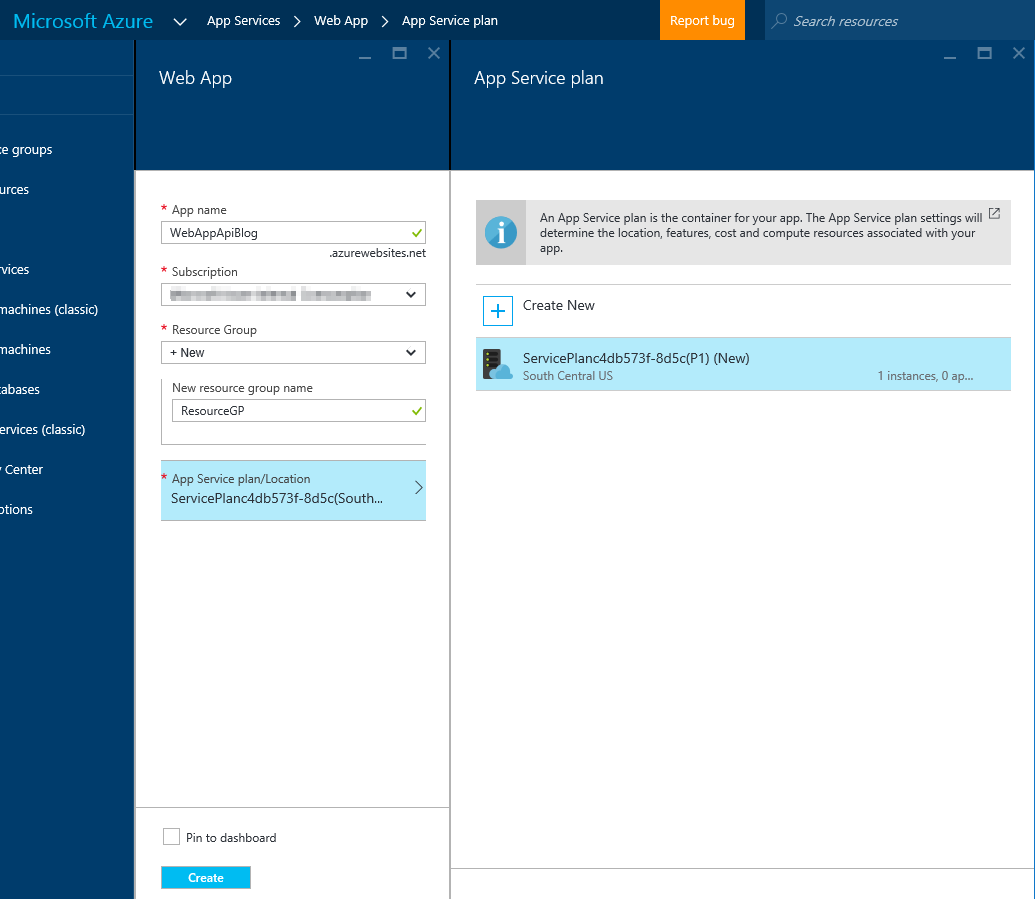
Create a new Resource Group, App Service Plan (If you don’t have any already). Wait for the deployment to Finish. Once done, you will see your Web App listed under App Services.
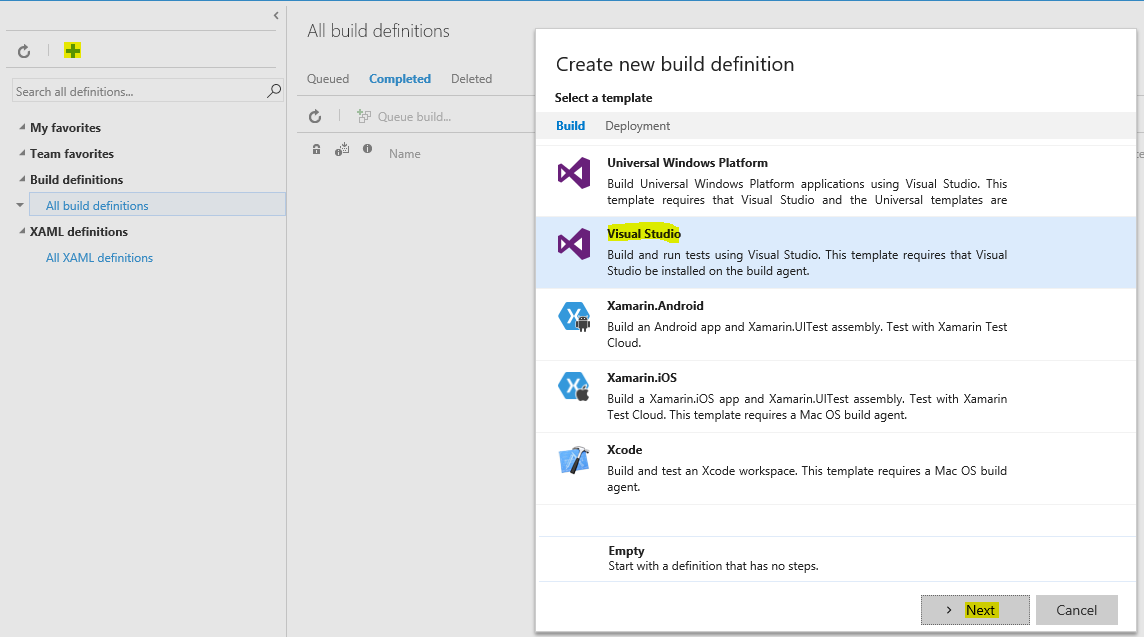
Create a vNext Build Definition from VSTS to Build and Deploy the App.
Now that we have a container to host the App in Azure, what remains is creating a build definition in VSTS to build and deploy the app.
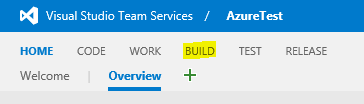
Connect to the Team Project in VSTS and Click on Build
Let’s create a new Visual Studio Build definition,
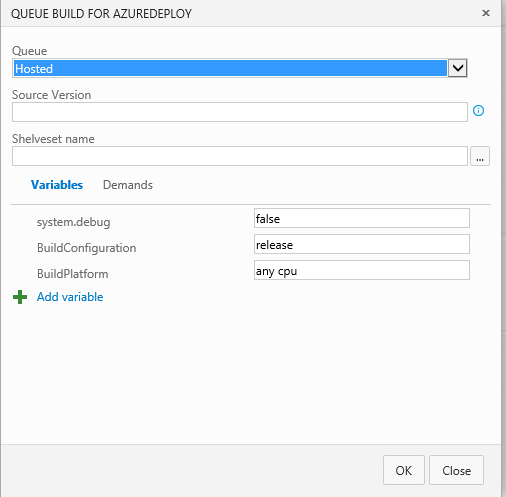
You also get an option to set up Continuous Integration (meaning whenever there’s a check in, a build is triggered). You can also set the default agent queue.
Selecting “Hosted” will run the build using VSTS resources.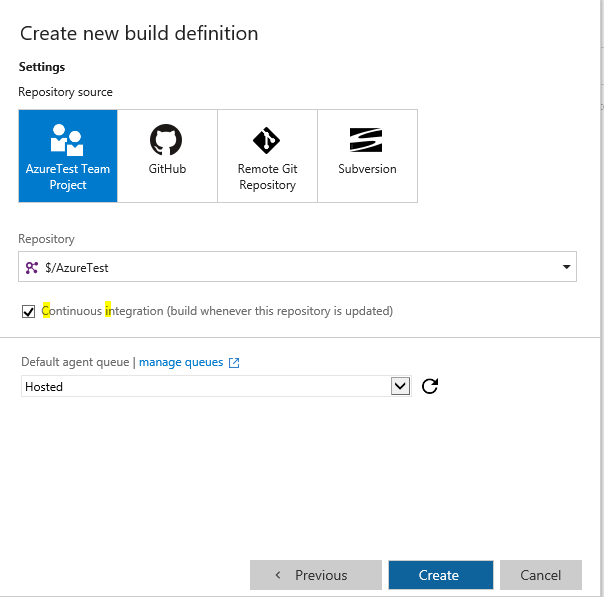
You can also get your own machines and install agents on them.
In case of on premise agents, ensure it has the required capabilities, to avoid the below warning (and build failure, of course) when you queue the build.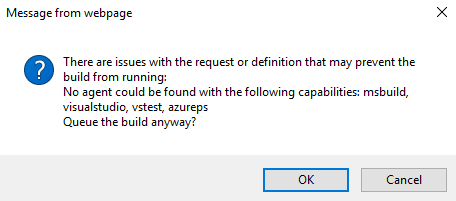
Under the Visual Studio Build Step, I have added the Web app solution from Source Control,
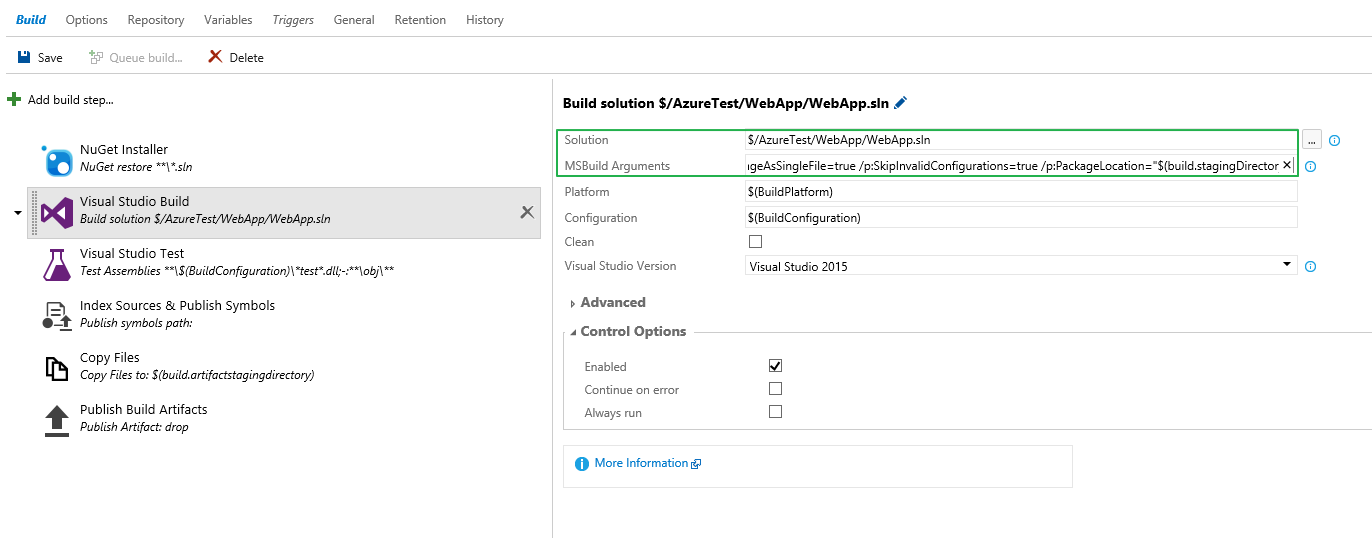
We also need to specify the MSBuild Arguments to create a web deploy package, that would be needed in the deploy step. Here’s my MSBuild Arguments,
/p:DeployOnBuild=true /p:WebPublishMethod=Package /p:PackageAsSingleFile=true /p:SkipInvalidConfigurations=true /p:PackageLocation=$(build.stagingDirectory)
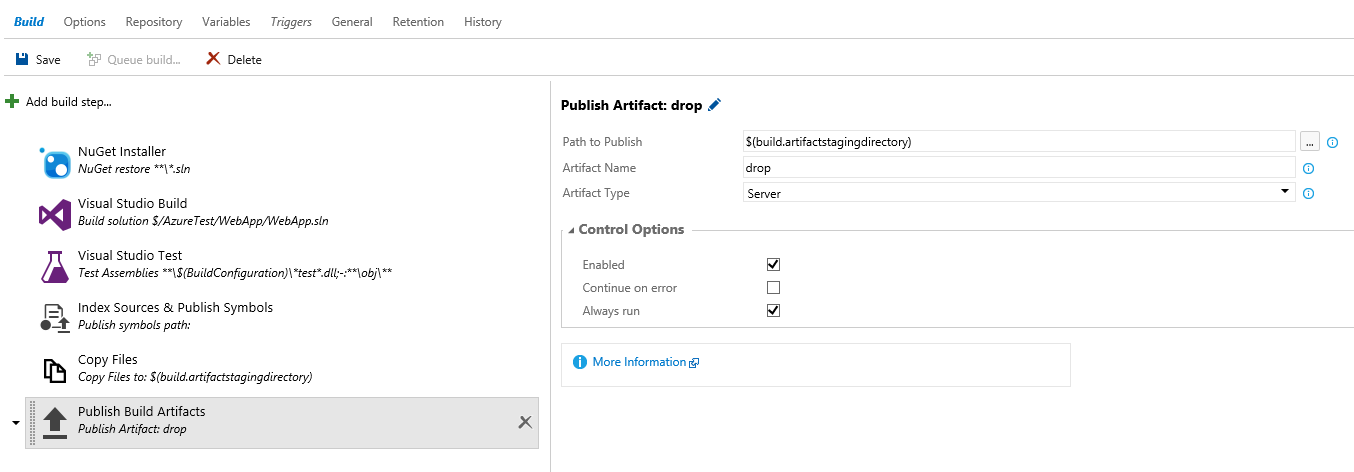
I’ve also set the Drop location to server.
Now, we will add the deploy step,
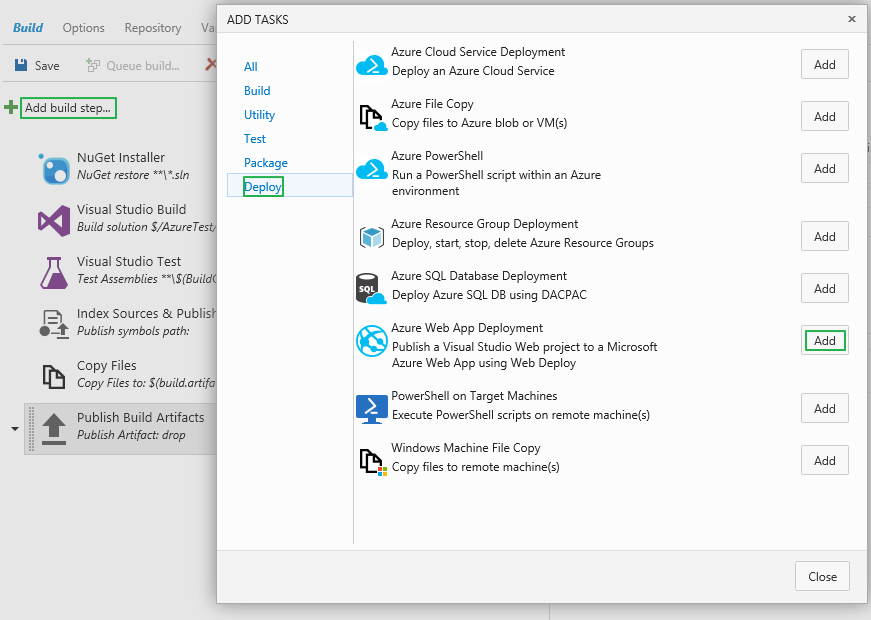
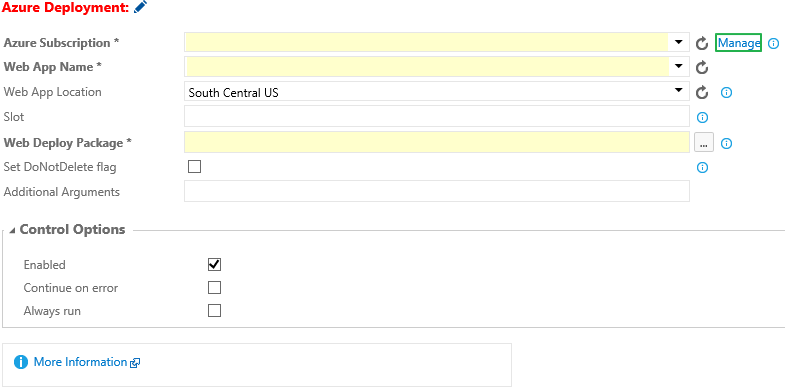
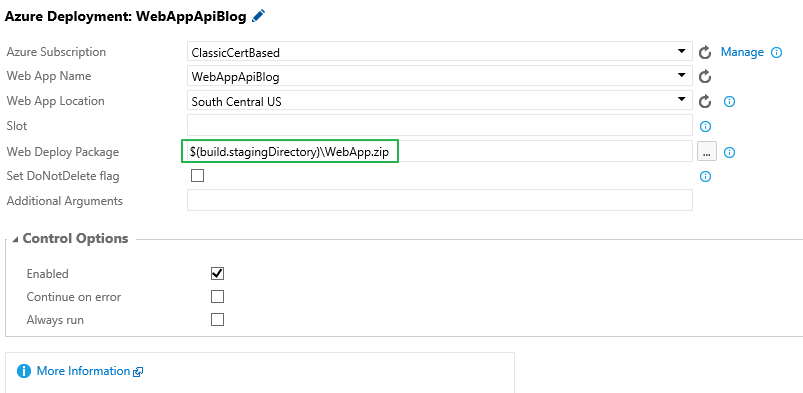
Now, for the Deployment step, we need to specify the Subscription details and the Web App name. But before that, we must create a Service Endpoint.
You could click on the Project’s settings icon and go to services, or Click on Manage from the step to get there.
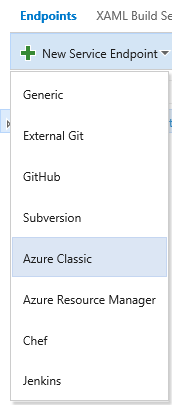
Create an Azure Classic Service Endpoint,
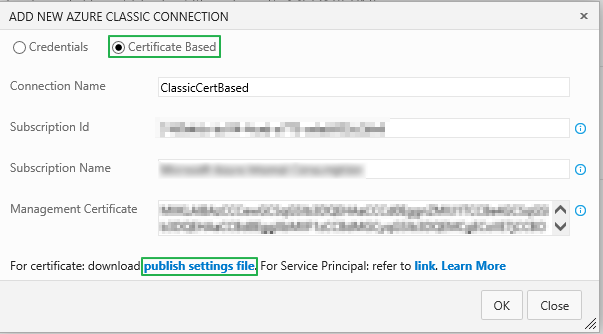
Select the Certificate Based connection. This is very important when you are trying to deploy.
Credential based Microsoft Account (@outlook, @hotmail) are no longer supported and only Organizational accounts are. Even then, if they use Two-Factor Authentication(2FA), the build will fail trying to connect to Azure.So, avoid Credential based, 2FA connections. Use Certificate Based.
To populate the fields, download the publish settings file.
Give a friendly connection name, and copy the ID, name and management certificate (without quotes) and hit OK.Go back to the Deploy step, hit refresh for each field and populate them
At the time of writing this article, we have an issue where the Web App doesn’t auto populate. The product group is investigating this, and I will update this once fixed.
But that shouldn’t stop you from manually entering the (right) Web App name.
The deploy step needs the Web Deploy package to push it to Azure. This is a mandatory step.
To get the package as part of the build, we have set the corresponding MSBuild arguments to place the package in the $(build.stagingDirectory)In the staging directory, it creates a web deploy package as a Zip, with the same name as the solution.
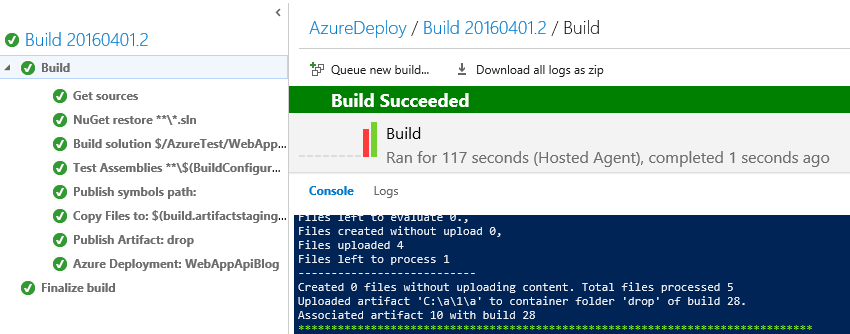
In my case, it’s WebApp.zip.That’s pretty much it. Save the build definition and queue the build.
And, just like that, we have built and deployed the web app to azure.
And, just to double check the CI build work as expected, I made a simple change to the index.cshtml and checked it in. As expected, it triggered a build neatly,
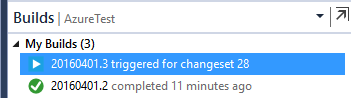
And deployed the change!
Do let us know if you have any questions on the comments below.
Content by – Manigandan Balachandran
Reviewed by – Chandra Sekhar Viswanadha