How to create a new Tool in Release management?
We have seen customers asking us on how to customize the tools or create new tools in Release management.
Here is an article which gives you step by step procedure on how to achieve this.
1. Open the release management Client.
Go to Inventory > Tools > Create New Tool.
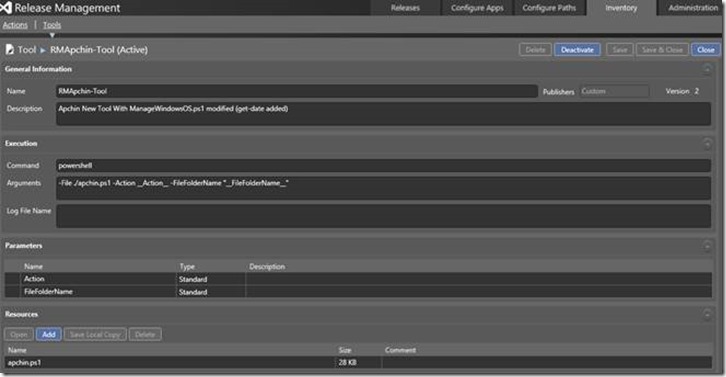
2. Give the name of the tool, description.
Under Command mention PowerShell (If you are using PowerShell script to customize)
Add the PowerShell script under resources
Add the arguments.
Example:
I have given the below arguments as I have lot of actions in 'apchin.ps1' script.
(You can also just add an action and not create the entire tool.)
-File ./apchin.ps1 -Action __Action__ -FileFolderName "__FileFolderName__"
Save and close the new tool which you created.
3. Go to Actions > New action
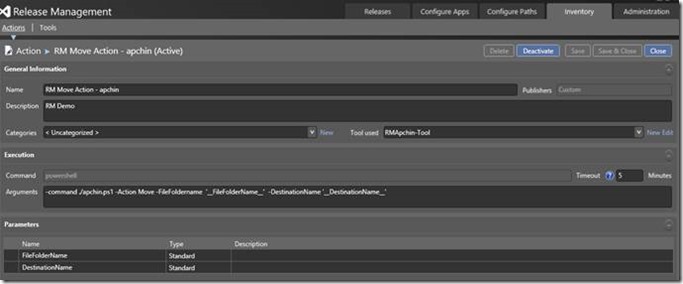
Give a name, description
Select the Tool which we created in the previous step. (You can add a category as well)
Example:
I have given the below arguments as I am performing a Move operation - where I want the date to be included in the New Folder Name.
-command ./apchin.ps1 -Action Move -FileFoldername '__FileFolderName__' -DestinationName '__DestinationName__'
The apchin.ps1 can contain various other actions as well. You need to create new ACTIONS if there are more than 1 action written in the script.
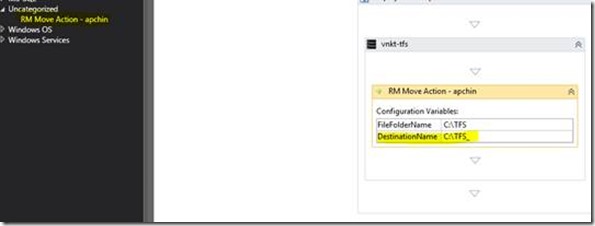
4. Go to your RM Template - you should be able to see the Move action which we just created.
apchin.ps1 - Code snippet to do a move action is shown below.
if ($Action -eq "Move")
{
$today = Get-Date
$DestinationName = $DestinationName + "_" + $today.ToString('yyyy-mm-dd')
Move-Item -Path $FileFolderName -Destination $DestinationName
}
You can see a new Folder Created which has the Date included in the folder name created and everything from TFS will be moved to TFS_2015-05-14.
Go ahead and create your own tools in Release Management!
Cheers!
Content created by – Aparna Chinya
Content reviewed by – Romit Gulati


