Integrate Windows Store for Business with System Center Configuration Manager
The Windows Store for Business allows you to inventory Windows apps for your organization -individually or in volume. By connecting the Store for Business to Configuration Manager, you can synchronize the list of apps you've add to your inventory with Configuration Manager, view these in the Configuration Manager console, and deploy them like you would any other app.
If you are interested on how to accomplish this with Intune, I wrote a similar post on how to integrate the WSfB with Intune which you can find here.
This post will cover how to integrate the WSfB with System Center Configuration Manager.
Note: to use the Windows Store for Business, Windows 10 devices must be on version 1511. You will also need to be running
Configuration Manager 1606 to sync WSfB applications.
Additional information about capabilities, can be found here.
Now let’s take a look at how to enable the sync with WSfB in System Center Configuration Manager.
The first thing that you will want to do is enable the site for pre-release features.
In Configuration Manager, navigate to Administration – Site Configuration – Sites. Choose the top level site in your hierarchy, and choose Hierarchy Settings across the top ribbon.
Check the box for Consent to use Pre-Release Features. This will allow you to turn on the Windows Store for Business Integration feature in the next step.
Now go to Administration – Cloud Service – Updates and Servicing – Features. You will see the Windows Store for Business Integration feature listed here, choose Turn On.
You will then be notified that the feature will be replicated across all servers.
Close and reopen the console – the next time you open the console, you’ll see the Windows Store for Business under Administration – Cloud Services.
Now that the Windows Store for Business feature has been activated in Configuration Manager, we will need to register Configuration Manager as a Web Application management tool using the Azure portal – this will allow for synchronization to Configuration Manager.
Open up your browser and go to https://manage.windowsazure.com. Choose your directory under Active Directory, and then click Applications – Add.
Choose Add an application my organization is developing, enter a Name and select Web Application and/or Web API. Click Next.
Enter the same URL under the Sign-on URL and App ID URI sections. This can be any URL and does not need to actually resolve to an external address. In this example, I’m using https://tshyamlabs.com/wsfbconfigmgr
Once the Sign-On URL and APP ID URI have been verified, complete the wizard.
Now we will need to create a client key in Azure Active Directory for the registered management tool. Choose the application that you just created in the previous steps, and click Configure.
Under the Keys section, select a duration from the list and Save. This will create a new client key.
Ensure that the configuration for the application is successfully updated with the key before moving on.
Next we will need to add Configuration Manager as a management tool in the Windows Store for Business.
Browse to https://businessstore.microsoft.com/en-us/managementtools and sign in. Under the Management Tools section, choose Add a Management Tool.
Note: only one management tool can be active at a time, so if you already have another management tool activated, it will need to be deactivated before going through the next steps.
You will see box which says Search for tool by name. Type in the name of the application you created in Azure Active Directory in the previous steps and click Add.
Click Activate next to the application that was just imported.
When you click activate, you will be prompted to Show offline-licensed apps. Click Yes if you plan to deploy Offline applications.
The last thing we will want to do is finish up the integration by adding the Windows Store for Business account to Configuration Manager. Before doing this, make sure you have added at least one app to your inventory. This can be done by searching for an application in the Windows Store for Business, and choosing Get the app.
Click on Manage – Inventory, and you will see all the applications you have added.
If you also want to add this to your private Windows Store (for machines registered to Azure AD), in the Actions column for any of the applications in your inventory, choose the option to Add to private store.
Now back to Configuration Manager, we can finalize the integration by going to Administration – Cloud Services – Windows Store for Business. Choose the option to Add Windows Store for Business Account.
Enter your tenant ID, client ID, and client key from the Azure Active Directory application which was created earlier. Also specify a location to which Offline Windows Store for Business applications will be downloaded.
Click Next.
Choose the language that should have Application Catalog entries for the apps you sync from the Windows Store for Business. Click Next.
You will see a summary of the settings, click Next and complete the wizard.
In the console, you should see an entry with your Windows Store for Business Account
Now under Software Library – Application Management – License Information for Store Apps, you will see all the applications from the Store for Business inventory.
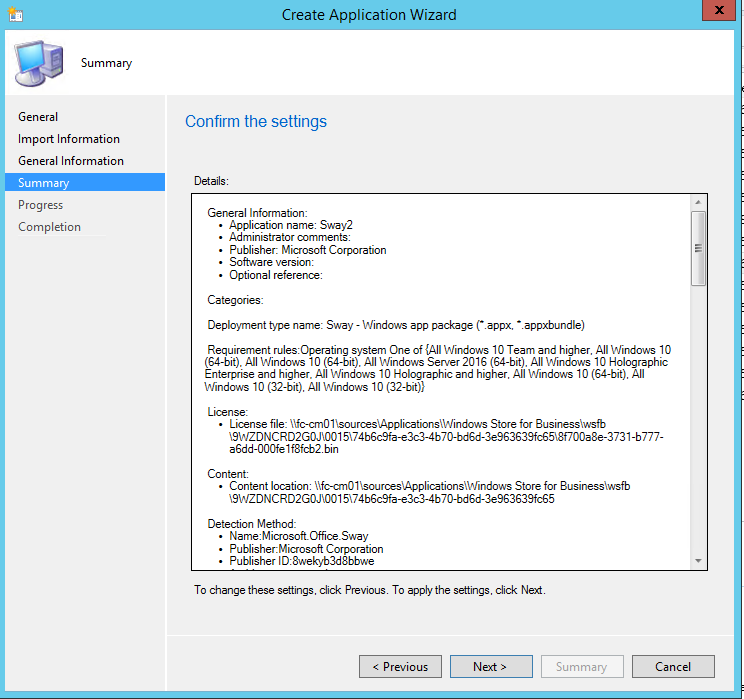
Next let’s deploy an Offline licensed application – in this scenario we will deploy Sway. As we did previously, right click on the application and choose Create Application. This opens the Create Volume Purchased Application wizard.
The application you just created will be in the top level Applications node.
Now let’s deploy this as an Available application to a Configuration Manager client agent and see how the behavior differs on the client side as an Offline licensed app vs an Online licensed app as described in the previous section.
Right click on the application, Deploy, and choose a collection to which this application will be deployed. Click Next.
This is an Offline licensed application, so on the next page we will need to choose a Distribution Point in Configuration Manager to distribute content to. Click Next.
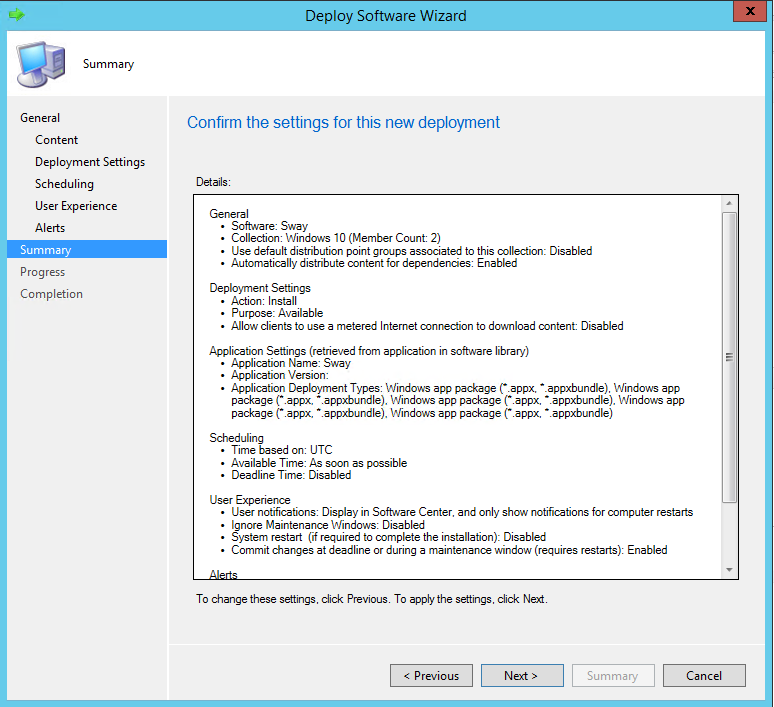
On the Deployment Settings page, choose action Install and purpose Available. Click Next.
On the Scheduling page, click Next.
On the User Experience page, choose Display in Software Center and only show notifications for computer restarts. Click Next. 
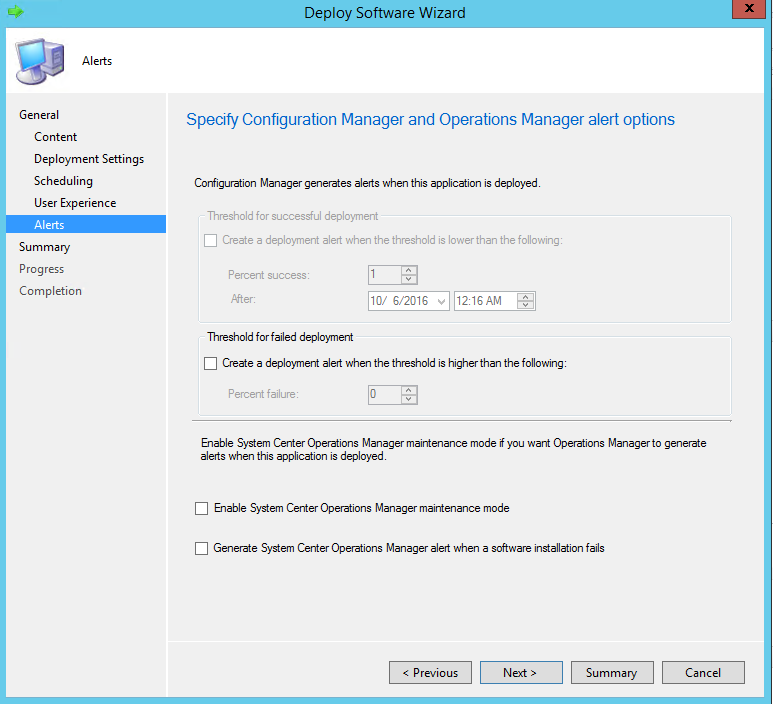
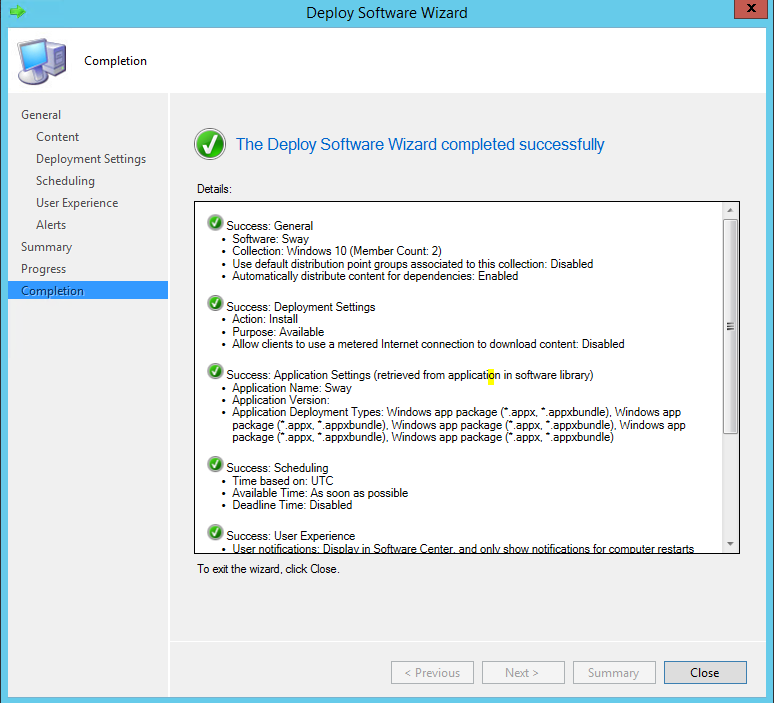
On the Summary page, verify that the settings configured in the wizard are correct. Click Next to kick off the deployment.
Now on your Configuration Manager client machine, open Software Center and you will see the application which was just deployed.
Click on Install.
When the application is finished installing, you will see it listed in the Start Menu. Note that there is no dependency on the Windows Store as we had with the previously deployed Online licensed application.
And that's all! You have successfully integrated the WSfB to Configuration Manager using an Azure Web Application.
Troubleshooting
- Windows Store for Business sync errors
Initially I noticed that the Windows Store for Business applications in my inventory were not synchronizing with Configuration Manager with the following errors in the WsfbSyncWorker.log on the Configuration Manager site server.
[20, PID:3544][09/27/2016 21:52:46] :Exception requesting application inventory from Windows Store for Business.
[20, PID:3544][09/27/2016 21:52:46] :Exception: [Microsoft.ConfigurationManager.CloudBase.CMHttpRequestException: Unsuccessful response when content result expected for request.
Error occured making http request calling 'GET' method on 'https://bspmts.mp.microsoft.com/V1/Inventory?maxResults=1000&modifiedSince=0001-01-01T00:00:00.0000000': (Unauthorized) 'Unauthorized'.
at Microsoft.ConfigurationManager.CloudBase.SmsHttpClient.<GetStringFromHttpResponseMessageAsync>d__32.MoveNext()
--- End of stack trace from previous location where exception was thrown ---
This was because after adding Configuration Manager as a management tool in the Windows Store for Business, I had not activated it. Once I activated Configuration Manager, everything starting synchronizing successfully.
- Windows Store for Business does not launch on Configuration Manager client
When attempting to install an Online licensed application on a Configuration Manager client via Software Center, I noticed that the application was stuck at Installing, and the Store for Business did not launch. This was because I was using the legacy Software Center – after updating the Client Settings in Configuration Manager to use the new Software Center introduced in Current Branch, the Store for Business was able to launch.
- Offline application does not install when the Store is open
When installing an Offline application, the install failed. The AppEnforce.log on the client had this error –
In-line script returned error output: Add-AppxPackage : Deployment failed with HRESULT: 0x80073D02, The package could not be installed because resources it
modifies are currently in use.
error 0x80004004: Unable to install because the following apps need to be closed
Microsoft.WindowsStore_8wekyb3d8bbwe!App.
NOTE: For additional information, look for [ActivityId] a3750a78-1a23-0000-906d-75a3231ad201 in the Event Log or use
the command line Get-AppxLog -ActivityID a3750a78-1a23-0000-906d-75a3231ad201
At C:\Windows\CCM\SignedScripts\InstallWindows8App.ps1:9 char:9
+ Add-AppxPackage -path $AppPath -DependencyPath $DependencyPat ...
+ ~~~~~~~~~~~~~~~~~~~~~~~~~~~~~~~~~~~~~~~~~~~~~~~~~~~~~~~~~~~~~
+ CategoryInfo : NotSpecified: (C:\Windows\ccmc...Sway.appxBundle:String) [Add-AppxPackage], Exception
+ FullyQualifiedErrorId : DeploymentError,Microsoft.Windows.Appx.PackageManager.Commands.AddAppxPackageCommand
After closing the Windows Store, the application was able to install successfully.


