Windows 8 Game Development using C#, XNA and MonoGame 3.0: Building a Shooter Game Walkthrough – Part 4: Adding and Processing Player (User) Input
Before we get into adding the code to receive and processing input from the player (user) of the Shooter game, there is GREAT news in the MonoGame 3.0 world. Drum Roll Please….
The MonoGame team announced the immediate availability of MonoGame 3.0 Stable version on Jan. 21st. The MonoGame team had this to say about their latest release: A lot of work has gone into preparing this major release, with considerable refactoring of the code base to support 3D and enhanced XNA 4.x compatibility. To install the latest release go to https://www.monogame.net/downloads and select your operating system. If you are on Windows, there is a Windows installer which will install the appropriate assemblies and project templates for Visual Studio 2010 and 2012. So what are the cool new things included in this release? Glad you asked! Please note the listing below of new features added with this latest release:
• 3D support (courtesy of Infinite Flight Studios Sickhead Games) |
• New platforms: Windows 8, Windows Phone 8, OUYA, PlayStation Mobile (including Vita). |
• Custom Effects. |
• PVRTC support for iOS. |
• iOS supports compressed Songs. |
• Skinned Meshs |
• VS2012 templates |
• New Windows Installer |
• New MonoDevelop Package/AddIn |
• Several bug fixes |
• Deeper XNA 4 compatibility |
Needless to say the MonoGame team rocks!
Alright, now on with the tutorial and our discussion of adding and tracking user inputs using Keyboard, GamePad, Mouse, and Touch.
Overview
Now that we have added our content pipeline and successfully have our player graphic drawing (the golden airship) being rendered on the screen, we can add a critical component that every game needs: Ability to move the player around based on various types of user input. Therefore, this tutorial will show how you can adding input logic enabling the ship to move around the screen, and hopefully save you time, pain, and research of how this should be handled with MonoGame in Windows 8.
Updating the Game Loop to Process User Inputs
Open up the core game file named Game1.cs within your Win8ShooterGame project and select the Update() method. Like Draw() method, the Update() method is called automatically many times per second (the target rate is approximately thirty times or more per second). By tracking delta-time taken between calls- of the Update() method, incremental changes can be made to the game such as the player's position. Give this is a first person shooter game, the core of the game is the ability for the player to move around the screen. Since Windows 8 devices have a wide range of inputs available, let's add code to take and respond to user input from the keyboard, a Gamepad, the Mouse, and/or a Touch screen. We can write and track input for all four by adding the appropriate Device State object and update them all in the same function in order for all to be processed when needed.
Step 1: Initialization of Game Loop to Process Player inputs
First let's add the correct XNA libraries to the Win8ShooterGame. Go to the top of Game1.cs file, where you see the using statements. At the end of the list of the using statements on a new line, add the following lines of code:
using Microsoft.Xna.Framework.Input;
using Microsoft.Xna.Framework.Input.Touch;
Now in order to process the inputs, we need to add objects specific the input type and track the State of each input type. So within the Game1.cs go to the Player player declaration line of code. Add a new line directly below this statement and then add the following lines of code:
// Keyboard states used to determine key presses
KeyboardState currentKeyboardState;
KeyboardState previousKeyboardState;
// Gamepad states used to determine button presses
GamePadState currentGamePadState;
GamePadState previousGamePadState;
//Mouse states used to track Mouse button press
MouseState currentMouseState;
MouseState previousMouseState;
// A movement speed for the player
float playerMoveSpeed;
Now let's initialize these object when the Game starts by updating the Initialize method. Select the Initialize() method from within the Game1.cs file. See Figure 1 below.
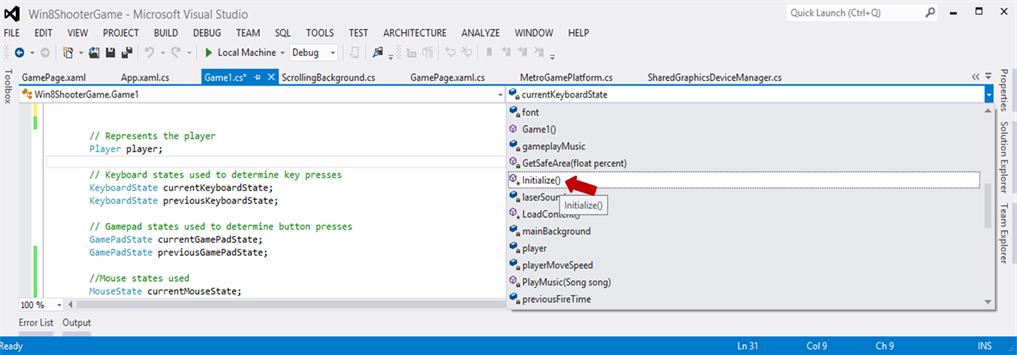 Figure 1 Locating the Initialize() Method in Game1.cs
Within the Initialize() Method, find the code which we create a new player ( player = new Player ();). Underneath this call to the player class constructor, let's add a constant for the speed in which the player object should move. Add the following lines of code:
// Set a constant player move speed
playerMoveSpeed = 8.0f;
Now let's enable Touch for the Game by adding initializing the types of Gestures that should be enabled for our Shooter game. For our Shooter Game we will give users the ability to freely drag the ship using touch. We will discuss the usage of Touch in Windows 8 using MonoGame in more detail when we add the code to handle user Touch input. But now let's initialize the Gesture we desire (FreeDrag) to be used by the game by setting TouchPanel.EnabledGestures value which is an enumeration of for various gestures denoted by the GestureType enum. Let's accomplish this by adding the following line of code:
//Enable the FreeDrag gesture.
TouchPanel.EnabledGestures = GestureType.FreeDrag;
Step 2 – Create an UpdatePlayer method to Handle Updates from User Input (Keyboard/GamePad)
We could now add the actual input code directly to Update() method, but we will encapsulate it into our own method called UpdatePlayer(), and do all our work there, then just call it from Update(). That will keep the Update() method from getting messy. Create a brand new method inside Game1.cs, directly below the Update() method, called UpdatePlayer() by adding the following code:
private void UpdatePlayer(GameTime gameTime)
{
}
Now inside the method, add controls for processing inputs for moving up, down, left, and right by add the following lines inside the UpdatePlayer() method:
// Get Thumbstick Controls
player.Position.X += currentGamePadState.ThumbSticks.Left.X * playerMoveSpeed;
player.Position.Y -= currentGamePadState.ThumbSticks.Left.Y * playerMoveSpeed;
// Use the Keyboard / Dpad
if (currentKeyboardState.IsKeyDown(Keys.Left) || currentGamePadState.DPad.Left == ButtonState.Pressed)
{
player.Position.X -= playerMoveSpeed;
}
if (currentKeyboardState.IsKeyDown(Keys.Right) || currentGamePadState.DPad.Right == ButtonState.Pressed)
{
player.Position.X += playerMoveSpeed;
}
if (currentKeyboardState.IsKeyDown(Keys.Up) || currentGamePadState.DPad.Up == ButtonState.Pressed)
{
player.Position.Y -= playerMoveSpeed;
}
if (currentKeyboardState.IsKeyDown(Keys.Down) || currentGamePadState.DPad.Down == ButtonState.Pressed)
{
player.Position.Y += playerMoveSpeed;
}
// Make sure that the player does not go out of bounds
player.Position.X = MathHelper.Clamp(player.Position.X, 0, GraphicsDevice.Viewport.Width - player.Width);
player.Position.Y = MathHelper.Clamp(player.Position.Y, 0, GraphicsDevice.Viewport.Height - player.Height);
Now that we have our UpdatePlayer() method, we will call the method we wrote from the Game's Update() method so that every time Update() is called by the game loop, it will call our UpdatePlayer() method. Anything we want to update every frame should be done the same way.
Look for the Update() method inside the Game1 class, and replace the line marked "// TODO: Add your update logic here" with the following code:
// Save the previous state of the keyboard and game pad so we can determine single key/button presses
previousGamePadState = currentGamePadState;
previousKeyboardState = currentKeyboardState;
// Read the current state of the keyboard and gamepad and store it
currentKeyboardState = Keyboard.GetState();
currentGamePadState = GamePad.GetState(PlayerIndex.One);
//Update the player
UpdatePlayer(gameTime);
You have written all the input code you will need to get your ship moving using the Keyboard and GamePad. Let's test the effort by running the game either on the Local Device or in the Windows Simulator. Again if you are successful, you'll see the game pop up on your chosen platform. Now move the ship (player) around the screen by pressing the arrow keys on your keyboard.
 Figure 2 Ship/Player Moved on Screen via User Input (Keyboard)
Step 3 – Create an UpdatePlayer method to Handle User Input from Mouse and Touch
Now that we've set up our game to accept user input to move the player from the keyboard and/or gamepad, now let add the code to enable use of the Mouse and/or Touch to control our ship aka player. Now our task is to start enabling the mouse and touchscreen for our game, and well that's when it gets very interesting. If you read any documentation about Windows 8, you will find that Windows 8 WinRT APIs supports user input across input modes and devices (touch, mouse, pen) through three types of interaction events: pointer, gesture, and manipulation. Pointer events provide a unified to access mouse, touch, and pen data. Gestures can be anything from simple interactions like tapping to more complicated manipulations like zooming, panning, and rotating. Touch, mouse, and pen/stylus interactions are received, processed, and managed as Pointer object input in Windows Store apps. In addition to the aforementioned objects and associated event structure, WinRT exposes a GestureRecognizer object for more control over specific gestures, such as Pinch, Slide, etc.
So with this information in hand, I implemented the Pointer event handlers against the XAML GamePage hosting the XNA Game. Unfortunately, the pointer event was not being raised when I clicked the screen. So I set about debugging the pointer events with the XAML GamePage and the XAML MetroGamePlatform, as well as, debugging through all the initialization events and the studying order in which each was called. Despite all of the effort, there was no way that I could get any of the Pointer or the Gesture events to successfully fire upon Mouse press. Luckily in researching the Touch objects on the MonoGame documentation hosted on https://monogame.codeplex.com , I stumbled upon a thread about the implementation of the MonoGame touch and gesture events. In order to provide a consistent experience with XNA and behavior similar to the XNA implementation on Windows Phone 7, the TouchPanel and MouseState objects should be used. Therefore, instead of leveraging the Pointer and Gesture events, we will enable mouse and touch with the aforementioned objects.
So let's add the code for accepting user input for Touch. We have already added the type of Gesture that will be supported by this code when we added the Gesture Type: FreeDrag. Therefore, let's go back to the UpdatePlayer() method and before the GamePad/Thumbstick controls code and its related comment and on a line right above; Add the following code:
// Windows 8 Touch Gestures for MonoGame
while (TouchPanel.IsGestureAvailable)
{
GestureSample gesture = TouchPanel.ReadGesture();
if (gesture.GestureType == GestureType.FreeDrag)
{
player.Position += gesture.Delta;
}
}
Now let's add the code for responding user input for Mouse. Unlike using the TouchPanel, with a GestureSample object which calculates the delta of the touch/pointer position and the player (ship) position, we will have to manually calculate delta. To accurately calculate the mouse position, we create a Vector2 with the X and Y coordinates of the current MouseState by using the currentMouseState variable as noted below:
//Get Mouse State then Capture the Button type and Respond Button Press
Vector2 mousePosition = new Vector2(currentMouseState.X, currentMouseState.Y);
Now let's check if the Button pressed on the Mouse is the Left button. If it is indeed the Left Button that has been pressed, our next step will be to calculate the delta my subtracting the Mouse position from the player object current position. Once have the delta, we then will call the Normalize method on this. I found the use of this method beneficial as it creates a unit vector with one unit in length pointing in the same direction as the original vector. Finally, we would need to multiply the delta by the player speed and add that to the player current position. The result is the player (ship) moving where the mouse is clicked or the player following the direction of mouse movement when holding down the left button and moving around the screen which is similar to touching and dragging your finger around the screen. So in order to complete the tasks mentioned above, add the following code below the creation of the mousePosition vector.
if (currentMouseState.LeftButton == ButtonState.Pressed)
{
Vector2 posDelta = mousePosition - player.Position;
posDelta.Normalize();
posDelta = posDelta * playerMoveSpeed;
player.Position = player.Position + posDelta;
}
You're all done and now have written all the input code you will need to get your ship moving using the mouse, as well as, using gestures and touch. Let's test the effort my running the game either on the Local Device or in the Windows Simulator. Again if you are successful, you'll see the game pop up on your chosen platform. Now move the ship (player) around the screen by clicking and holding your mouse and/or via touch if you have access to a touchscreen.
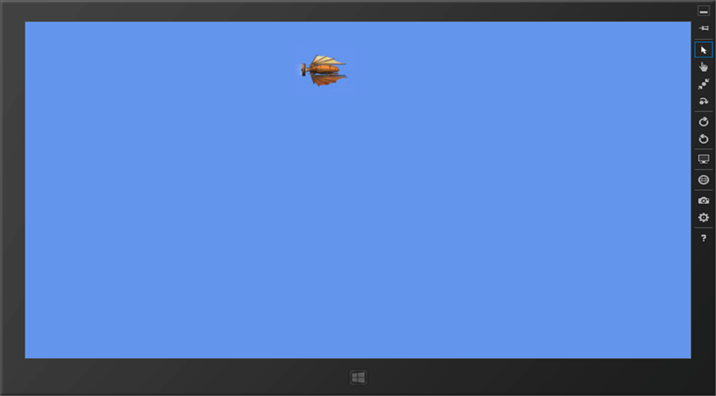
Figure 3 Ship/Player Moved on Screen via User Input (Mouse/Touch)
In conclusion, this walkthrough demonstrated how to respond to user input from the keyboard, gamepad, mouse and touch by adding the appropriate input logic. We went through the step to create and leverage the keyboard and gamepad state, and update the position of the player in response to keyboard/gamepad input. We learned about the handling of of the gesture and mouse screen in MonoGame is different than the typical Windows RT unified and streamlined way to get mouse, touch, and pen data with gesture and pointer events. We now have a ship that we can move around the screen, but without any animation, our game does not have an engaging experience. In Part 5 of this series, we will add logic to animate the ship by building a simple animation system within the game.