Using the Windows Live Spaces Photo Control with Silverlight
 I was just able to figure out how to use the Windows Live Space Photo Control and get it to serve up images to Silverlight. Here's what the Windows Live Spaces Photo control can do:
The Windows Live Spaces control is a client-side browser JavaScript object that enables visitors to use their Windows Live Spaces photos with your Web site.
Take a look at this simple demo page that lets you put photos from your Windows Live Spaces into a Silverlight Application. If you want to see the images in this demo, they're from my sketchbooks on my Windows Live Spaces Page.
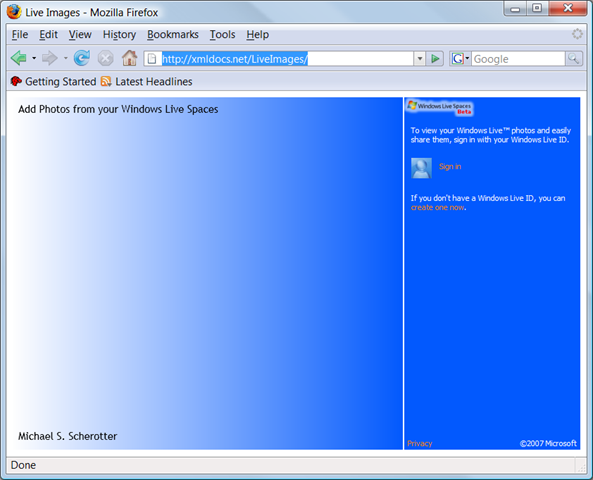
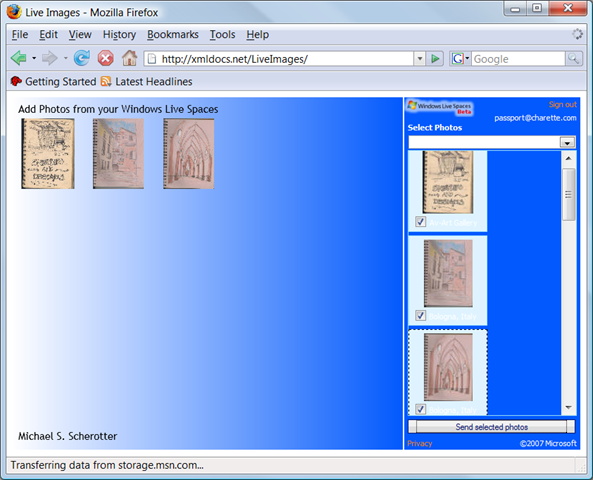
- You start here at https://xmldocs.net/LiveImages.

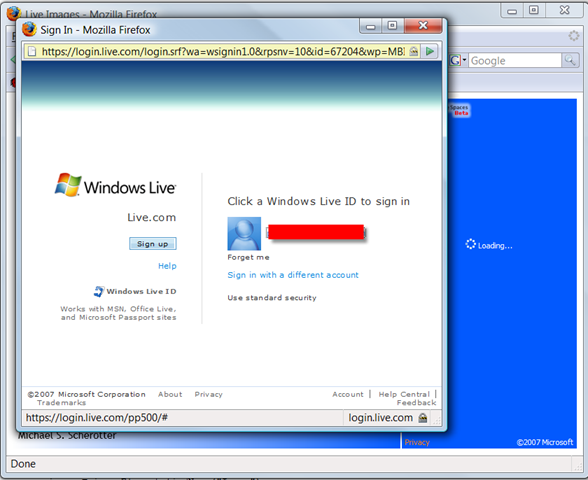
- Then you click on the sign-in button in the control:

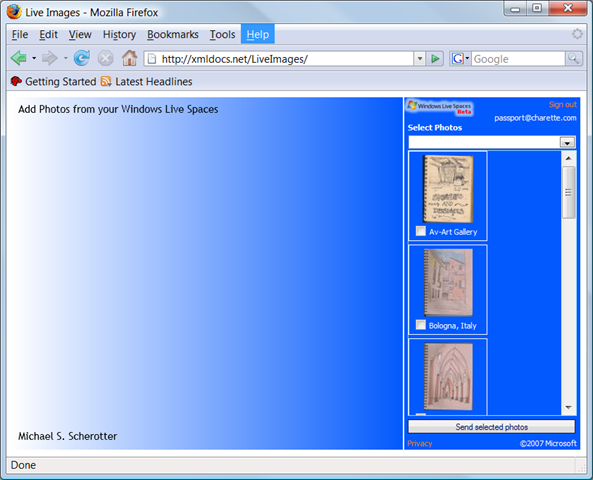
- Your Live ID is authenticated by live.com and the photos from your Windows Live Spaces are shown:
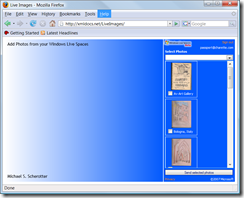
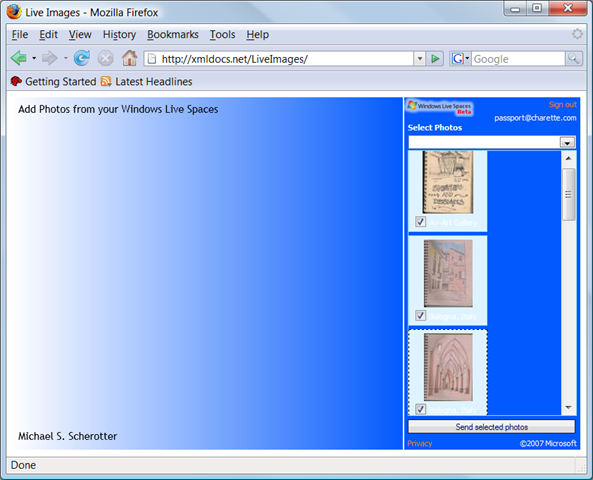
- Select the photos you want to use and press [Send selected photos]:
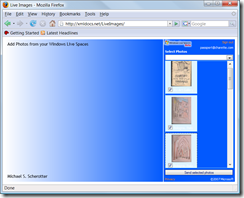
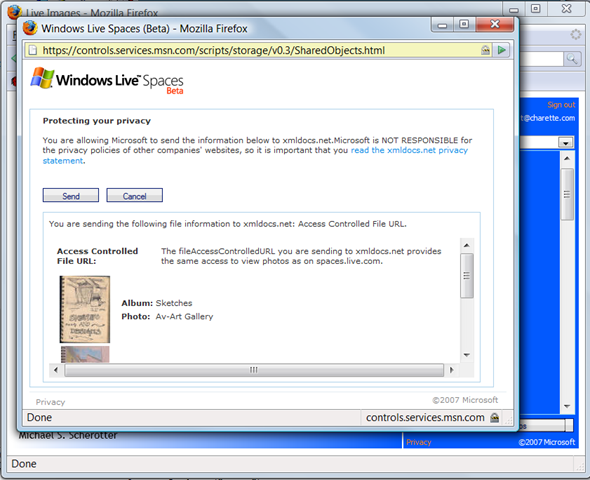
- You get one more confirmation dialog:

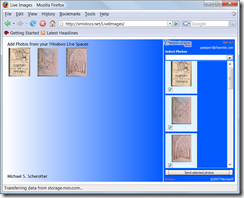
- And a list of photo URLS are returned in the callback function that you define.
You can see an example of my callback function below. There is no persistence in the demo but you could imagine a community site or social networking site implementing this to allow users to easily select photos instead of uploading them to multiple sources. The code below is called when the user has selected the photos to include and they are to be added into the Silverlight Application:
Callback function
function onData(p_items)
{
var control = document.getElementById("SilverlightControl");
var downloader = control.createObject("Downloader");
downloader.addEventListener("completed", function(sender, eventArgs)
{
var left = 0;
var top = 0;
var parent = control.content.findName("Images");
for (var i = 0; i < p_items.length; i++)
{
var xaml = sender.ResponseText;
var imageElement = control.content.CreateFromXaml(xaml, true);
var image = imageElement.findName("Image");
image.Source = p_items[i].fileAccessControlledURL;
parent.children.Add(imageElement);
if (left + imageElement.Width >= control.content.Root.Width)
{
left = 0;
top = imageElement.Height + 10;
}
imageElement["Canvas.Left"] = left;
imageElement["Canvas.Top"] = top;
left += imageElement.Width;
}
}
);
downloader.Open("GET", "Image.xaml");
downloader.send();
}
I have shared the source code for this demonstration in Popfly. Search for the project LiveImages once you download the Popfly Explorer for Visual Studio.