PowerApps with SQL server on-premises – Using the Gateway
On-premises data gateway allows you to access on-premises data with PowerApps!
The gateway is a bridge from your app to the on-premises or virtual machine where your data is stored. On-premises means that your data is stored on a server physically located within your organization, not in the cloud. A virtual machine acts as a private cloud-based server. The gateway can be deployed centrally and you can connect to your on-premises data and manage it securely from PowerApps.
In this blog, I’ll demonstrate how we can create a simple App in PowerApps which can connect to on-premises SQL database. The App is created to capture Leads information from the user’s phone and the submitted data is saved to SQL database which is on-premises.
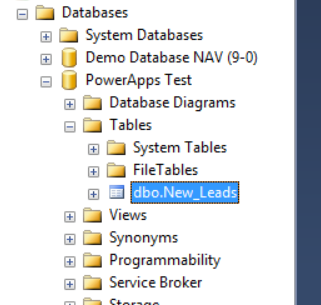
Creating Demo SQL database: Create a new database in on-premises SQL server called PowerApps Test and create a new table within the database called New_Leads.
The New_Leads table should have the following columns with ID field as an auto-incremental primary key:

Installing the Gateway: Sign into PowerApps (https://powerapps.microsoft.com/en-us/) and under settings, click on Gateways to download and install the on-premises gateway:

Steps to Install and sign into the gateway is available at: https://powerapps.microsoft.com/en-us/tutorials/gateway-reference/
Install and setup a gateway with name PowerApps Gateway in the same machine where the SQL Server is located .
Creating the connection to SQL server on-premises: When logged into PowerApps click on Connections:

Next, click on New Connections:

Search for SQL from the list of services and click on SQL Server:

In the window that opens, select the right options and fill up the parameters required for the connection.
- Select the option Connect using on-premises data gateway
- Type in the SQL server name, Database name, Authentication type, Username & Password
- Under Choose a gateway option, select the gateway that is setup in the previous step
- Click on create to create the connection to on-premises SQL database

Create an App: You can choose to use PowerApps studio for Windows (requires installation)or PowerApps studio for Web for creating an App.
Let’s consider using PowerApps studio for windows. Open the application, click on New and choose the Phone Layout under Start with blank canvas or template:

This opens up a designer screen with a blank App screen at the center.
Add a Textbox and place it at the top of the screen. Set the following properties of the textbox: Color = RGBA(255, 255, 255, 1), Fill = RGBA(0, 119, 255, 1), FontWeight = FontWeight.Semibold, Text = “New Lead”
Add an Editable Form (Under Insert tab > Forms > Edit) to the screen and place it below the Textbox covering the rest of the area:

The Form part in the screen will have an option to connect to data. click on Connect your form to data. On the right hand side, under data sources tab, select the SQL server connection created in the previous step, select default and then choose the table New_Leads and click on Connect.

After the connection, set the Form’s Item property to Defaults(‘[dbo].[New_Leads]’).
Form customization part will be open in the right pane where you’ll be able to add the required fields in the App.
Select the required fields from the fields list. The selected fields gets added in your App’s screen.

you’ll be able to re-size the text boxes or input controls if required.
Add another screen to the App (Under Home tab click on New Screen). Select the newly created screen from the left pane and add a Text box control. Set the Text Property to The lead information was submitted successfully! and Align property to Align.Center.

Now we have 2 screens in the App. You can see the names of the screens in the Left pane.

Select Screen1, click on Add a custom card option at the bottom within the screen.
Add a Text box control in the new card. Set the Auto Height property of the new text box control to true, and set its Text property to this formula: Form1.Error ( The text box will show any errors from the form. This also requires the form name to be Form1)
Add a Button control in the card. set the button’s Text property to Submit and set the button’s OnSelect property to SubmitForm(Form1); If(Form1.ErrorKind = ErrorKind.None, Navigate(Screen2, ScreenTransition.None)) (This formula tries to insert the data entered to SQL table. If there is any error while writing to SQL, the Error message will be displayed on the app otherwise the screen 2 of the app will be displayed informing the user that write to SQL was successful)
The App is now complete and is able to accept user input and save it in SQL table.

Testing:
In SQL server, run the following simple query Select * From [PowerApps Test].[dbo].[New_Leads] and no rows will be returned.

Run the App created in PowerApps, enter all the information within the App and click on Submit.

In SQL server, run the same select query (Select * From [PowerApps Test].[dbo].[New_Leads]) again and you’ll find the newly inserted row in SQL:

Microsoft continues to enhance the features and capabilities of PowerApps! You can learn more at https://powerapps.microsoft.com/en-us/blog/
Have fun building Apps with PowerApps!