Building .NET Core Linux Docker Images with Visual Studio Team Services
If you've been wondering how to build a .NET Core app into a Docker image using VSTS, well here's the current steps as of June 2016.
Prerequisites
You'll need the following to complete this walk through
- Docker Tools for Visual Studio 0.21 to build the docker assets we'll use for CI in VSTS
- Docker Tools for Visual Studio Team System, which adds some Docker Build steps
- Docker for Windows Beta which provides a local docker host. You can also use Docker Toolbox. However, for this post, I'll focus on Docker for Windows as I'm hoping you've been able to switch to the much cleaner Docker for Windows experience.
Provision the Linux Build Agent
To build a .NET Core Docker Image, you'll need a VSTS Build Agent. Since this post focuses on a Linux Docker Image, we'll use the new Linux VSTS Build Agent that Donovan explains how to provision here:
Installing the Docker Tools for Visual Studio Team System
If' you're unfamiliar with how to add VSTS extension, you can follow the steps here
Starting with a project to build
You'll need an ASP.NET Core project to deploy. Following the steps here, we'll walk you through the creation of an ASP.NET Core site, debug it, and set it up for deployment.
Configuring VSTS Docker Build Steps
Now that we have everything installed, we're ready to start configuring. I do assume you've already configured VSTS and are ready to configure the unique part of VSTS and Docker. See here more info on Visual Studio Team Services
Create a new build definition
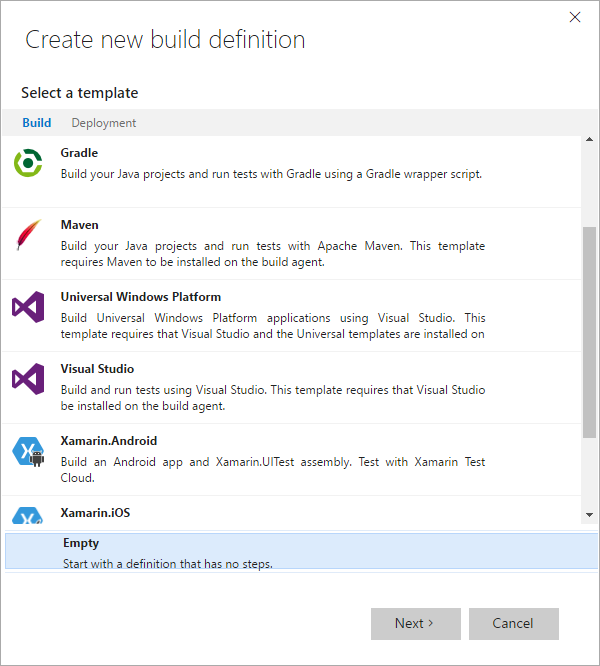
- Choose the + sign in the top left corner to create a new build definition
- Choose the Empty build definition. We'll look to create one from this post
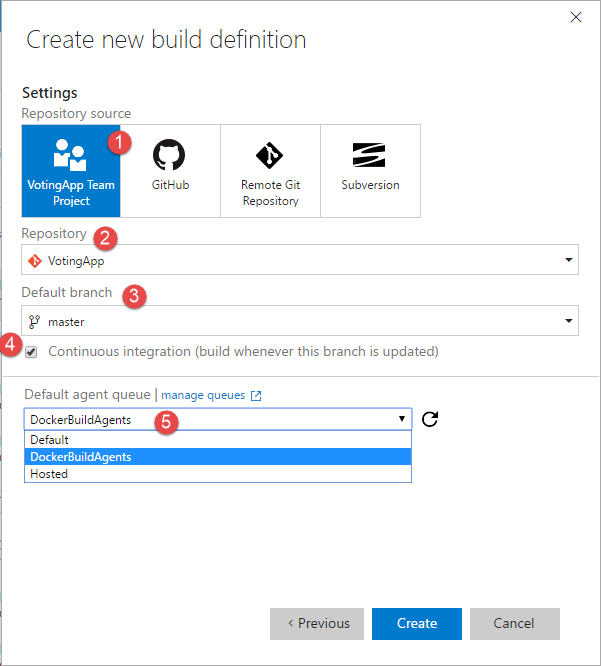
- Configure your build definition
- 1-3 configure your repo, including the branch you wish to build from
- 4 - you'll likely want continuous integration
- 5 - choose the build agent you previously configured
- click Create
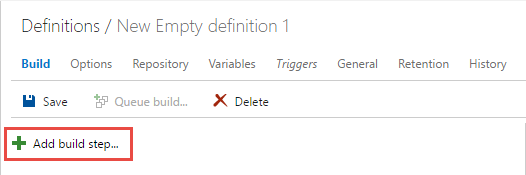
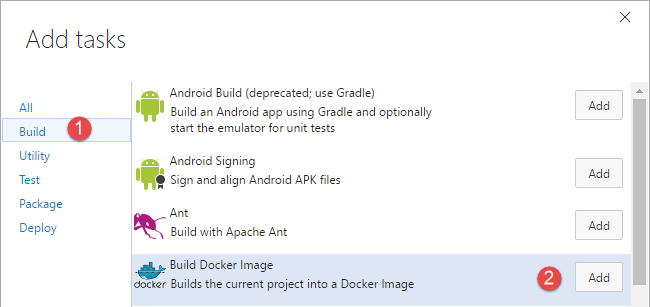
Add the build steps
- Click the Add build step...
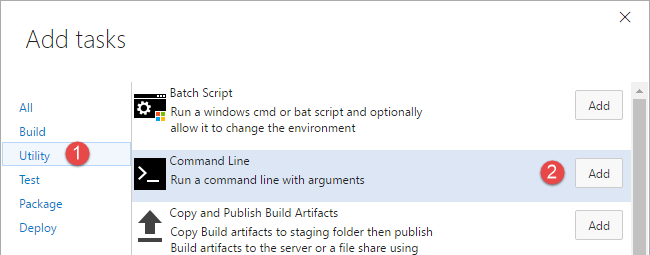
- Add 2 command line steps by hitting the [add] button twice. Note, although this step looks like a Windows/Doc command shell, the same step can be run on a Linux image
- Add 4 docker steps
We'll now walk through the various build steps, and the configuration for each one.
dotnet restore
- step name = dotnet restore
- tool = dotnet
- Arguments = restore -v minimal
- Advanced --> Working Folder = $(Build.StagingDirectory)
This is the root of your source, where the project.json file lives as it will perform the restore based on the project.json
dotnet publish
- step name = dotnet publish
- tool = dotnet
- Arguments = publish -c $(Build.Configuration) -o $(Build.StagingDirectory)/app/
the app/ directory is where we'll place the resulting files that will be placed in the runtime container. This must match the COPY command in your dockerfile as this is the source of that COPY command - Advanced --> Working Folder - same as above as both commands must be run in the context of your project
docker build
- step name = docker build
- Skip the Docker Host and Registry Connection for a moment
- Action = Build an image
- Docker File = $(Build.StagingDirectory)/app/dockerfile
This is the "release" mode dockerfile that has your optimized settings. It should not be the dockerfile.debug which is only used for the developers inner loop. - Image Name = {your hub username}/{your image name}:$(Build.BuildNumber)
for me, this was stevelasker/example-voting-app-worker:$(Build.BuildNumber) - Context = $(Build.StagingDirectory)/app
This one is really important, and the source of a lot of confusion. When you issue docker commands from the client to the host, this directory is first copied up to the docker host. When you see a COPY command, the left side is from the Context directory - Working Directory = $(Build.StagingDirectory)/app
Docker Host Connection
- From within the docker build step, choose manage next to the Docker Host Connection
- Click New Service Endpoint
- Choose docker Host
- Enter the Name for your connection and your Docker Hub details to create the service endpoint
- Connection Name = LinuxBuildHost
In this Linux VSTS build agent, the host is on the same machine - Server URL = tcp://138.91.245.113:2376/
Get this from the output of docker-machine ls, for the specific host you'll connect to. Notice the tcp protocol and port number - CA Certificate, Certificate, Key - Use the handy dandy tooltip to figure out which files to use. Just simply open the file from your docker machine directory (eg:
%userprofile%\.docker\machine\machines\vsts-linux-buildagent) into notepad. Be sure to copy the entire contents, not just what's between the --- BEGIN and ---END text. - Press OK, then switch tabs to the previous screen
- Refresh the list and select the host you just configured
Docker Registry Connection
- From within the docker build step, choose manage next to the Docker Registry Connection
- Click New Service Endpoint
- Choose Docker Registry
- Connection Name: Docker Registry
- Docker ID = your username for docker hub
- Password = yup, your password
- Email = the email you associated with your docker hub account
- Press ok, then switch tabs to the previous build step configuration page
- Refresh the list, and select the registry you just configured
Docker Push Build Number - Public Registry
- Step Name = Docker Push :BuildNumber
- Docker Host Connection = LinuxBuildHost
- Docker Registry Connection = Docker Registry
- Action = Push an image
- Image Name = stevelasker/example-voting-app-worker:$(Build.BuildNumber)
- Advanced --> Working Directory = $(System.DefaultWorkingDirectory)
Validation Steps
This is where you'd most likely do your validation steps against the images. You now have a production ready image (binary). You haven't yet tested it, but you haven't set it to the :latest tag, which typically indicates the thing you want to deploy. For the purposes of this post, we'll skip this step. But, I wanted to cover why we first tagged our image with the build number, push, then re-tagged with latest, and re-pushed
Docker Tag Latest
- Step Name = Docker Tag Latest
- Docker Host Connection = LinuxBuildHost
- Docker Registry Connection = Docker Registry
- Action = Run a docker command
- Command = tag stevelasker/example-voting-app-worker:$(Build.BuildNumber) stevelasker/worksonmymachine:latest
Notice I've used the original image name, and re-tagged it with latest. This doesn't create yet another copy. The Docker layering system knows this image is based on another image, that actually has nothing different, other than the tag. In the subsequent step, where we push, docker will know to just send the metadata up for latest. - Advanced --> Working Directory = $(System.DefaultWorkingDirectory)
Docker Push Latest - Public Registry
- Step Name = Docker Push :Latest
- Docker Host Connection = LinuxBuildHost
- Docker Registry Connection = Docker Registry
- Action = Push an image
- Image Name = stevelasker/example-voting-app-worker:latest
- Advanced --> Working Directory = $(System.DefaultWorkingDirectory)
CI Complete - lets validate it
Our configuration should now be complete, and look something like this:
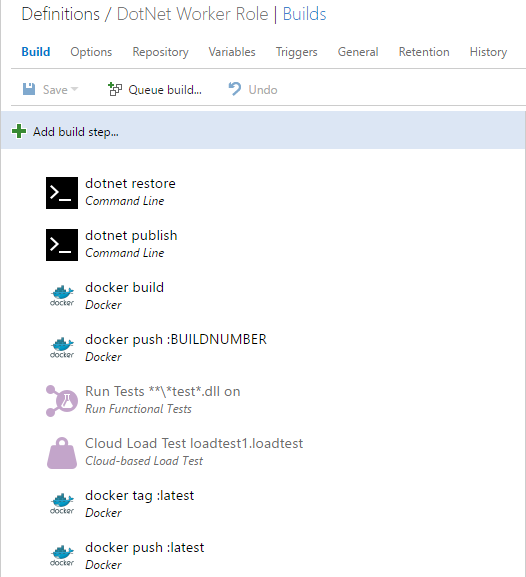
Lets save the definition, and give it a try
Queue a build
At this point, you should be able to queue a build, which should find our Linux VSTS Build agent, and execute the steps
If you have problems, just look close at the logs. You may have forgotten a cert, typo'd one of the parameters, or forgotten the advanced working folder for some of the steps.
If you've hooked up continuous integration, you can also kick things off by making a change
Instancing a built image
In this post, we didn't get into the specifics of deploying a built image. You may deploy to the Azure Container Service with Swarm or the Mesos template. You may have instanced Kubernetees. You may have some dedicated VM Hosts, or submit the image to Service Fabric.
To test the image, lets simply do a pull from the hub we pushed to.
From a powershell prompt, on a desktop. If possible, a machine that you didn't write the code that went into the image to have full isolation from other images. try the following
docker run -d -p 80:80 stevelasker/worksonmymachine:latest
That wraps up this post. Please keep the feedback coming
Steve