Part1: Creating a Custom SSMA Report
SSMA provides a migration assessment report to help you identify potential migration issues . You can generate the assessment report by selecting source schema, right click and select Create Report. Alternatively, you can also click on the Create Report button on the top navigation bar.
The report provides the information organized by database object types, for example:
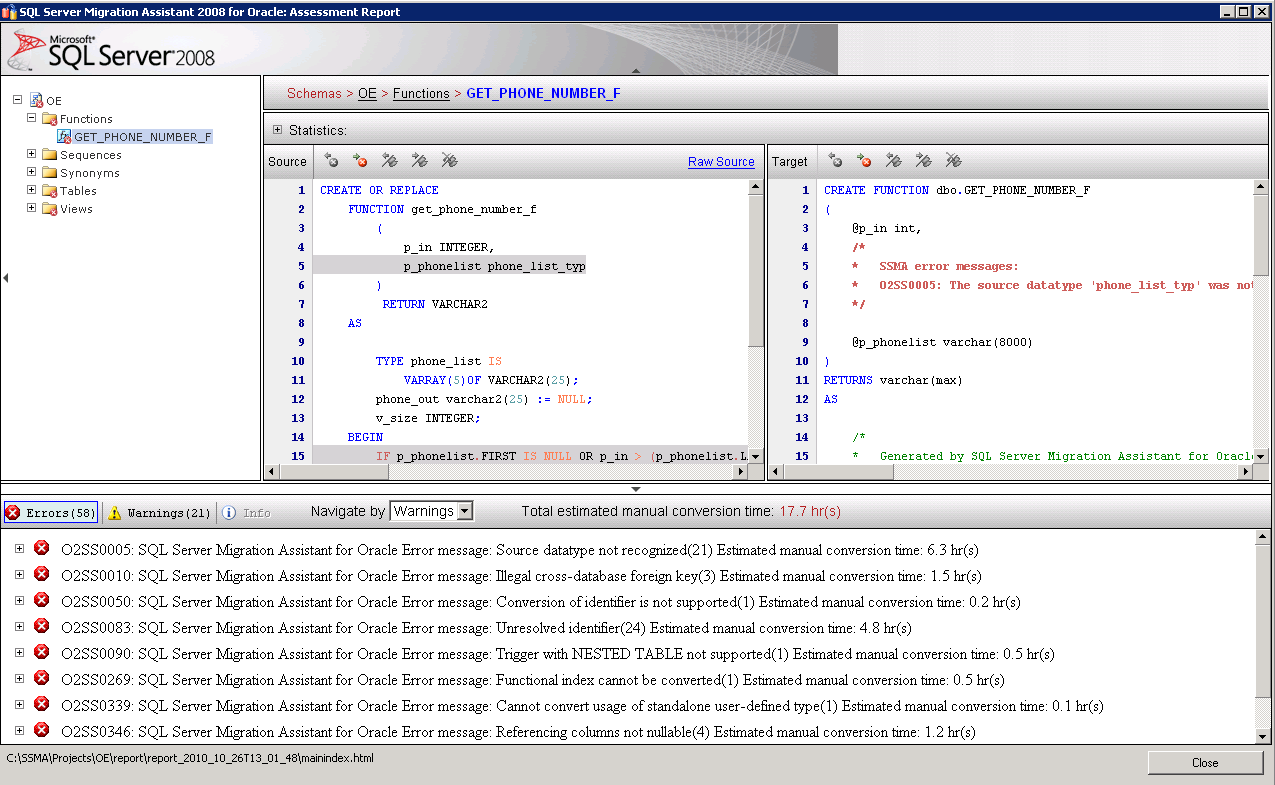
For each database object, the report provide you with list of conversion errors (issue that requires manual mitigation), warning (potential issues that needs review) and information (describe how SSMA does conversion for your reference).
However, the report is limited to one migration project. If you are migrating multiple database instances and would like to compare results across different projects, then you need to create a custom report using the data generated by SSMA.
Part 1: Extracting Data from SSMA using SSIS
When you generate SSMA Assessment Report, there are several files created and saved into Report folder under your SSMA project folder.
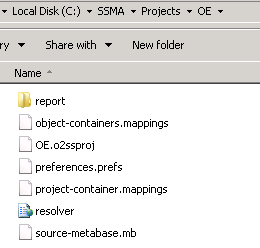
Under the report folder, you fill find sub-folders, each correspond to an object in your source database. Each sub-folder contains several files including:
- cat.xml: describes the object type and the overall conversion result
- path.xml: specifies object name, type and schema path. For example
- messages.xml: describes conversion messages, including error, warning, and additional information generated by SSMA
You need to traverse to all the sub-folders and load the content of the files above to a database table. You can use SQL Server Integration Services (SSIS) to automate the file uploading. First, let's create a table to store all the data in SQL server:
 CREATE TABLE tblRawData
    (
    FileID          INT IDENTITY(1,1) PRIMARY KEY,
    FileName        VARCHAR(4000),
    ObjectCategory  XML,
    ObjectPath      XML,
    ObjectMessage   XML
    )
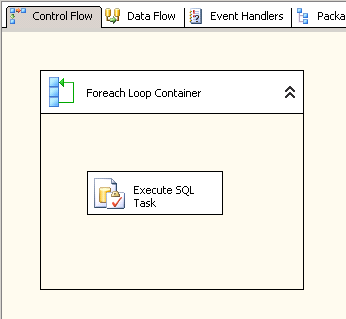
Next, create SSIS package with ForEachLoop Container to loop through all the subfolders and execute OPENROWSET statement to load the content of the file to a SQL Server table.
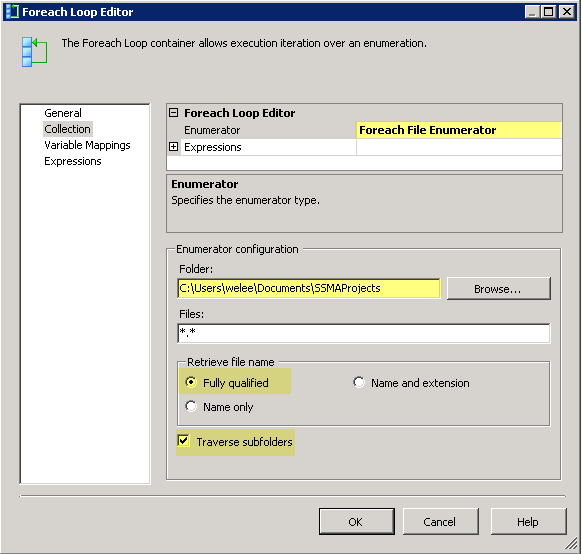
Edit the ForEach Loop container property as follows:
Enumerator : Make sure "Foreach File Enumerator" is selected
Folder : Browse to your SSMA project files.
Retrieve File Name : Select "Fully Qualified" option (to collect the full path to the file)
Traverse Subfolders : Make sure that the checkbox is checked
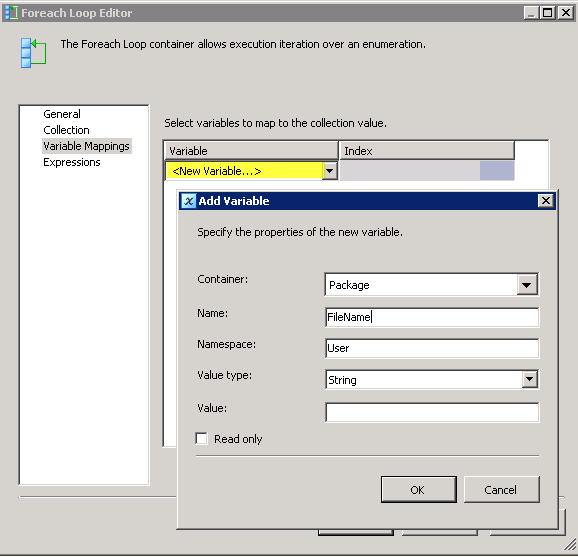
At the Variable Mappings tab, create a new variable for "User::FileName" to store the fully qualified name for each files.
Edit the Execute SQL Task control and specify connection to your SQL Server.
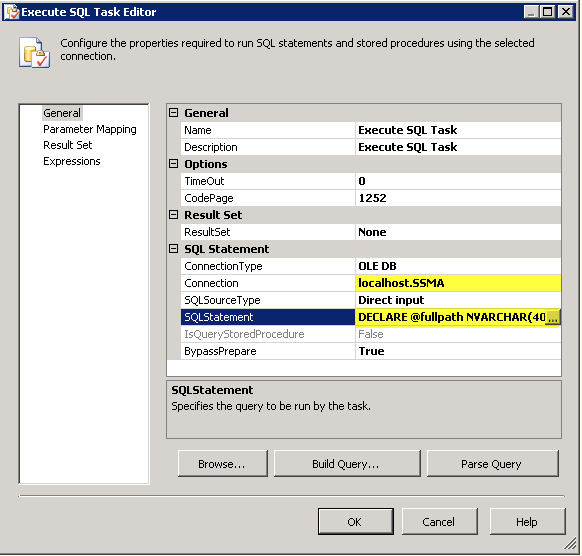
Then paste the following code to the SQLStatement property:
 DECLARE @fullpath NVARCHAR(4000)
DECLARE @filename NVARCHAR(4000)
DECLARE  @columnname varchar(16)
SELECT @fullpath = ?
SET @filename = RIGHT( @fullpath, CHARINDEX('\', REVERSE(@fullpath))-1)

SELECT @columnname =
    CASE  @fileName
        WHEN 'cat.xml'THEN 'ObjectCategory'
        WHEN 'messages.xml'THEN 'ObjectMessage'
        WHEN 'path.xml'THEN 'ObjectPath'
    END

IF @columnname IS NOT NULL

EXECUTE ('INSERT INTO tblRawData([FileName],' + @columnname + ')
SELECT ''' + @fullpath  + ''', * FROM OPENROWSET(BULK ''' + @fullpath + ''', SINGLE_BLOB) AS X')
The statement above takes the value of parameter (marked by ?) and assign it to @filename variable. There are three files that we need to pull information from. Based on the name of the file, the xml will be loaded to different column in the table.
Click on Parameter Mapping tab and add new variable for User::FileName with the datatype set to VARCHAR. Set parameter name to '0'. Your final parameter mapping set up should look like as follows:

After you finish, execute the SSIS package.
In the part 2 of this article, we will discuss how we parse the data and normalize into tables for reporting.