Using Azure Functions, Cosmos DB and Powerapps to build, deploy and consume Serverless Apps
Azure Functions can be used to quickly build Application as Micro Services, complete with turnkey integration with other Azure Services like Cosmos DB, Queues, Blobs, etc , through the use of Input and output Bindings. Inbuilt tools can be used to generate Swagger definitions for these Services, publish them and consume them in Client side Applications running across device platforms.
In this article , an Azure Function App comprising of 2 different Functions that perform CRUD operations on data residing in Azure Cosmos DB, will be created. The Function App would be exposed as a REST callable endpoint that would be consumed by a Microsoft Powerapps Application. This use case does not require an IDE for development. It can be built entirely from the Azure Portal and the browser.
[The Powerapps App file, C# Script files, Yaml file for the Open API Specs created for this article can be downloaded from this Gtihub location here]
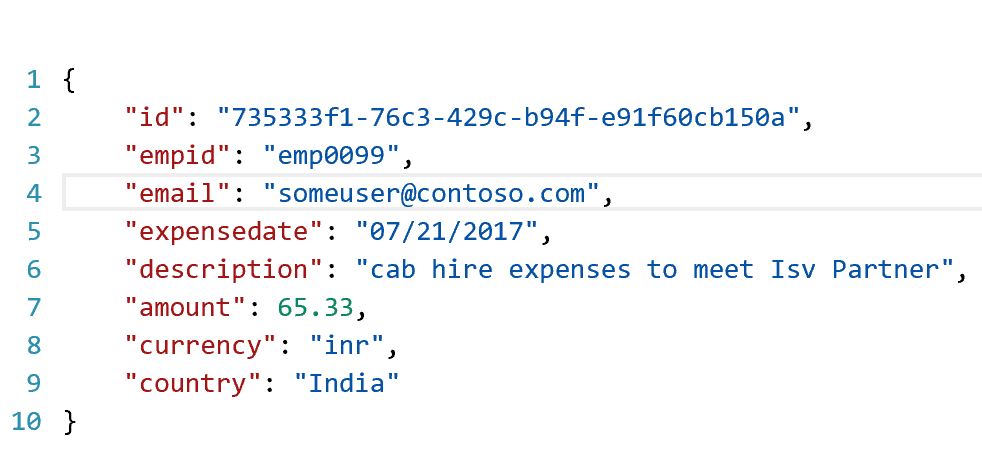
- Creation of a DocumentDB database in Azure Cosmos DB
Use the Azure portal to create a DocumentDB database. For the use case described in this article, created is a Collection (expensescol) that stores Project Expense details, comprising the attributes shown below.
2 . Creation of a Function App that implements the Business Logic in Service
Two Functions are created in this Function App using C# Scripts.
- GetAllProjectExpenses that returns all the Project Expenses Data from the collection in Cosmos DB
- CreateProjectExpense that creates a Project Expense Record in Cosmos DB
a) Function GetAllProjectExpenses ->
The Input and output Binding configured for this Function:

Apart from the HTTPTrigger input binding for the incoming request, an additional input binding for Cosmos DB is configured that retrieves all the Expense records from the database. Due to this binding, all the Expense records are available to the Run Method through the 'documents' input parameter - see screenshot of the C# Script used in this Function, below.
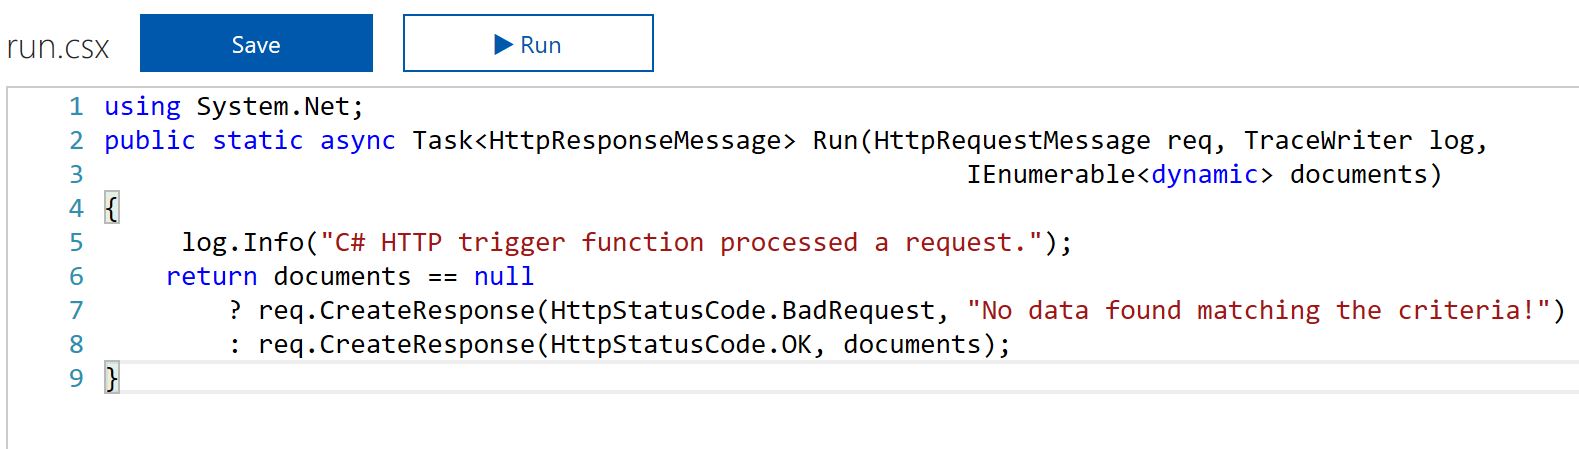
[Note: The scripts provided here are only meant to illustrate the point, and do not handle best practices, Exceptions, etc]
Refer to the Azure Documentation for detailed guidance on configuring Bindings in Azure Functions, for HTTPTriggers and Azure CosmosDB
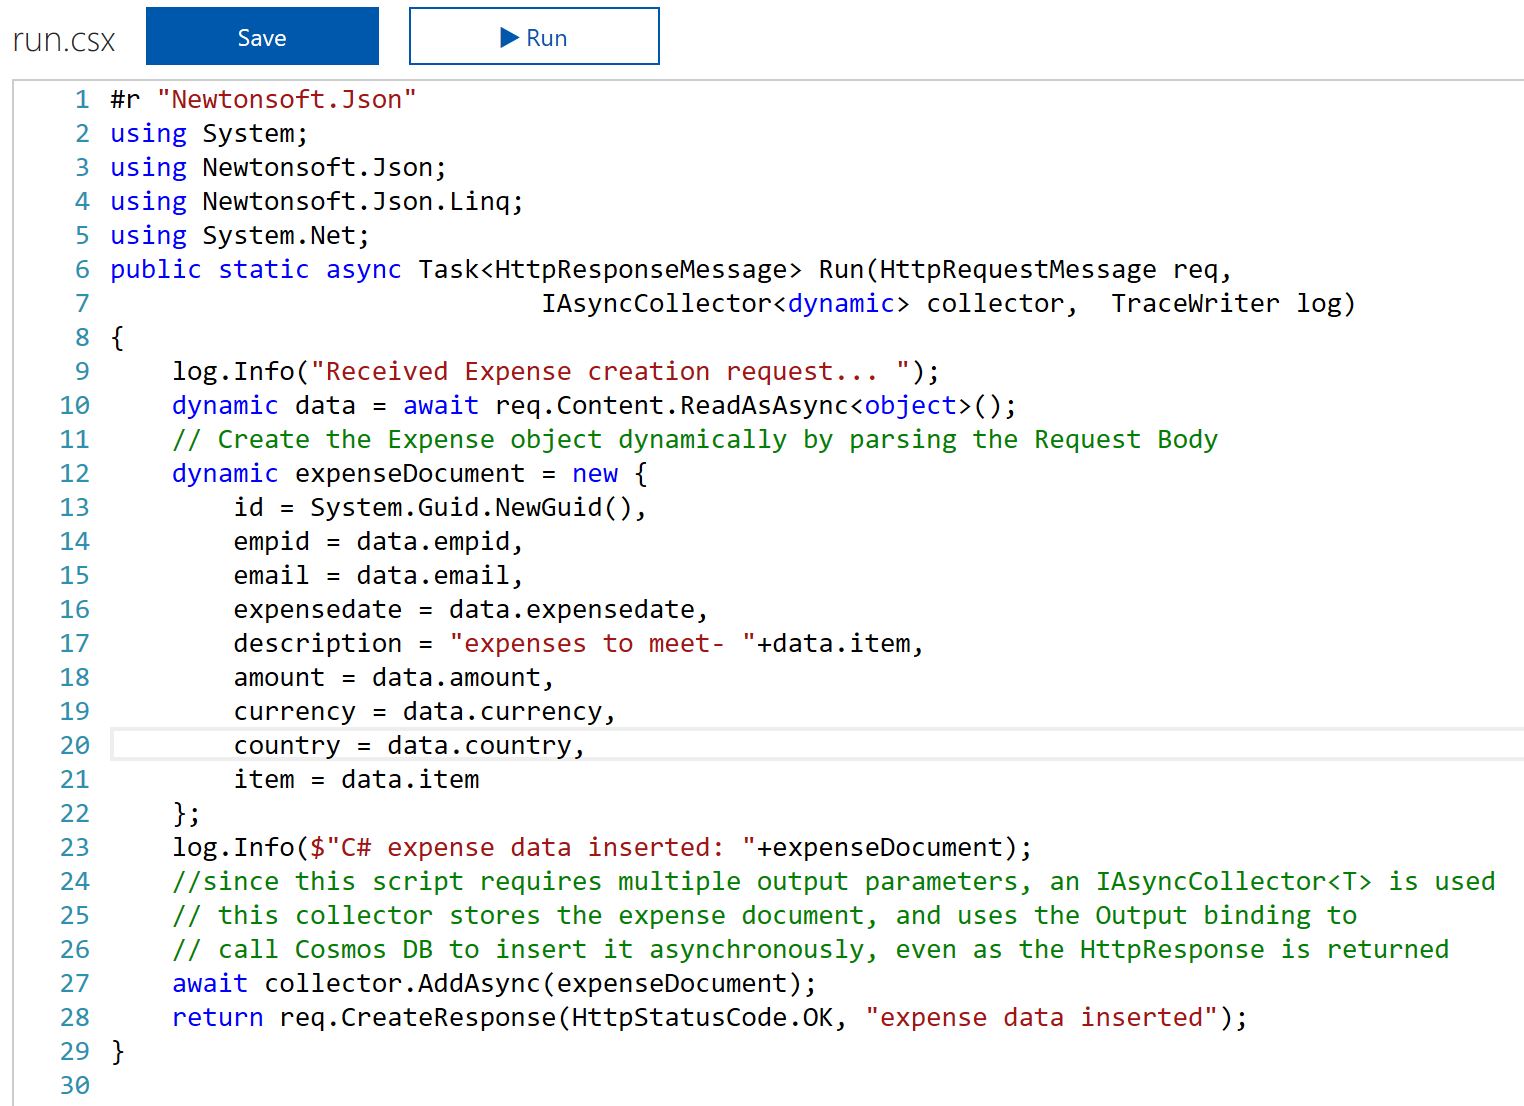
b) Function CreateProjectExpense ->
The binding configuration used for this Function is:

Notice that there are 2 output bindings here, one for the HttpResponse and the other is the binding to Cosmos DB to insert the expense record into it.
[Note: When the Run method in a Function is invoked asynchronously, we cannot use an 'out' parameter to the Cosmos DB Binding and an'out' for the HttpResponse in it. In such cases, we need to add the document meant for insertion into an IAsyncCollector Object reference, 'collector' in this case. Note that the parameter 'collector' is used in the output binding to Cosmos DB, shown above . Refer to the documentation here for more info pertaining to scenarios with multiple output parameters]
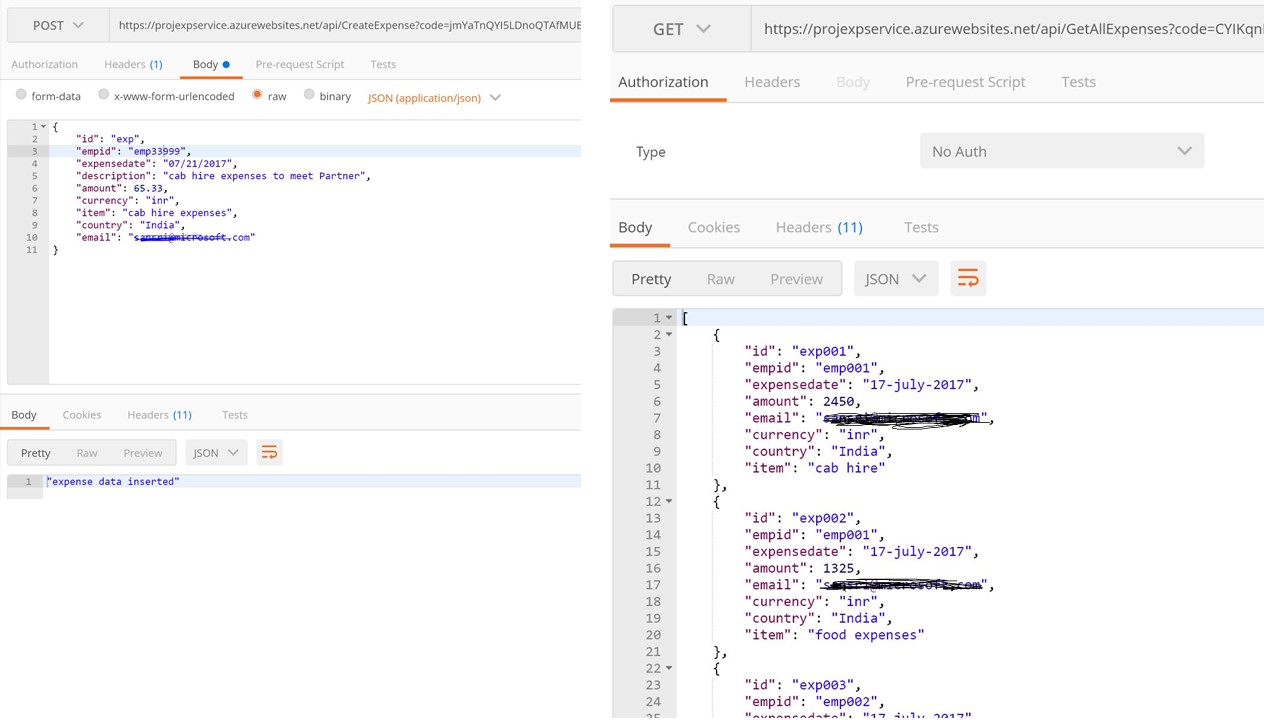
3. Test the Functions created
Use Postman to ensure both the Functions work without errors. The HttpTrigger Url can be obtained from the C# Script Editor View of the Function
4. Generating an OpenAPI (Swagger) Definition for the Function App
A Function App could contain different Functions, each of which could potentially be written in different programming languages. All of these Functions or individual 'Micro Services' could be exposed through a single base end point that represents the Function App. From the Application Settings, navigate to the 'API Endpoint' Tab.
Click on the button 'Generate API definition template' to generate a base definition of the Swagger. But it lacks all the elements required to fully describe the Functions. The definition, described in Yaml format, has to be manually edited in the editor pane. The Yaml file created for this Function is available along with the other artefacts in this blog Post.

Refer to this , this and this links that provides guidance on working with Yaml to create the Swagger definitions, or using other options to create it.
[Note: The samples considered in the links above use simple primitive types as parameters in the Method calls. The scenario in this article however deals with Collections, and needs more work to get the Yaml right. Refer to the artefacts download link in this article to view the Yaml that was created for the scenario in this blog post]
[Note: For simplicity in this article, I have considered the option provided by Functions to add the API key in the Request URL, under the key 'code'. For more secure ways to deal with it, use Azure AD integration or other options]
After the Yaml is created and the definition is complete, test the requests from the Test console on the Web Page, and ensure that the Functions work without errors. Once tested, click on the button 'Export to Power Apps and Flow' to export the Swagger definition and create a Custom connector in the latter.
5. Create a new custom Connection in powerapps.microsoft.com from the connector registered in the previous step. Embed the Security code for the Function App. This gets stored with the connection and automatically included in the request by Powerapps to the REST Services deployed on Azure Functions.

6. Create a new Powerapps App that would consume the REST Services exposed by Azure Functions in the earlier steps
While you could start with a blank Template, it involves some work to create the different Forms required in the App for 'Display All', 'Edit' and 'Browse All' use cases. Powerapps supports the ability to automatically generate all these Forms and provide a complete App, when selecting a Data Source like OneDrive, SharePoint Office 365 Lists, and many others. Since the 'ProjExpensesAPI' Connector we have created is a custom one, this Wizard is not available to create the App automatically.
To work around this, I have created a Custom List in Office 365, that has the same fields as in the Expense data returned by the Function App. I used the wizard to generate a complete App based on the Custom List in Office 365, and then changed all the Data Source references from it to the 'ProjExpensesAPI' Connection.
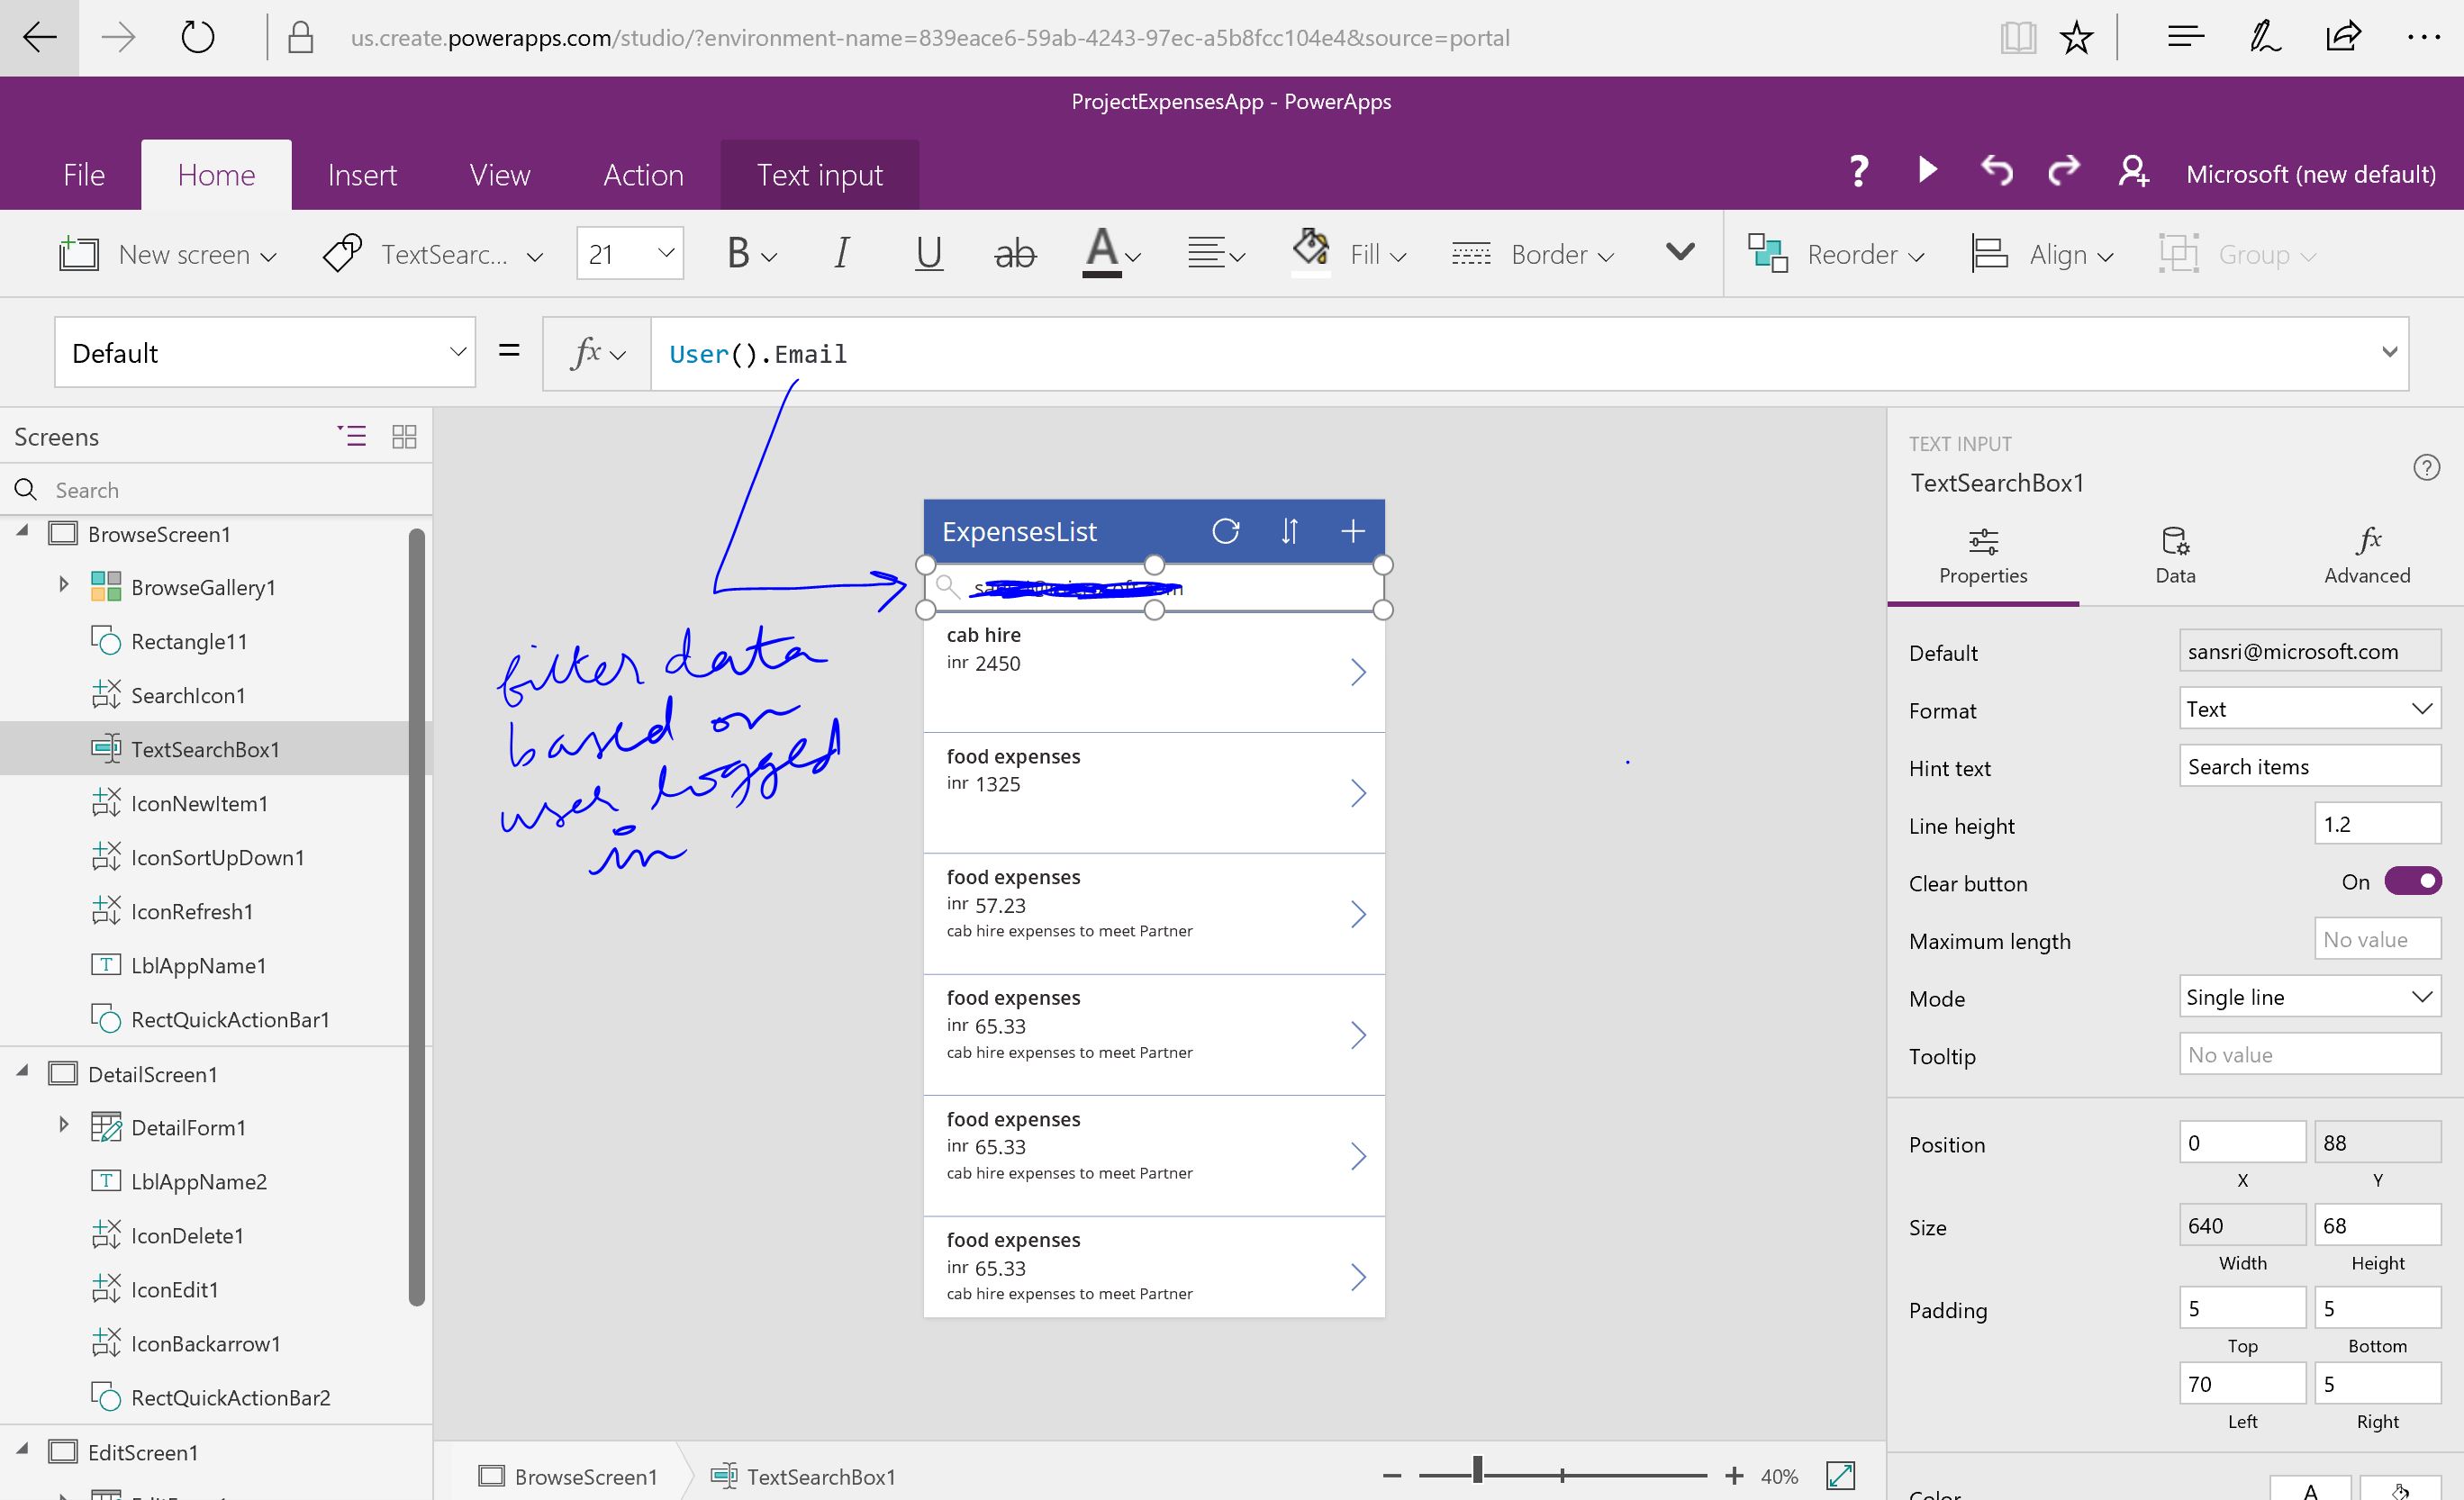
Note in the screenshot above, how the Logged in User context can be passed through 'Excel like' functions to the Search Box. The data is filtered after it is received from the REST APIs. Notice how our custom API is invoked below, and the data returned is filtered using the expression shown

The screen shots of the App with each of the Forms is shown below. This App can be run on any of Windows, Android or iOS Mobile Devices.

Test the App to ensure that all the REST API operations like GetAllExpenses and CreateProjectExpense requests work from the App. It can then be published by the user and shared with others in the Organization.
The powerapps App file is also provided along with the other artefacts in this article.