How to deploy SQL Server Client Aliases using Active Directory GPO/ADM
1. On your Domain Controller make sure you have installed the GPMC with SP1
2. Open GPMC
3. Create and link a GPO at the Top of the Domain level or inside the Organizational unit containing the computers where you want the alias to be applied
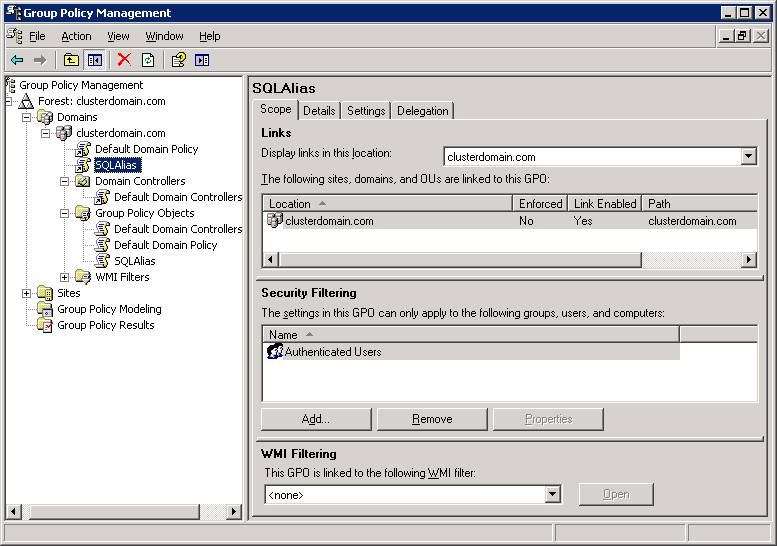
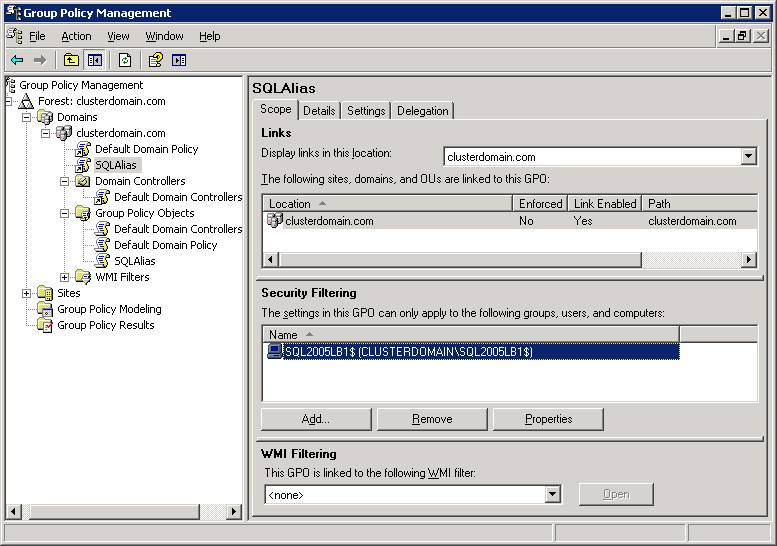
4. If you leave the policy at the domain level it will be applied to the entire Domain. If you want to apply the alias only to a part of the domain Computers and do not have all of these computers inside a single OU, you need to remove Authenticated Users from the security Filtering, then click on the Add button from the Security Filtering. Then select the object types to only be Computers, then Advanced, Find and select the computers where you want the policy to be applied. If you have lots of computers where this policy needs to be applied, you can use WMI filtering or LDAP query to put all computers inside a security group and then add the group to the security filtering.
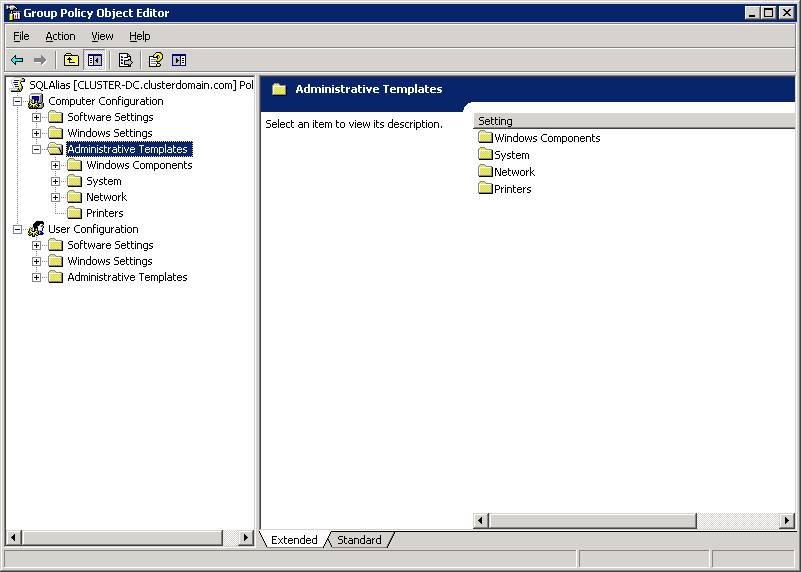
5. Right click the linked GPO and select Edit
6. The Group Policy Object Editor Should open
7. It is now time to create your ADM file using notepad. Create a new file with the ADM extension and put the following code inside it:
CLASS MACHINE
CATEGORY "SQL Server Client aliases"
KEYNAME "SOFTWARE\Policies"
POLICY "List of SQL Server aliases"
EXPLAIN "This list of SQL Server aliases will be deployed to users which are affected by this GPO !"
PART "ALIASLIST" LISTBOX
KEYNAME "SOFTWARE\Microsoft\MSSQLServer\Client\ConnectTo"
EXPLICITVALUE
END PART
END POLICY
END CATEGORY
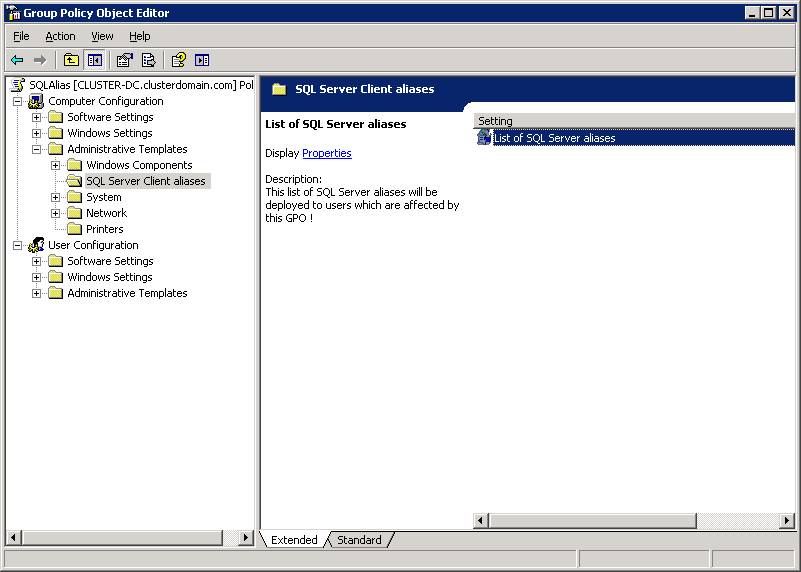
8. In the Group Policy Object Editor, right click the Administrative Templates and choose Add/Remove Templates
9. Browse to your newly created ADM files and then click close
10. You should now have the new policy defined. It looks like this:
11. Double click on the policy, check "Enabled" and then click "Show" :
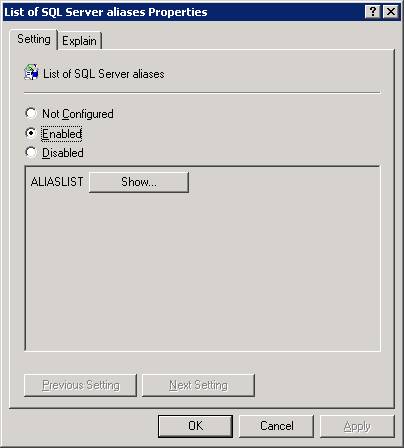
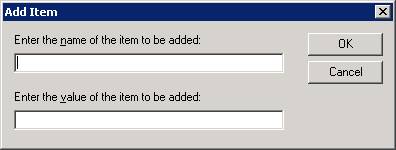
12. Because the policy is new, the list is empty. Click "Add" to specify a new Alias.
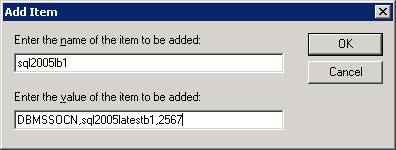
13. Inside the NAME you should enter the NAME as used inside your applications to specify the server to connect to. If the connection string inside your applications are only using the machine name you will also only use the machine name. If the con string uses the machinename\instancename you should use the same format.
14. Inside the VALUE you should enter the new machine name and the new port for the migrated SQL instance. If this is the default instance the port is not required. However you also need to mention DBMSSOCN for the alias to work. So the syntax would be "DBMSSOCN,machinename,sqlinstanceportnumber"
15. For example let's suppose that one of your applications on a client machine uses the following connection string "Provider=SQLOLEDB.1;Integrated Security=SSPI;Persist Security Info=False;Data Source=sql2005lb1". Then you migrate your SQL instance from machine SQL2005lb1 to machine SQL2005LatestB1 and now the SQL instance is named SQL2005 and it is listening on port 2567. This is how the Add Item text boxes should be filled:
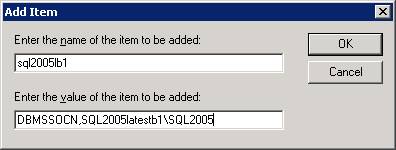
You can also use the new SQL instance name instead of the port number if the port is dynamic. Be careful to have the SQL Browser open on the Server machine in this scenario in order to have the instance name translated into port number. Here is how the Add Item text boxes should be filled in this case:
16. Everything is not set correctly. Client machines will have to be restarted for the policy to be automatically pushed. They can be manually forced without the need to restart the machine, by running on each client machine the command "gpupdate /force".
Writter:
Rares Radulescu
SQL Server Support Engineer
Microsoft Customer Service and Support