Easier SQL Server Cluster Upgrades with Windows Server 2016!
One of the major complaints that I hear from the field has to do with how hard and time consuming it is to upgrade Windows Server versions and SQL Server versions in a clustered environment. In the entire history of clustering with SQL Server, there were very limited ways to accomplish the upgrade of the software which would normally coincide with a hardware refresh cycle. This was a big problem, but now it's something we can finally take control of and create our own migration and upgrade paths!
Introducing Windows Server 2016 (currently Tech Preview)!
Windows Server 2016 has many improvements upon older versions, the one that many SQL Server DBAs will be happy about is the subject of the blog post today. This new feature is called "Cluster Operating System Rolling Upgrade" and allows for a Windows cluster currently running at least Windows Server 2012R2 to have mixed versions of Windows Server in the cluster.
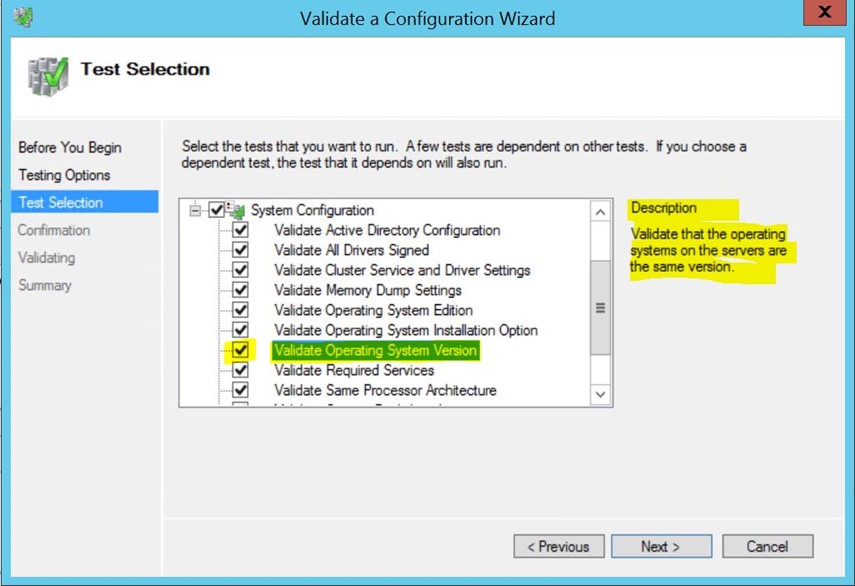
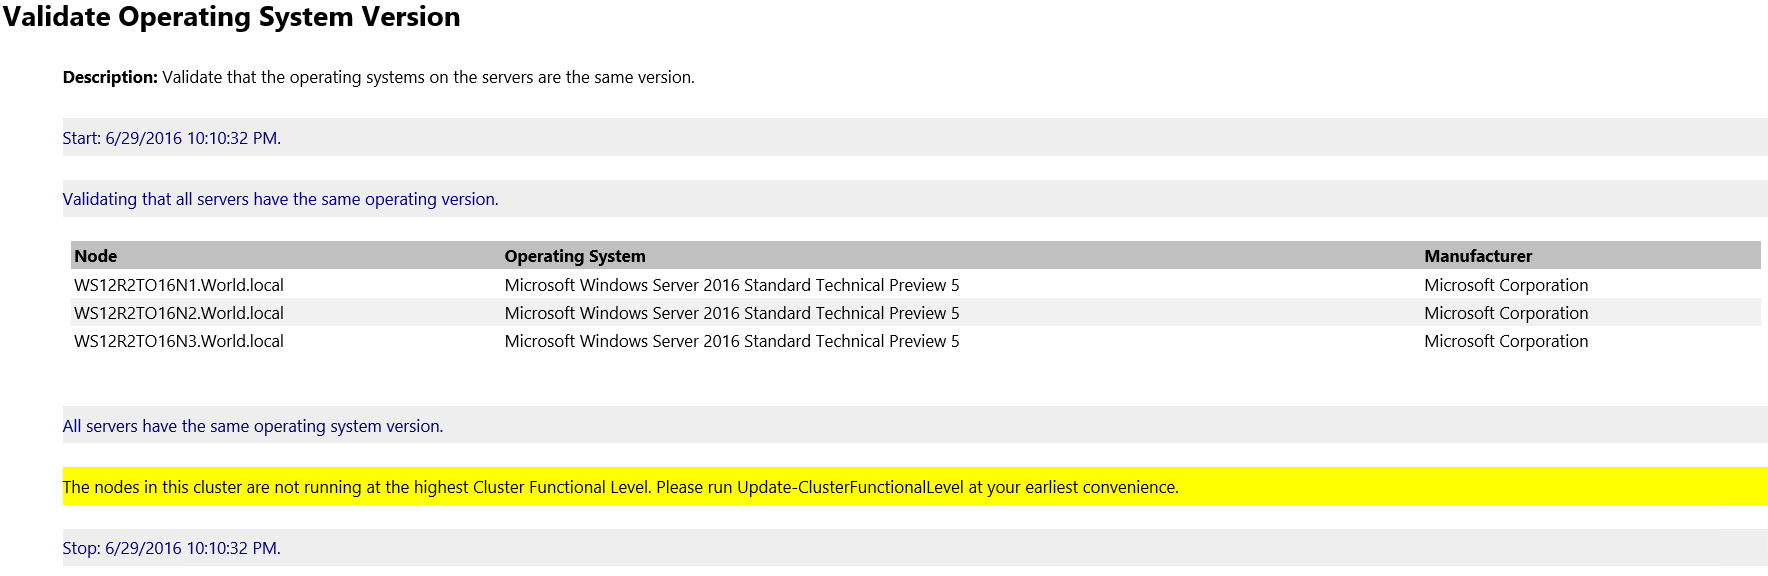
In the current version of Windows Server (2012R2) when creating a cluster or adding a new node, one of the checks completed during these operations is that of the Windows Version (image below).
This in of itself is extremely exciting – but let's see it in action!
Upgrading Windows Server 2012R2 Cluster to Windows Server 2016 using AlwaysOn Availability Groups
What we're going to walk through is upgrading the current Windows Server 2012R2 cluster to Windows Server 2016. Additionally we could also upgrade SQL Server with the cluster upgrade or at a later date.
Environment Overview
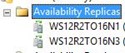
The current environment we're going to upgrade is a two node Windows cluster utilizing SQL Server 2014. There is a single availability group that we want to keep running and have as little downtime as possible. This environment starts are being a single subnet but will end having multiple subnets. I'll be showing this from the availability perspective, but will also add in information for those of you who may be running FCIs.
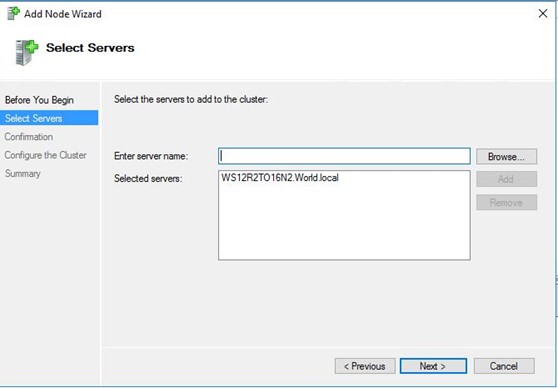
Step 1 – Add in a new node to the existing cluster
The first step is to add in a new node to the cluster as this will keep the cluster availability high. If possible, have this new node already updated to the new version of Windows Server as this will save a step later. This node doesn't have to live in the cluster the entire time, but it should be able to handle the workload of the node it is replacing (if repurposing the old node) or should be the newer upgraded hardware node (or azure VM) running the latest Windows version. This new node should already have SQL Server installed on it if using Availability Groups. If using FCIs, add the node then choose to add a node using the SQL installer.


Once the node is added, we'll want to run the cluster validation wizard. Please note, if using FCIs *uncheck* the storage checks or the storage will be failed over to each node to test the infrastructure.
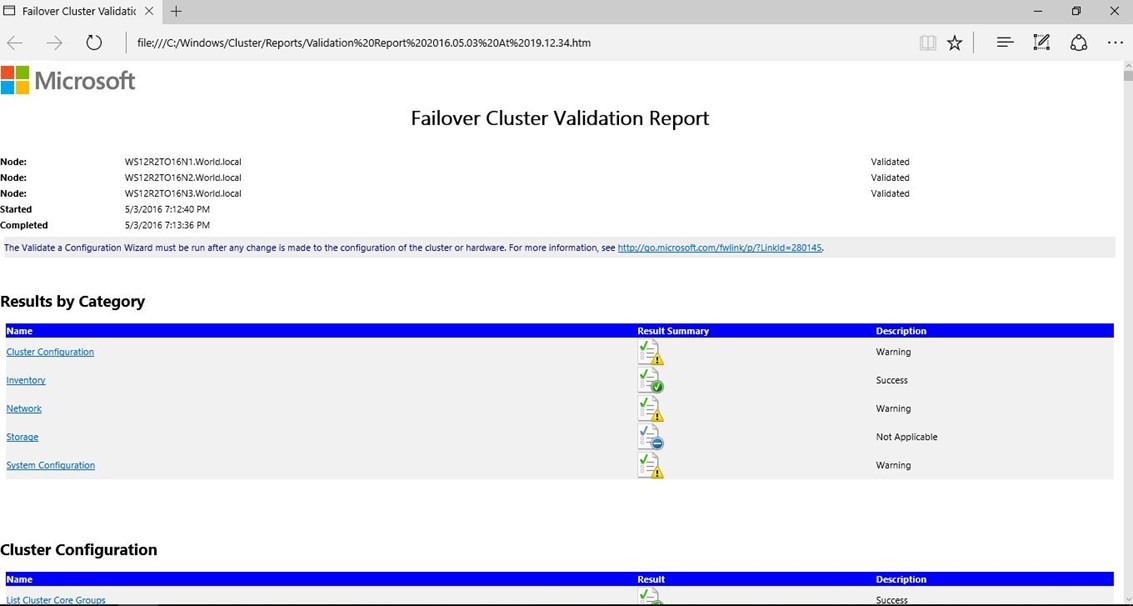
Note that there is a "warning" under system configuration.
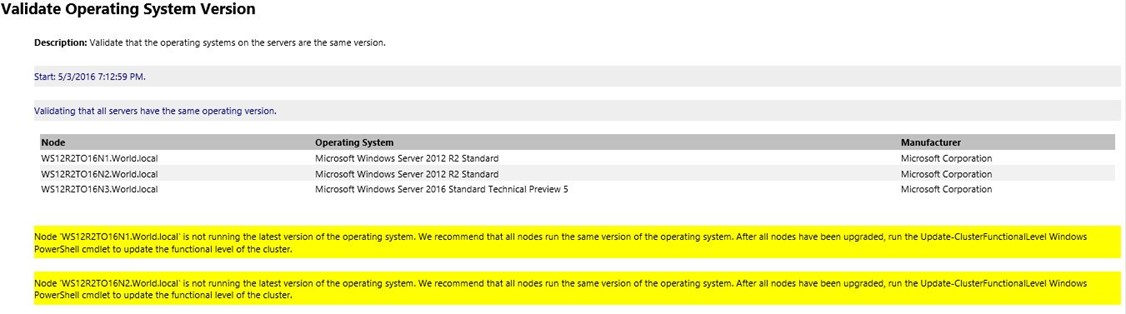
This is a new warning message letting us know that the cluster can see that the nodes aren't all running the same OS version. This would have caused an issue before, however now the cluster will continue to run and operate as normal. This doesn't mean the cluster should run in the downlevel mode for a very long time as all new functionality will not be able to be used while the cluster level is not at the newest version.
Step 2 – Add Services to the New Node
After adding the node, I add in a second subnet by adding in the IP resource manually to facilitate the new node being physically located anywhere. The cluster now became a multi-subnet cluster.
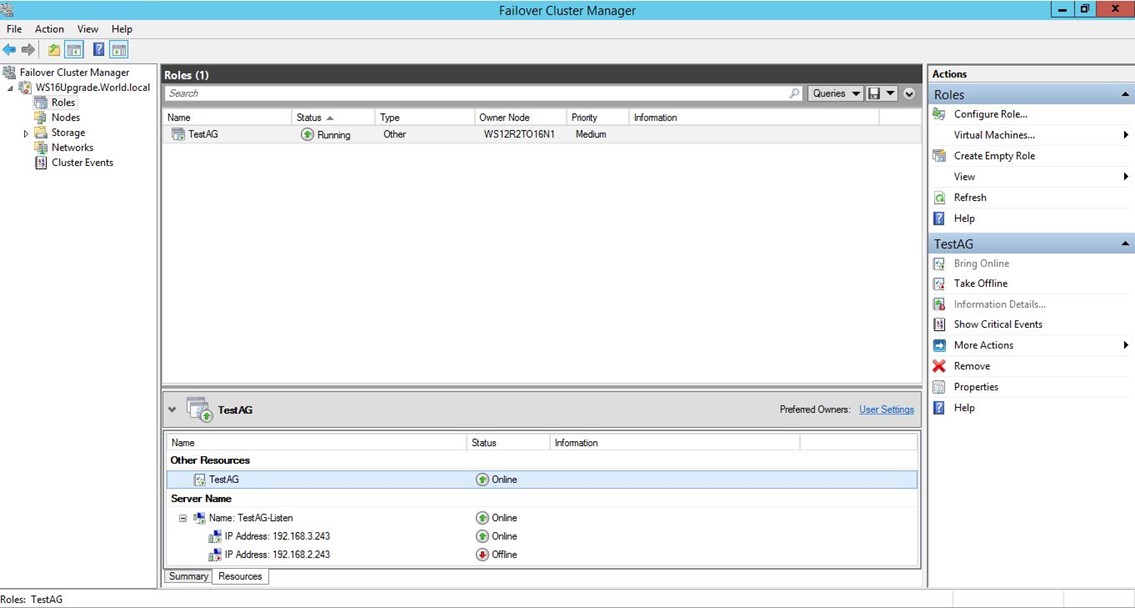
Once the networking is setup, I can add the node to the current availability group and make sure everything is working before we start the node upgrade rotation.
Step 3 – Evict a Current Node and Upgrade Windows Server
The steps before this were done to make sure we don't lose any availability (as that's why we build clusters!) by only having a single node in the cluster. If there are multiple nodes in your cluster already, the previous steps may not need to be completed and would be able to start on Step 3 (this step).
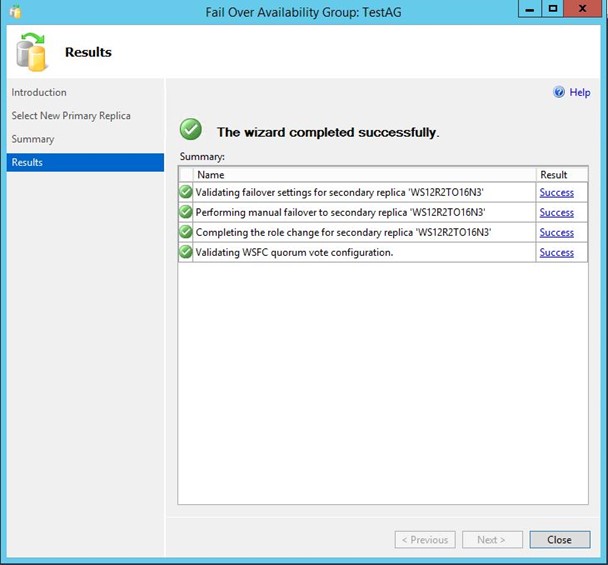
We're going to evict one of the current Windows Server 2012R2 nodes in the current cluster so that the operating system can be upgraded to Windows Server 2016 and introduced back into the cluster. In my environment I'm choosing the node that is currently not the primary Availability Group node. In this case, it's WS12R2TO16N2. Before we can evict the node from the current cluster, we'll want to be nice to our availability group and nicely remove the replica from the AG. If using FCI, this would be the time to use the remove node feature part of the FCI installer.
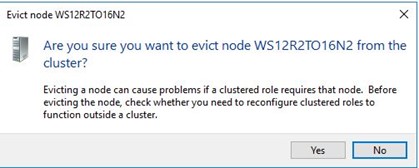
Once the node is evicted, upgrade the operating system (generally this is done with an image which wipes the current server in the process). Once the node has the new version of Windows Server, we'll repeat Step 1 which was to add a node into the cluster. In this case we're going ot add it back in, giving it the same node name that it had before.
Repeat Steps 2 and 3 until all but a single node remains.
Step 4 – Upgrading the Last Node
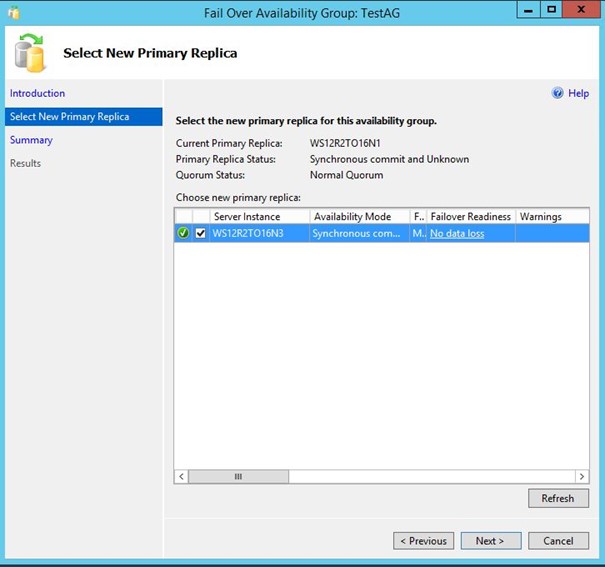
When we upgrade the last node, there is nothing different that should be done at this point. The only call out is that this is the ONLY time in this entire process where our SQL Server services will encounter a small downtime. This means we were able to upgrade our entire environment in the background without incurring any down time. When we finally upgrade the last node running our services, there will be a very short disruption in services while we fail over the AG/FCI to one of the newer nodes in the cluster.
Again, don't forget Step 2 after adding the node back in. When everything has been completed, go to step 5.
Step 5 – Upgraded the Cluster Level
Until now, the cluster nodes were running at the lowest version common across all nodes – which in this case was 2012R2. Now that all of the nodes are 2016 TP the cluster needs to be told that it can operate at the higher functional level.
Before going any further, let's run one more cluster validation wizards – again if using SQL Server FCIs, please uncheck the disk checks.
You can see that running the cluster validation wizard again points out to us that we should update to the highest cluster functional level whereas before it was a warning that we were running a mixed version environment. So, let's upgrade the cluster functional level!
Open a powershell prompt as a user that is a local admin of the cluster nodes.
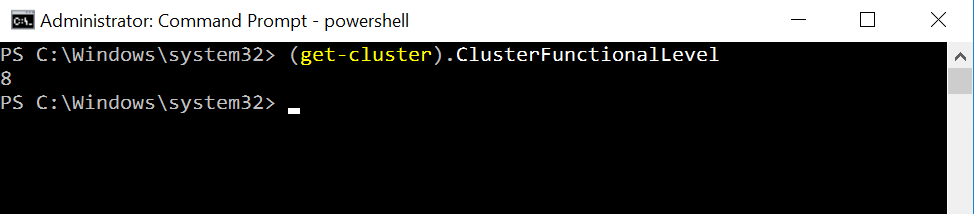
Let's check to see what the current cluster functional level is: (Get-Cluster).ClusterFunctionalLevel
Which we can see is currently set to "8".
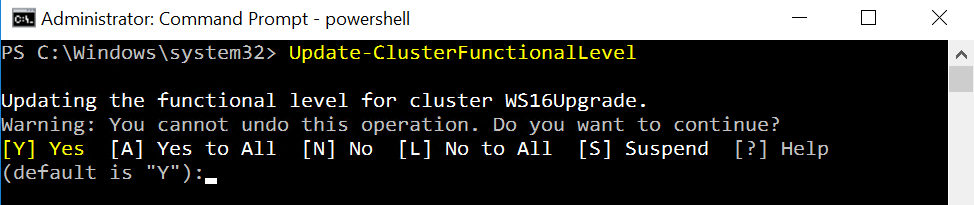
Now let's update the functional level and check again. One last word of caution… Once this is done, the cluster cannot be leveled to a lower version (much like SQL Server and backups)! Please make sure you're ready to do this as there is no going back. A similar warning will be shown upon invokcation of the powershell cmdlet.
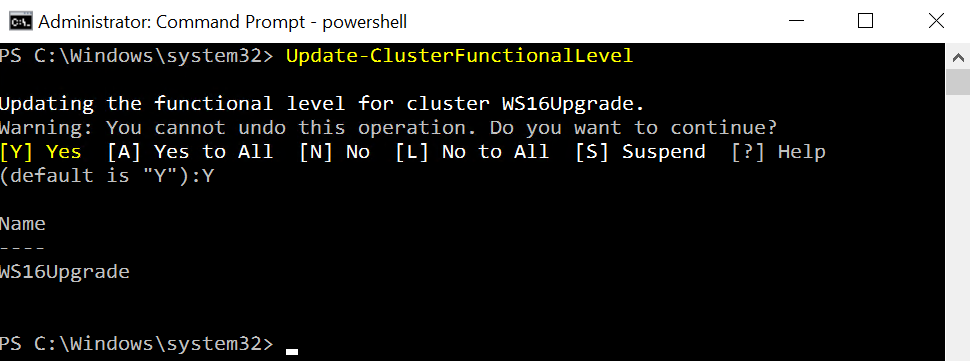
Great! Our update went well J Let's investigate what the functional level is now:

We can now tell that 8 = Windows Server 2012R2 and 9 = Windows Server 2016.
Our cluster is now running Windows Server 2016 and we were able to upgrade and do this with extremely little downtime!
Step 6 – Final Cluster Validation Check
This is where one more cluster validation check should be run in order to "double check" the cluster. It doesn't take very long or many resources to do this and I always like to double check all changes made to clusters.
In addition, take a look at the recent cluster events. This is the point where we should no longer be receiving event 1548:

