Install & Configure SharePoint 2013 with SQL Client Alias
Though this topic is very simple and highly recommended approach in the enterprise deployments, I have seen many deployments which are not following this approach. E.g.: Using SQL client alias for SharePoint installations will be really useful if you want move all databases to another SQL Server by just making alias change point to the new SQL server. In this post I’m going to cover how we can install & configure SharePoint 2013 Preview with SQL Client Alias. Though this post is talking about SharePoint 2013 preview, the underlying concept will be same for SharePoint 2010 & SharePoint 2013 RTM.
In my test lab, I have total four virtual machines configured. This post is based on a SharePoint small server farm for setup and proof of concept. I will refer to this same environment in my future blog posts, there will be more servers adding to the existing server farm.
litdc : is the domain controller and AD server (domain : litware.local), this machine is installed with Windows 2008 R2 + SP1
litsql1 : is the SQL server machine which is installed with SQL Server 2012 RTM with Windows 2012 Server Release Candidate.
litsp1 : is the one of the SharePoint Servers, I’m configuring this server with WFE role. This server is installed with SharePoint Server 2013 Preview with Windows 2012 Server Release Candidate.
litsp3 : is the one of the SharePoint Servers, I’m configuring this server with Application role (central administration and other services). This server is installed with SharePoint Server 2013 Preview with Windows 2012 Server Release Candidate. Name of the server is litsp3 as I’m planning to add one more SharePoint Server litsp2 to with WFE layer later.
In this post I’m only concentrating on the part of configuring SharePoint Servers with SQL Client Alias.
# Step 1
To harden the security for SQL server it is highly recommend to install SQL Server with named instance with custom port and block all default SQL specific ports. So, that is our first step to consider while setting up the SQL Server.
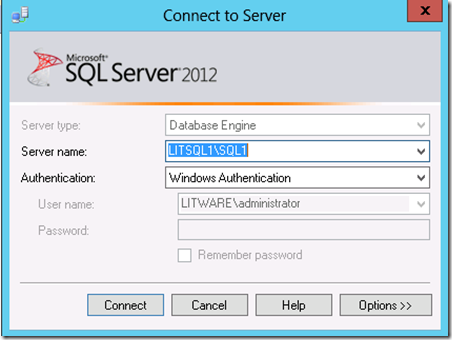
While installing the SQL Server in litsql1 server I have installed it with named instance “litsql1\sql1”.
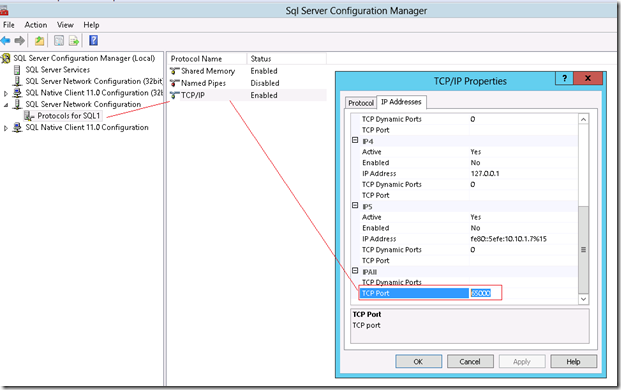
After the installation of SQL Server with named instance, we have to assign a custom static port number for the SQL Service. You can do this in “SQL Server Configuration Manager”. We have to configure it by taking the TCP/IP properties of “Protocols for SQL1 (SQL1 instance name)”. By default, whenever we install SQL Server with named instance it will assign a “TCP Dynamic Port”, we have to clear it out in the same location (just before TCP Port).
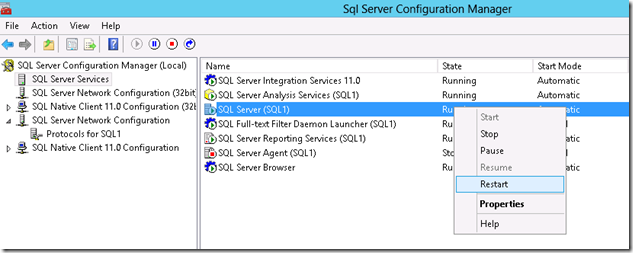
After doing the above step, we have to restart the “SQL Server Service” to use the newly assigned port.
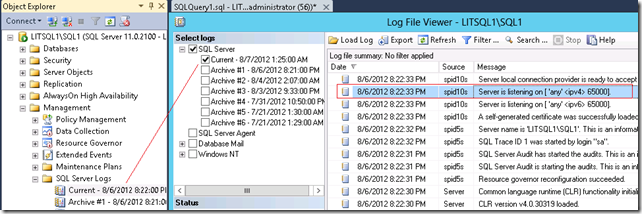
To confirm the usage of the new port, you can either look at the SQL Server Logs in the SQL Server Managements studio or can look at the windows application event logs directly.
# Step 2
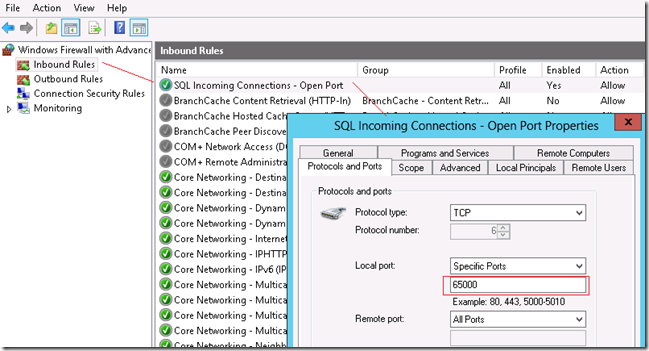
Once the above port validation is over the next important step is open the custom port for In bound connections if you have firewall enabled. Just need to create a new Inbound Rule for allowing connections for the custom port, in my case it is “65000”
# Step 3
Alright, now we can go to SharePoint side. In my case there are two SharePoint Servers to be configured, one WFE – litsp1 and one Application Server – litsp3. Since I’m going to host central administration in litsp3, I’m going to configure this server first. Main configuration needs only before running the PSConfig. I have installed SharePoint 2013 Preview in both of these servers initially.
Before running the PSConfig , we have to configure the SQL Client Alias. There will be two versions of cliconfig in 64 bit operating system.
C:\Windows\System32\cliconfg.exe - 64 bit version of cliconfig.exe
C:\Windows\SysWOW64\cliconfig.exe – 32 bit version of cliconfig.exe
SharePoint 2010 & 2013 are 64 based so we have to configure the 64 bit version of cliconfig.
C:\Windows\System32\cliconfg.exe
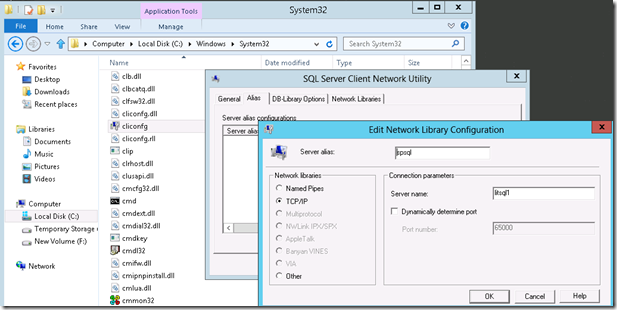
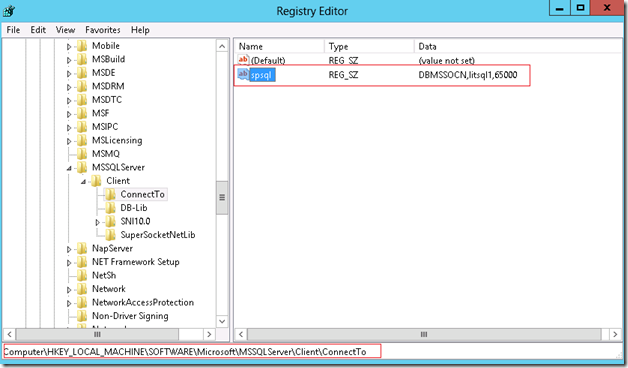
In my test case I have created alias “spsql” with network library type “TCP/IP” (don’t use named pipes). In the Server Name textbox we have to give the SQL Server name (litsql1) and then uncheck the “Dynamically determine port” option and give the custom port number, in my case “65000”. After saving the changes you can validate the registry settings to make sure that it is applied correctly.
# Step 4
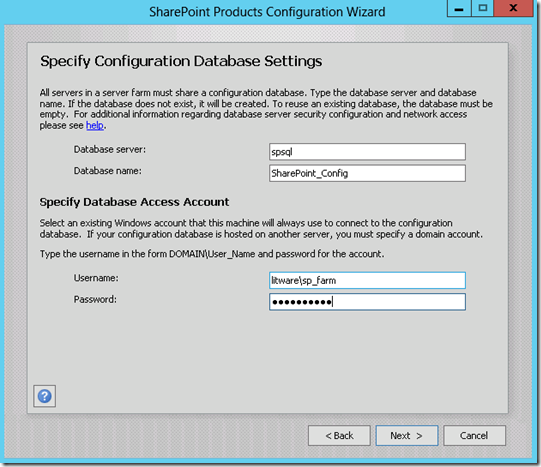
At this point we are good to run SharePoint PSConfig and provision a new server farm. While creating a new farm, provide the SQL Client Alias “spsql” instead of the the SQL Server Instance name “litsql1\sql1”.
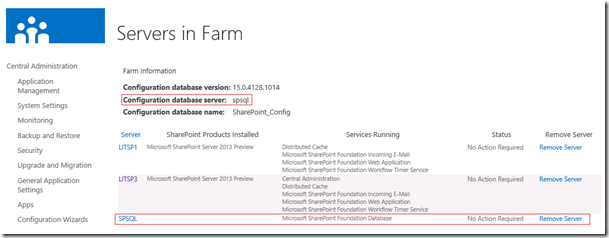
After finishing the PSCofig tasks, central administration site will be provisioned the SQL Server name will be used as “spsql”. To connect other servers to the SharePoint farm we have to repeat step #3 in all servers. In my test lab I have one more server to be added to the same farm.
Here is the download link for free eBook of “SharePoint 2013 deployment guide”

