Add Azure Active Directory B2B users to your Visual Studio Team Services
I often go on site with customers and do some work for them inside their VSTS. I am going to document a way for those companies that are using AAD and VSTS together to add me into their Azure Active Directory so that I can use my company email address and bring in my MSDN license. This means that end customer does not have to create me an account within their domain and does not have to pay for a licence for me to use VSTS.
So, how to add my Organisational Id to your VSTS tenant. Step 1 and 2 are not necessary as the GUID is actually unique for Visual Studio Team Services, but at least you can see how I got the details
Prerequisites
- The service to be shared with the third party must be connected to the Azure AD of the company wishing to share the service
- The third party company must also be using Azure AD
- The person configuring the federation must have Administrator Privileges on the Azure AD
Step 1: Obtain the Application ID for the Service to be Shared
The first step is to obtain the ApplicationID for the specific service that you wish to federate (in this case Visual Studio Team Services).
This may be achieved by manually reading the GUID for the service from the Azure Active Directory (AzAD) portal or by using PowerShell. You can install the PowerShell cmdlet from here - https://go.microsoft.com/fwlink/p/?linkid=236298
Open a PowerShell console as Administrator
| PS C:\>Connect-MsolServicePS C:\>Get-MsolServicePrincipal -ServicePrincipalName Microsoft.VisualStudio.Online |
This will return the following information:
| ExtensionData : System.Runtime.Serialization.ExtensionDataObjectAccountEnabled : TrueAddresses : {Microsoft.Online.Administration.RedirectUri}AppPrincipalId : 499b84ac-1321-427f-aa17-267ca6975798DisplayName : Microsoft.VisualStudio.OnlineObjectId : 8648cd11-9177-xxxx-9fc740f1ad20ServicePrincipalNames : {https://app.vssps.visualstudio.com/, 499b84ac-1321-427f-aa17-267ca6975798,Microsoft.VisualStudio.Online}TrustedForDelegation : False |
The Service Principal Name is what you need: - 499b84ac-1321-427f-aa17-267ca6975798
Step 2: Create a CSV File
Now that you have the GUID for the service you wish to federate, you can put this into a CSV file to create the new identities in AzAD. Based on this blog: -
Azure AD B2B Invitation: CSV file format
The new fields are as follows:
| Type | Field | Description |
| Required | The email address of the person you are inviting to use the service | |
| Required | DisplayName | Display name for invited user (typically, first and last name) |
| Optional | InvitationText | Customize invitation email text after app branding and before the redemption link |
| Optional | InvitedToApplications | AppIDs to corporate applications to assign users. AppIDs are retrievable in PowerShell by calling: Get-MsolServicePrincipal | fl DisplayName, AppPrincipalId |
| Optional | InvitedToGroups | ObjectIDs for groups to add user to. ObjectIDs are retrievable in PowerShell by calling Get-MsolGroup | fl DisplayName, ObjectId |
| Optional | InviteRedirectURL | URL to direct an invited user after invite acceptance. This should be a company-specific URL (such as contoso.my.salesforce.com). If this optional field is not specified, the invited user is directed to the App Access Panel where they can navigate to your chosen corporate apps. The App Access Panel URL is of the form https://account.activedirectory.windowsazure.com/applications/default.aspx?tenantId=<TenantID>. |
| Optional | CcEmailAddress | Email address to copy emailed invitation. If the CcEmailAddress field is used, this invitation cannot be used for email-verified user or tenant creation. |
| Optional | Language | Language for invitation email and redemption experience, with "en" (English) as the default when unspecified. The other 10 supported language codes are:1. de: German2. es: Spanish3. fr: French4. it: Italian5. ja: Japanese6. ko: Korean7. pt-BR: Portuguese (Brazil)8. ru: Russian9. zh-HANS: Simplified Chinese10. zh-HANT: Traditional Chinese |
The following table is a copy of the actual CSV file used in the proof of concept (several optional fields were not used):
| DisplayName | InvitationText | InvitedToApplications | InviteRedirectURL | |
| xxxx@microsoft.com | Ivor Engine(Microsoft) | Hi Ivor, Welcome to VSTS | 499b84ac-1321-427f-aa17-267ca6975798 | https://mytenant.visualstudio.com/ |
Step 3: Create a new user in Azure AD
- Navigate to the Azure Active Directory User management panel
- Add user
- Select 'Users in partner companies' as shown below:
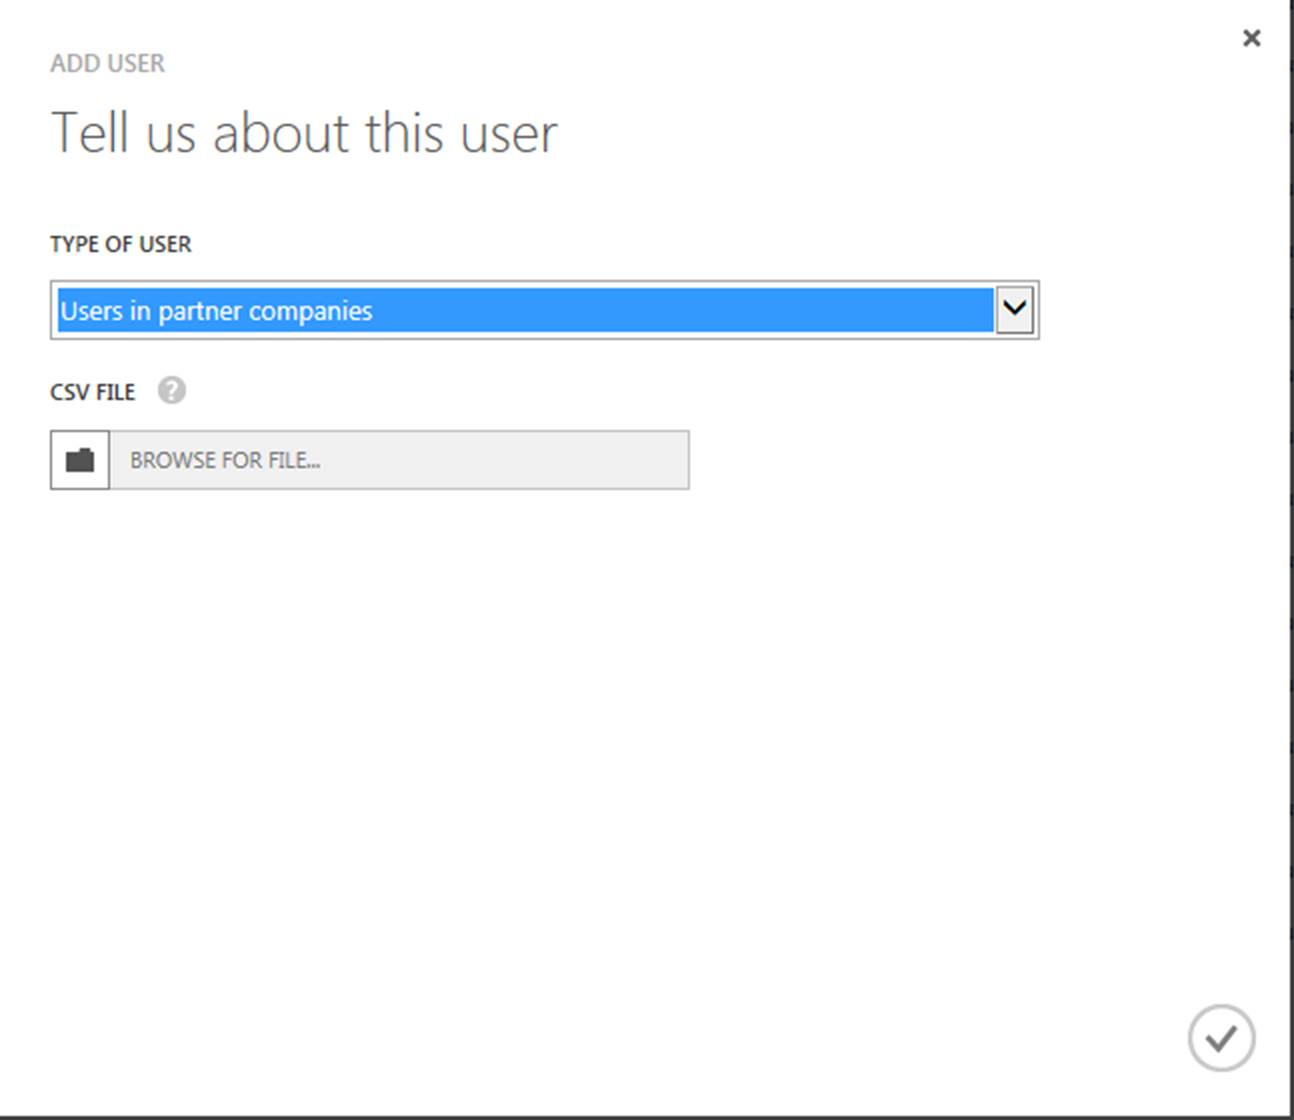
- Upload the CSV file created in Step 2
- Wait for the update to complete
- Azure AD will now send an invitation to all users identified in the CSV file.
| PLEASE NOTE: It is vital that the invited users respond to the invitation from Azure AD (as well as the subsequent invitation that they will receive from VSTS), or they will be unable to access the services that have been identified in the CSV file |
Step 4: Add User(s) to Visual Studio Team Services Collection Group
Once the user has been added to Azure Active Directory and they have accepted both the invitation from AzAD and from the application, you will be able to add them as a user in VSTS. They will appear as though they were in your directory, now they can utilise their MSDN account to collaborate with you on your project. This user will authenticate against their own companies Azure Active Directory. So if they no longer work for that company (Joiners/Leavers) they will not be able to authenticate. Which is not the case if you have created them an account in your AD.
Good luck!