Continuous Deployment with Windows Azure Web Sites
Last Friday, Windows Azure added support for continuous deployment from GitHub and CodePlex repositories to Windows Azure Web Sites. Continuous deployment notifies Windows Azure when updates are made to a Git repository on GitHub or CodePlex, and Windows Azure will then pull in those changes to update your website.
I thought I'd try setting up something that would benefit from continuous deployment. Like a blog created using Octopress.
Octopress
Octopress is a Ruby blogging framework that takes articles you write in Markdown and generates a static site from them. Static site means there's no database, no dynamic generation of pages when they're viewed, etc. Just plain old HTML, JavaScript, CSS, etc.
Since it's a blog, (which in theory I'd update regularly,) it's a perfect use for continuous deployment; I write a post, check it into my local Git repository, push to GitHub, and it automatically gets pulled into my website on Windows Azure.
Note that while I use Octopress, the same general process could be used with other projects. Octopress just happens to be a handy example.
Setting up a Windows Azure Web Site
Before we get into the process of setting up Octopress, let's walk through the steps to create a Windows Azure Web Site to host it. While there's multiple ways to create a Windows Azure Web Site, I just used the portal since it's fairly straight forward. Here's the steps:
Open a browser and go to https://windows.azure.com. Login with your subscription.
NOTE: You want the preview portal, which may or may not be your default (it stays with whichever portal you selected last.) If you're not on the preview portal, select the Visit the Preview Portal link at the bottom of the page.
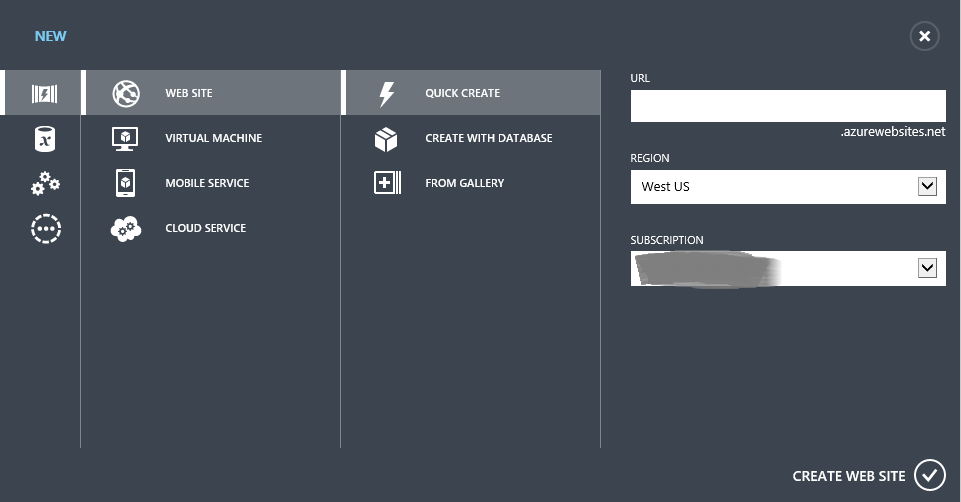
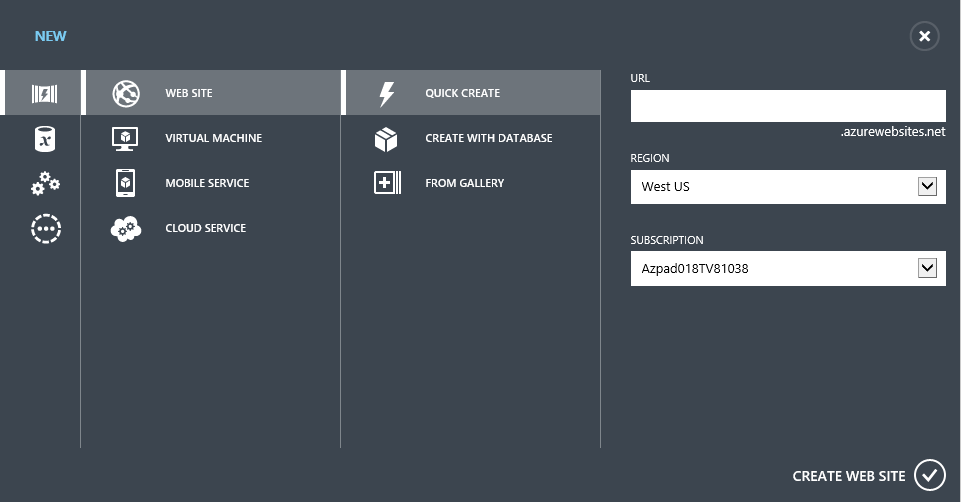
Click + NEW at the bottom of the page, select WEB SITE, and then QUICK CREATE.
Fill in the URL, select a region, etc. and then click the checkbox to create the site.
Once the site has been created, select the site name to navigate to the DASHBOARD. Look for the SITE URL on the right side of the page. This will be something like https://mysite.azurewebsites.net/ . Save this value as you will need it during the Octopress configuration steps.
Setting up Octopress
Octopress setup is pretty well documented already. I was able to follow the setup and configuration steps with only minor problems.
Start by creating a fork of the Octopress project on GitHub and cloning the fork to your local machine.
Follow the steps on the Octopress setup page. This will guide you through installing required gems and initializing the theme.
Follow the steps on the Configuring Octopress page. This will guide you through updating the _config.yml with values for your site. You will need the site URL value from the Windows Azure Portal for the 'url' value in this file.
Follow the steps on the Blogging basics page to create a blog post or two. This will guide you through the process of creating posts for the site.
Run
rake generateto generate the static files in the /public sub-directory.Finally, commit the updates to your local repository and push back to the GitHub repository by doing:
 git add .
git commit -m "new blog post"
git push origin master
That pushes your blog posts and the static site generated in step 5 above back up to your GitHub repository.
Enable continuous deployment
Back in the Windows Azure Portal, select your website and select the DASHBOARD. In the quick glance section, select setup git publishing.
NOTE: If you haven't set up a Git repository for a Windows Azure Web Site previously, you'll be prompted for a username and password.
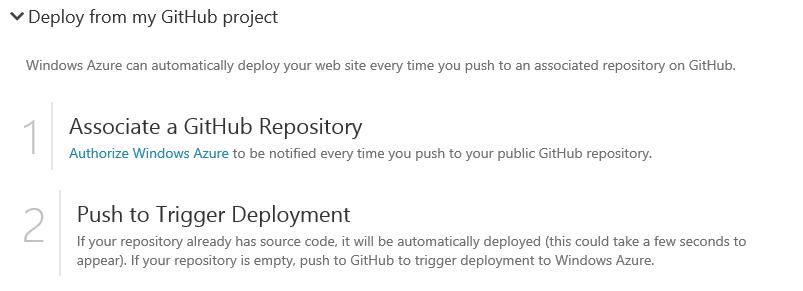
Once the repository has been created, you'll have several options: Push my local files to Windows Azure, Deploy from my GitHub project, or Deploy from my CodePlex project. Expand Deploy from my GitHub project and click the Authorize Windows Azure link.
You'll be prompted to login to GitHub, and finally to select the repository you want to associate with this web site. Select the repository you created earlier for Octopress.
Once you've selected the repository, Windows Azure will pull in the latest changes and begin serving up the files.
Oh noes! Something is wrong!
If you've tried browsing your Windows Azure Web Site at this point, you'll get an error. Probably something along the lines of "You do not have permissions to view this directory or page". There's two problems causing this:
All our static files are down in the /public directory and there's no default file (index.html for example,) in the root of the site.
The .gitignore file for the project has the /public directory listed, which is excluding all our generated static files from being deployed.
Both problems are easily fixed by performing the following steps in the local repository:
Edit the .gitignore file and remove the line containing public.
Create a file named web.config in the root of your local Octopress repository and paste the following into it:
The important piece is the rules section, which takes incoming requests and rewrites the request to the public folder.
Commit this change by using:
 git add .
git commit -m "adding public content and rewrite rule"
git push origin master
Once the push has completed, if you look at the DEPLOYMENT section of your web site in the Windows Azure Portal you should see it automatically pull in this update as the new active deployment:
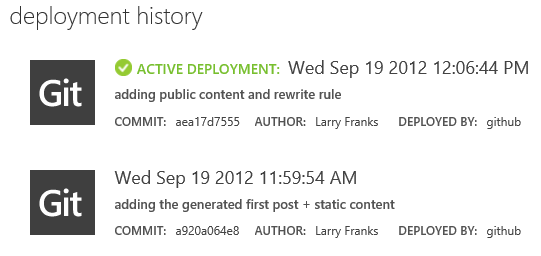
Now you can browse to the site URL and the main page should appear.
The secret sauce
The continuous deployment feature works by creating a unique URL for your web site, which then gets added to your repository settings on GitHub. You can find the URL by going to the CONFIGURE section of your web site in the Windows Azure portal and looking for the DEPLOYMENT TRIGGER URL. Note that right beneath this you can control what branch it pulls from also.
Now, to see where it's wired up on GitHub, go to the Admin link for your repository, select Service Hooks, and finally select WebHook URLs.
When you push an update to GitHub, it sends a POST request to the WebHook URL(s) telling those services that an update has occurred. Windows Azure checks if the update was to the branch you've told it to monitor (master by default) and if so, pulls down the updates.
If you want to disable continuous updates, you simply remove the WebHook URL from GitHub.
Archives
One annoyance I did run into is that the Archives link wouldn't work. Turns out this is because it is missing a trailing '/'. I updated the source/_includes/custom/navigation.html file and added a trailing '/' to the archives link.
Summary
The continuous update feature makes it pretty trivial to keep a Windows Azure Web Site updated with the latest and greatest software from your GitHub or CodePlex repository. While Octopress is just one example of using this functionality, you can do the same thing with any PHP, Node.js, .NET or static website. Alas, there's no Ruby support yet; for something like a Rails application you still have to use something like the RubyRole project I've blogged about previously.