Rapid Application Development Using InfoPath and BCS – Part 3 (Anweshi Deverasetty)
SharePoint InfoPath: For the Application Presentation Layer
Observe that in all the operations, the New, Edit, and View forms are automatically generated. The following is the screen shot of how the forms would look for an Employee external list.
Figure 11. New Item

Figure 12. Edit Item

Figure 13. View Item

Generating InfoPath Forms for External Lists
Notice that all of the forms generated look like the normal out-of-box forms for a custom list. However, it is difficult to customize these forms. InfoPath is one of the solutions you can use to customize these forms. The following steps demonstrate how InfoPath forms can be generated.
Start SharePoint Designer and then open the Department external list that you created. You can see that all the three forms are listed in the external list under Forms.
Figure 14. All forms are listed

To generate InfoPath forms for all three operations, from the List Settings ribbon menu under Design forms in InfoPath Designer select Item.
Figure 15. Generate forms for all three operations

This option generates all three InfoPath forms and then starts the InfoPath designer. Notice that three additional InfoPath forms (displayifs.aspx, editifs.aspx and newifs.aspx) are created and then marked as default forms.
Figure 16. Three additional forms are created

You can customize the entire form. Figure 17 shows the InfoPath designer.
Figure 17. InfoPath designer

Enabling Search and Filters on External Content Types
When you perform a search in the Show Picker dialog box, Figure 18 is the result.
Figure 18. Searching with the Picker dialog

The reason for this result is because filters are not enabled on the external content type Read List method. To see what needs to be changed for this, do the following:
- Change the stored procedure GetAllEmployees to accept Deptname as a parameter and write the query accordingly.
- Update the ReadList method with the FilterDescriptor as shown in Listing 12.
Listing 12
<Method Name="Read List" DefaultDisplayName="Department Read List"> <Properties> <Property Name="BackEndObject" Type="System.String">GetAllDepartments</Property> <Property Name="BackEndObjectType" Type="System.String">SqlServerRoutine</Property> <Property Name="RdbCommandText" Type="System.String">GetAllDepartments</Property> <Property Name="RdbCommandType" Type="System.Data.CommandType, System.Data, Version=2.0.0.0, Culture=neutral, PublicKeyToken=b77a5c561934e089">StoredProcedure</Property> <Property Name="Schema" Type="System.String">dbo</Property> </Properties> <FilterDescriptors> <FilterDescriptor Type="Wildcard" FilterField="Deptname" Name="Filter"> <Properties> <Property Name="CaseSensitive" Type="System.Boolean">false</Property> <Property Name="IsDefault" Type="System.Boolean">false</Property> <Property Name="UsedForDisambiguation" Type="System.Boolean">false</Property> <Property Name="UseValueAsDontCare" Type="System.Boolean">false</Property> </Properties> </FilterDescriptor> </FilterDescriptors> <Parameters> <Parameter Direction="In" Name="@Deptname"> <TypeDescriptor TypeName="System.String" AssociatedFilter="Filter" Name="Deptname"> <Properties> <Property Name="LogicalOperatorWithPrevious" Type="System.String">None</Property> <Property Name="Order" Type="System.Int32">0</Property> </Properties> <Interpretation> <NormalizeString FromLOB="NormalizeToNull" ToLOB="NormalizeToEmptyString" /> </Interpretation> <DefaultValues> <DefaultValue MethodInstanceName="Read List" Type="System.Object" xsi:nil="true" /> </DefaultValues> </TypeDescriptor> </Parameter> <TypeDescriptor TypeName="System.Data.IDataReader, System.Data, Version=2.0.0.0, Culture=neutral, PublicKeyToken=b77a5c561934e089" IsCollection="true" Name="Read List"> <TypeDescriptors> <TypeDescriptor TypeName="System.Data.IDataRecord, System.Data, Version=2.0.0.0, Culture=neutral, PublicKeyToken=b77a5c561934e089" Name="Read ListElement"> <TypeDescriptors> <TypeDescriptor TypeName="System.Int32" ReadOnly="true" IdentifierName="Deptno" Name="Deptno" /> <TypeDescriptor TypeName="System.String" Name="Deptname"> </TypeDescriptor> <TypeDescriptor TypeName="System.String" Name="Location"> </TypeDescriptor> <TypeDescriptor TypeName="System.String" Name="User"> </TypeDescriptor> </TypeDescriptors> </TypeDescriptor> </TypeDescriptors> </TypeDescriptor> </Parameter> </Parameters> <MethodInstances> <MethodInstance Type="Finder" ReturnParameterName="Read List" Default="true" Name="Read List" DefaultDisplayName="Department Read List"> <Properties> <Property Name="RootFinder" Type="System.String"></Property> <Property Name="UseClientCachingForSearch" Type="System.String"></Property> </Properties> </MethodInstance> </MethodInstances> </Method> |
Now, when you search for items in Show Picker dialog, you see the correct results.
The Application: A SharePoint Site or Site Collection
Creating a Site for the Application
Assume that you are planning to create a site named My First BCS Site for your application. To do this, you follow the standard site provisioning steps in Central Administration to create your site (a site collection from the SharePoint perspective).
Apply applicable security settings to your site. When this is completed, create a content page to place the external lists and then connect them to show a limited amount of data.
Creating an Application Page
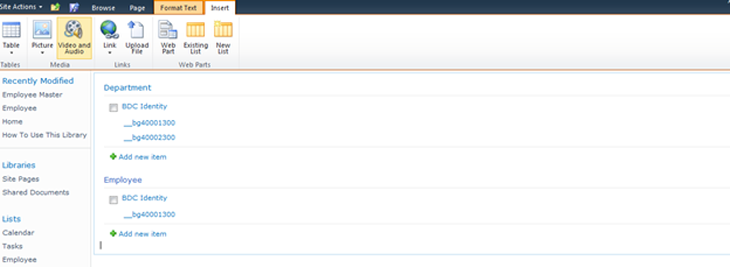
Create a New Page (select from Site Actions) with the name Employee Master and then add the two external lists. To add the external list in to the page, from the Insert ribbon menu, select External List and then select Department and Employee external lists. By default, when you add the external list, Figure 19 shows how the page will look. The page, by default, displays the BDC Identity columns.
Figure 19. Employee Master page
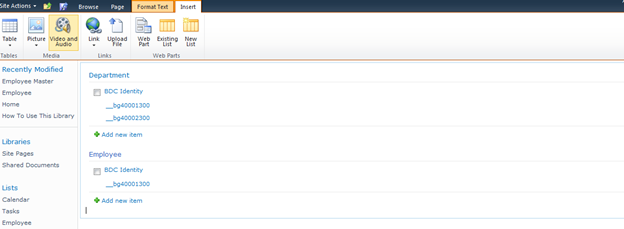
Edit both the web parts and select view as Department Read List and Employee Read List. Figure 20 shows the screen when the views are applied.
Figure 20. Results of selecting both views

In future posts, these two Web Parts will be discussed.
Technorati Tags: Anweshi Deverasetty,SharePoint,RAD,BDC,BCS