Working with SharePoint 2010 Themes (Anweshi Deverasetty)
Hi Everyone, I am Anweshi Deverasetty. I have been working as an Associate Consultant in Microsoft Services Global Delivery from past 4 ½ years. I have around 9 years of experience in Software Industry and have been extensively working on SharePoint. Currently, I am working on a project which involved migration of application from SharePoint 2007 to 2010, implementation of Pivot Viewer, BCS, FAST Search etc. This blog is an outcome of the effort that I put in to develop and deploy Themes.
Happy Reading!! :)
Introduction
Our application involved migration of site collections on a Web application from SharePoint 2007 to 2010 environment. As we wanted to perform Visual Upgrade on site collections on an as-needed basis at the user's request, we performed migration using PreserveOldUserExperience in stsadm. This will do the data migration but preserve the SharePoint 2007 look and feel. Later, Visual Upgrade can be used to upgrade to SharePoint 2010 look and feel. You can find more about PreserveOldUserExperience here on MSDN.
The migration basically involved 3 main steps—data migration, Visual Upgrade, and making our custom components compatible to work with the new version. After we were done with data migration, performing Visual Upgrade was simple, it was just performing Visual Upgrade from Site Settings->Site Collection Administration as shown here (click for a larger version):
Figure 1. Visual Upgrade in Site Settings
But just performing a visual upgrade does not make things work. There is more you need to think and work before you go for Visual Upgrade. The first thing is to work on master pages and themes. Before designing themes, you should decide if you want to go with themes or with cascading style sheets (CSS). It is always a good idea to go with one approach rather than using both because, themes might overwrite CSS sometimes and vice versa. The next sections will show you how to create and deploy a theme.
About Themes
Themes have been drastically changed in 2010. The new 2010 themes use an entirely different design. SharePoint 2007 themes used CSS and images while the new 2010 themes use the .thmx format. This means themes can be easily created using PowerPoint or any other tools which will be discussed later in this article. You will notice that the old SharePoint 2007 themes are no longer available in SharePoint 2010. When you perform migration without Visual Upgrade, the old themes are available to support the 2007 look and feel.
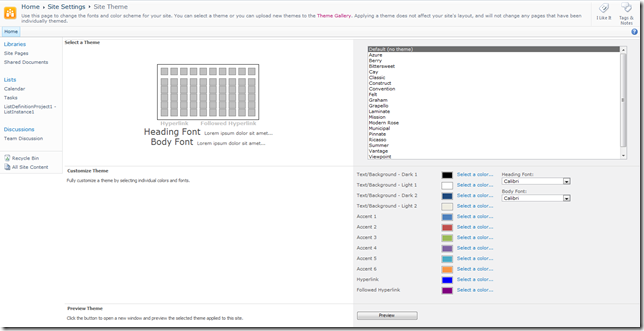
There are set of predefined themes available, which you can view from Site Settings->Look and Feel->Site Theme. Note that in SharePoint Server, you can customize the theme in the browser. In SharePoint Foundation, this functionality is not available. Here is a glimpse of the Site Theme in SharePoint Server (again, click for a larger view):
Figure 2. Set Theme in Site Settings
Creating Custom Themes
SharePoint 2007 involved some effort to create themes as we had to deal with CSS and images. But as the themes design is changed completely in 2010, it is rather easy. Following are set of tools available which will make life easier. Here are the different ways of creating Themes.
Customize Theme Feature
Set Theme in Site Settings under the Look and Feel section is a default feature available in SharePoint Server, which will help you to customize themes. In Figure 2, you can see the option Customize Theme, which will help you to customize the theme you selected. Whenever you select a predefined theme and customize it, it creates a new theme called Custom and all the changes get applied to this custom theme. So every time you modify a predefined theme, the Custom theme gets overwritten.
Now, if you want to preserve this theme and download it locally, here are the steps that will help you to download this customized theme:
- View the HTML source of the page and search for /_catalogs/theme/Themed/uniqueHexId/corev4-uniqueNumber.css
- From the browser, navigate to https://yourServer/_catalogs/theme/Themed/uniqueHexId/theme.thmx and download the file.
- Rename the file MyCustomTheme.thmx
Theme Builder
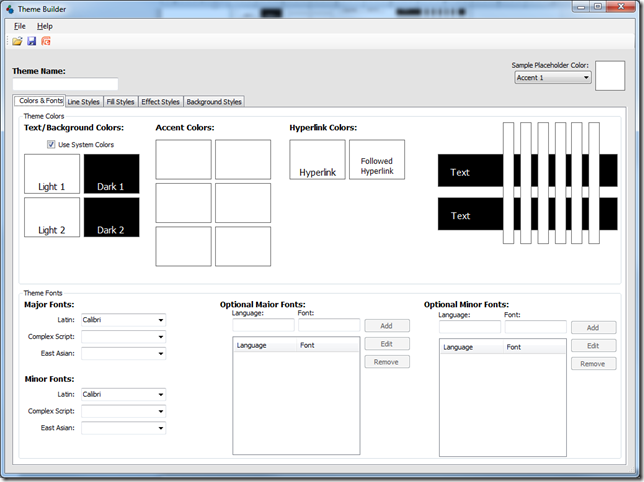
You can also create themes using Theme Builder, which is available at https://connect.microsoft.com/themebuilder . You can select an existing theme or create a new theme using this tool. Here is the screenshot of Theme Builder:
Figure 3. Theme Builder UI
PowerPoint
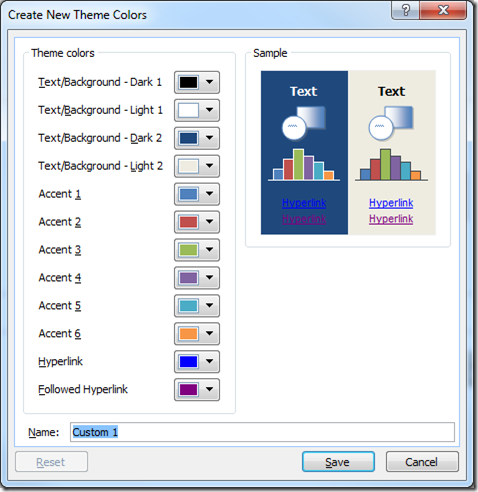
Themes can also be created using PowerPoint. On the Design tab under Colors, select Create new theme colors. Customize it and save it as a thmx file. Below is a screenshot of the Create New Theme Colors Dialog:
Figure 4. PowerPoint Theme UI
Deploying Themes
There are multiple ways to deploy themes both through code and through the UI. The following are the different ways to deploy themes.
Theme Gallery Deployment
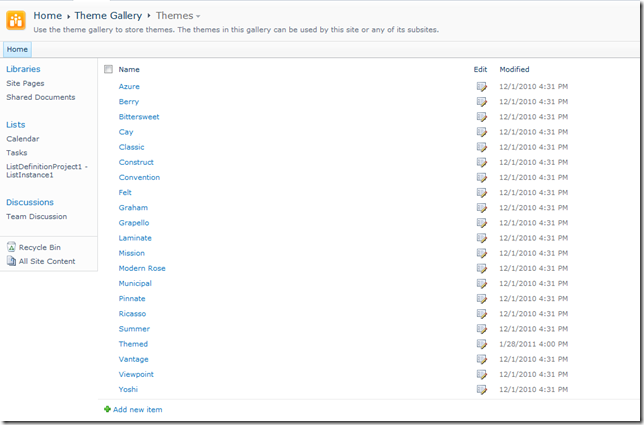
You can upload the thmx file that you created in PowerPoint or Theme Builder into the Theme Gallery. Deploying a theme to the Theme Gallery holds well if you're working for a single site collection. If you need it to apply to multiple site collections, see the next method of deploying using a Feature. You can access the Theme Gallery from Site Actions->Site Settings->Themes. Once you upload it, you can go to the Set Theme screen, as shown in Figure 2 above, and set the theme. You can see the Theme Gallery below:
Figure 5. Theme Gallery
Feature Deployment
It's always a best practice to deploy any artifact as a Feature. This works well for multiple site collections. Here is an example of the Feature and Elements XML files.
Feature.xml
 <?xml version="1.0" encoding="utf-8" ?>
<Feature  Id="28E39FC9-BFE9-4FAE-9E71-C5BFEB818D2E"
          Title="My Custom Theme"
          Description="My Custom Theme"
          Version="1.0.0.0"
          Scope="Site"
          Hidden="FALSE"
          DefaultResourceFile="core"
          xmlns="https://schemas.microsoft.com/sharepoint/">
  <ElementManifests>
    <ElementManifest Location="Elements.xml"/>
  </ElementManifests>
</Feature>
Elements.xml
 <?xml version="1.0" encoding="utf-8"?>
<Elements xmlns="https://schemas.microsoft.com/sharepoint/">
  <Module Name="MyCustomTheme" Url="_catalogs/theme" Path="MyCustomTheme" RootWebOnly="true">
    <File Url="MyCustom.thmx" Type="GhostableInLibrary" Path="MyCustom.thmx">
    </File>
  </Module>
</Elements>
For more information about deploying and installing a Feature, see Installing or Uninstalling Features. Once the Feature has been installed and activated, it will show up in the Theme Gallery that was shown in Figure 5.
Object Model Deployment
You can deploy the theme programmatically using the ThmxTheme class in the Microsoft.SharePoint.Utilities namespace. The ApplyTo method applies the theme to a site collection. Here is a code snippet:
C# Code
 using (SPWeb web = site.OpenWeb())
{
    using (ThmxTheme theme = ThmxTheme.Open(web.Site, "./_catalogs/theme/MyCustomTheme.thmx”))
    {
       theme.ApplyTo(web, false);
    }
}


