Steps to Setup SharePoint 2013 Development Environment
The most important change in SharePoint 2013 for developers is the introduction of SharePoint apps. An app for SharePoint is a small and isolated application that provides a specific bit of functionality. SharePoint apps can and have to be added to or removed from a site by the site owner. Apps have their own, isolated URLs, which are separate from the URLs of the sites where the app is being deployed to and where the app is being used. In order to provide isolation apps run in their own domain, instead of in the same domain name as your farm. Using a different domain name for apps helps prevent cross-site scripting between apps and SharePoint sites.
Each installation of an app has its own unique URL within the app domain. The app’s URL is based on a template “https://[app prefix][app hash].[app domain]/[relative site url]/[app name]. When you add an app to a site, a subweb of that site is created to host the app content. This subweb is not visible on the Site Contents page though.
You can choose whether you want your app domain to be a subdomain of the domain that hosts the SharePoint environment (option B), or whether you want to create a completely new domain for your apps (option A). Creating a new domain specifically to host your apps in is a bit more secure, but it also requires a little bit more configuration.
Below are the steps to Create a new domain to host your apps
Step 1: Access your DNS management console.
Step 2: Right click “Forward Lookup Zones” and select “New Zone…”. Click “Next”
Step 3 :Keep the default and click “Next” again.
Step 4 : On Active Directory Replication Scope page leave it to default and click "Next".
Step 5 : You now have to specify a zone name. It’s up to you what you choose here. My domain name is “mycompany.com” and for my app domain I will use “mycompanyapps.com”
Step 6 : Complete the wizard by choosing the default selelected options.
Below what I see once its configured
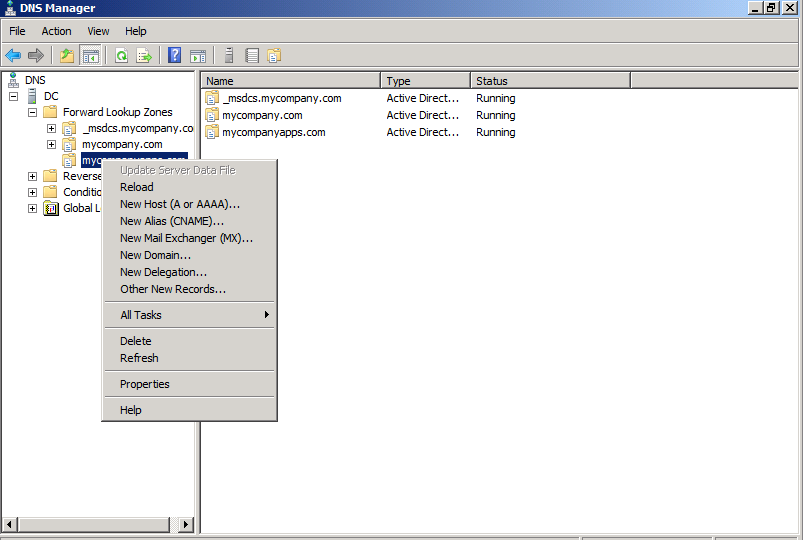
Step 7 : Right click on your new zone and select “New Alias (CNAME)"
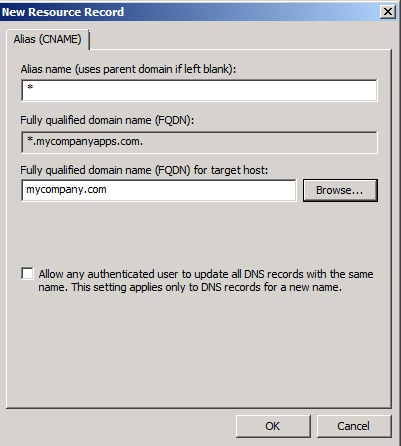
Step 8 : Fill in a * for “Alias name (uses parent domain if left blank)” Click “Browse”
- Double click on your server name
- Double click “Forward Lookup Zones”
- Double click the domain of your SharePoint environment. In my case this is “mycompany.com”.
- Select “(Same as parent folder)” and click “OK”
- Click “OK”.
Step 9: Below is what you see at the end
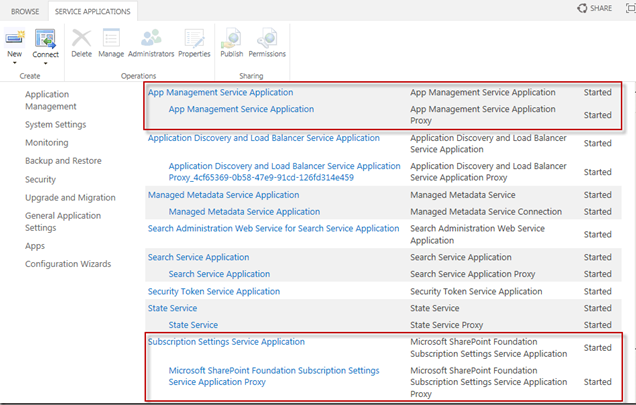
Once the above is done, then you will need to configure SharePoint 2013. Make sure App Management Service and Subscription Settings Service Application are up and running. If its not, then follow this MSDN link to configure it.
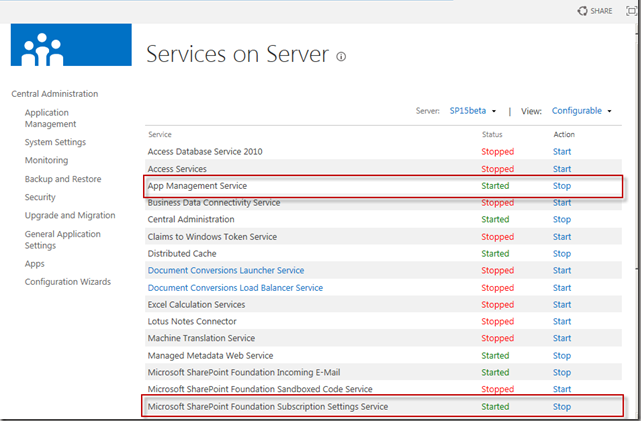
Also check if these services are started on the server as well
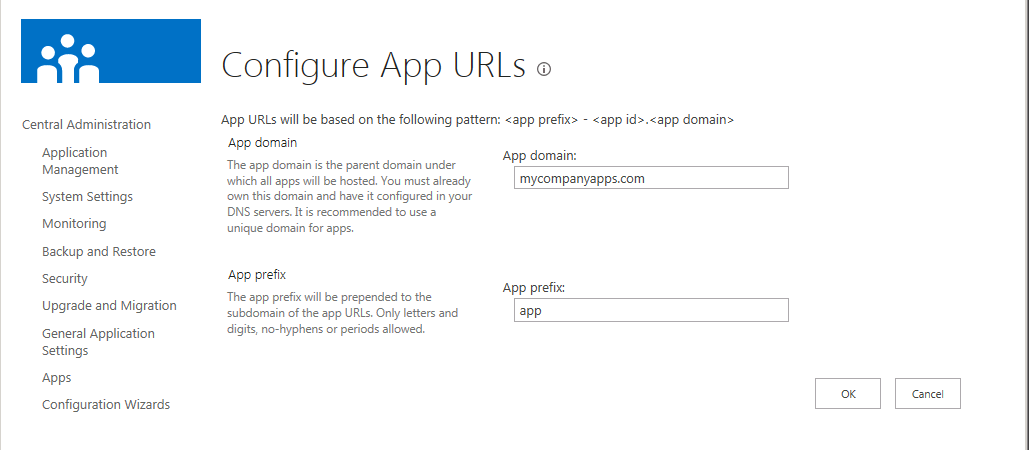
Then Go to Central Administration -> Click on “Apps” in the left side navigation -> Click “Configure App URLs”. Fill in the URL of the app domain that you configured. If you choose to use Option A the url will be something like “mycompanyapps.com”. Fill in an app prefix. This can be anything you like, although it is best to keep this short. I used “app” myself.
Thats it!!.. Now you are ready to host SharePoint 2013 apps on your SharePoint 2013 Server.

