Configuring User Name Mapping - Part 2 (Simple Mapping)
Configuring User Name Mapping - Part 2 (Simple Mapping)
Continuing the discussion from Configuring User Name Mapping - Part 1 - I will explain how to get Simple Mappings done in this post.
To rephrase, User Name Mapping (UNM) bridges the gap between the different user identification used in Windows and UNIX worlds. It's SID which identifies an object in Windows and Active Directory environment but it's UID and GID when it's a UNIX system in question. UNM is also a core authentication component in SFU World. When we are using it in conjunction with Server for NFS, UNM authenticates the incoming NFS access requests. With Client for NFS, it determines the effective UID and GID to be sent with the NFS requests to UNIX NFS servers.
UNM also provides a single point identity mapping database for all the machines running Server for NFS, Client for NFS and Interix/SUA components. For people looking for availability and clustering capabilities - you can configure UNM Server Pools and you can also run UNM on cluster nodes to achieve load balancing.
More on it later, back to Simple Mapping...
To match the Windows and UNIX identities, UNM uses Windows SAM or Active Directory to identify Windows users and UNIX files (/etc/passwd and /etc/group) or NIS domains as sources for identifying user and group information from UNIX perspective. This information is then mapped using Advanced and Simple Maps. Advanced maps are the ones that you create manually using the Administration Console while the Simple Maps are created automatically between the users and groups which have same names in Windows and UNIX databases.
It doesn't take much when creating Simple Maps apart from configuring basic things (I am assuming that you have installed the User Name Mapping service already and it's started).
First, you need to copy over the /etc/passwd and /etc/group files from your UNIX systems. Filter/Merge them so that they don't have any system account and duplicate UID/GID allocations. Now you can run this command -
mapadmin adddomainmap -d NTDomain -f Passwd/GroupDirectory
This command enables the Simple Mapping between the users and groups in Windows domain which is specified in place of NTDomain and the UNIX passwd/group files which have been stored under the directory specified in place of Passwd/GroupDirectory.
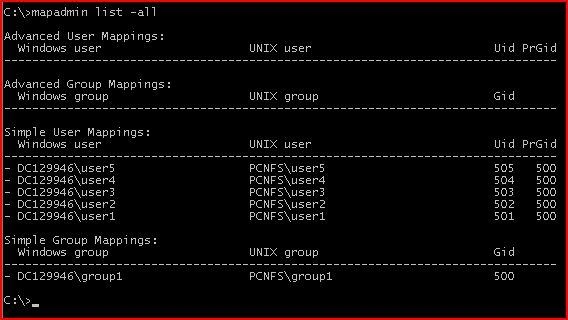
Now, you can run the following command to list all the maps -
mapadmin list -all
This lists all the maps which have been created. From my lab system -
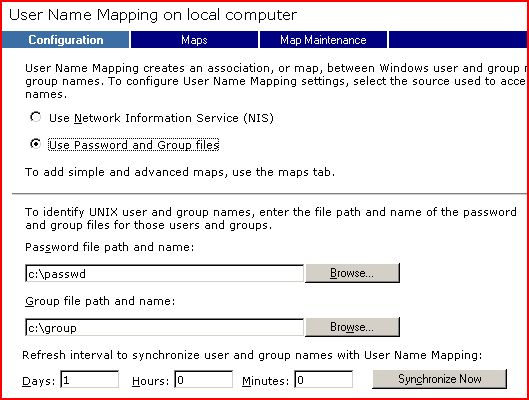
The first command we ran is equivalent of making the following changes using the GUI -
-
Defining the UNIX files as the data source -
Enabling Simple Maps -
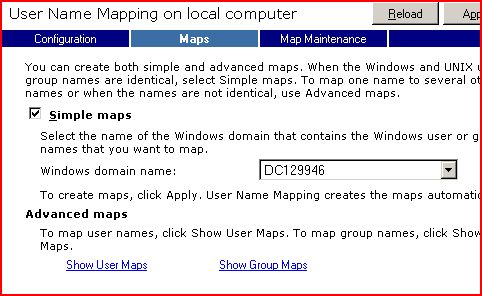
Displaying the Simple Maps -

It also takes care of enabling and creating Simple Maps for groups.
This KB article talks about installation and more command line options. I will soon post information in the form of Part 3 on UNM and talk about Advanced Mappings.