All Inside Visual Studio: Moving a Car Forward/Backward
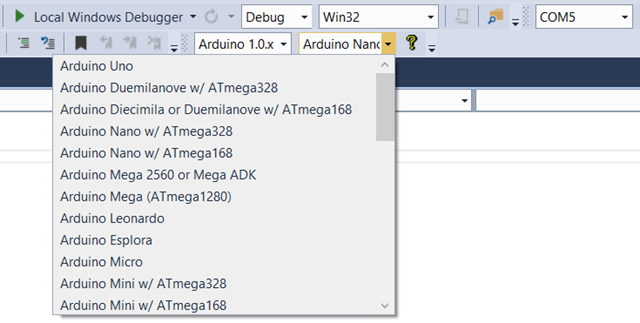
Well, because I got bored using Processing based default Arduino IDE, I have installed Visual Micro a very rich Visual Studio extension that offers you a fantastic integrated environment for Arduino based development that boasts powerful debugging capability, that too is free.
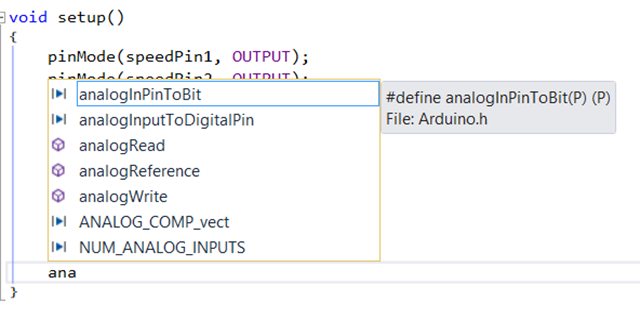
Not to mention state of the art code completion and intellisense:
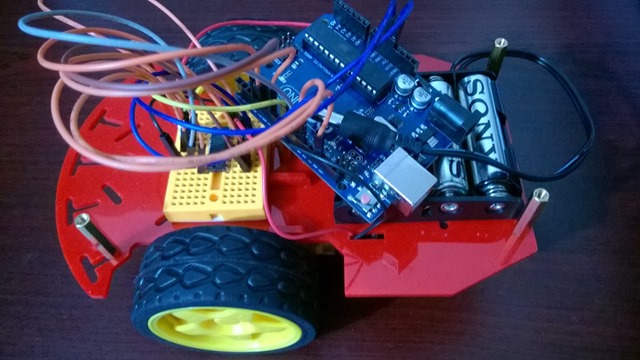
In today’s post, I would like to keep a record of how I have assembled a car chassis and made two DC motors move forward and backward controlled by an Arduino Uno and driven by a L293D IC. I have bought Magician Chassis that comes with two DC motors. A DC motor is simple and its capability is also limited, such as moving forward and backward at a specific speed. The L293D IC can set a speed to two motors at a time and change their directions when needed. I have passed unregulated voltage to the motors and I didn’t care; I just wanted to get up and running with the motors, hence you may expect this setup may damage your motors if you run for a long/little while. I’m also powering the motors as well as the L293D IC with an external 9V battery in order to draw less from the Arduino while I am giving the Arduino only 6V via 4 x 1.5V AA batteries. The IC will specifically run the motors with the power applied at its VSS (Pin 16).
Configuring the L293D
I have put Pin 8 and 16 safely into +9V since 8 and 16 are VCC and Pin 1 is Enable 1 and Pin 9 is Enable 2. Enable pins actually enable the motors. For example, if Pin 1 is put on the ground the motor connected to the left side of the IC will cease to work. If Pin 9 is put into ground, the motor connected to the right side of the pins will cease to work. Therefore, what we are going to do is that we are going to use these pins as speed controller. More about that later. I have also safely put Pin 4, 5, 12 and 13 into the ground. Other pins are setup as below:
| Motor connected to | Pin | Motor connected to | Pin |
| Left | 2 (Input 1) | Right | 10 (Input 3) |
| 3 (Output 1) | 11 (Output 3) | ||
| 6 (Output 2) | 14 (Output 4) | ||
| 7 (Input 2) | 15 (Input 4) |
Here’s the truth table based on which the motor will change direction:
| Left motor | Pin 2 | Pin 7 | Right motor | Pin 10 | Pin 15 |
| Clockwise | Low | High | Clockwise | Low | High |
| Anti-clockwise | High | Low | Anti-clockwise | High | Low |
Connecting the DC Motors to L293D
| Left motor negative | Pin 3 | Right motor negative | Pin 11 |
| Left motor positive | Pin 6 | Right motor positive | Pin 14 |
Setting up the Arduino
I have previously mentioned that Pin 1 and 9 are Enable pins and they will allow us to control the speed of the motors as well. Therefore, these need to be connected to Pulse Width Modulation (PWD) ports of an Arduino because we need to be able to pass analog values between 0-255. Notice the following Arduino setup of all the components along with Pin 1 and 9 of L293D.
| Arduino Pin | L293D Pin |
| 3 | 1 |
| 5 | 15 |
| 6 | 10 |
| 9 | 9 |
| 10 | 2 |
| 11 | 7 |
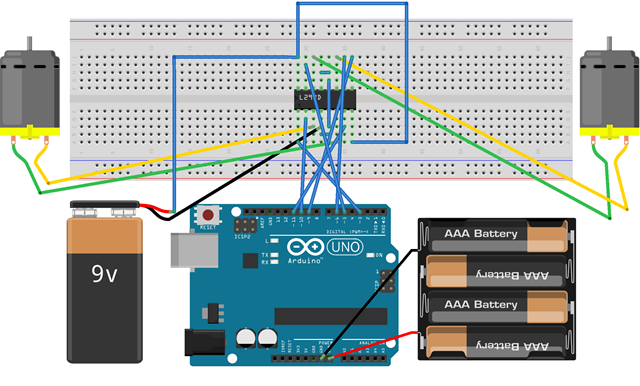
This is how it looks like:
The code
Here’s the code that runs the motors forward. If you would like to run it backward, just pass false instead of true into the move function that was written below. You will also notice that I have specified speed = 255 which is the max, and min = 0.
 int speedPin1 = 9;
int speedPin2 = 3;

int in1 = 10;
int in2 = 11;
int in3 = 6;
int in4 = 5;

int speed = 255;

void setup()
{
   pinMode(speedPin1, OUTPUT);
 pinMode(speedPin2, OUTPUT);

 pinMode(in1, OUTPUT);
   pinMode(in2, OUTPUT);
   pinMode(in3, OUTPUT);
   pinMode(in4, OUTPUT);

   analogWrite(speedPin1, speed);
  analogWrite(speedPin2, speed);
}

void loop()
{
 move(true);
}

void move(boolean forward)
{
 digitalWrite(in1, !forward);
    digitalWrite(in2, forward);

 digitalWrite(in3, !forward);
    digitalWrite(in4, forward);
}
Final Outcome
Originally posted at: https://tanzimsaqib.wordpress.com/2014/11/14/moving-a-car-forwardbackward/


