Basic Azure Diagnostics
Just as the camera is important in capturing the details of moments, logging and tracing are important in an application. Without them, you have no way to record the details when they happened. Today we will discuss how to enable and record data in an application in the cloud.
The following are the additions that will be done by Visual Studio for us when creating a web or worker role in Azure.
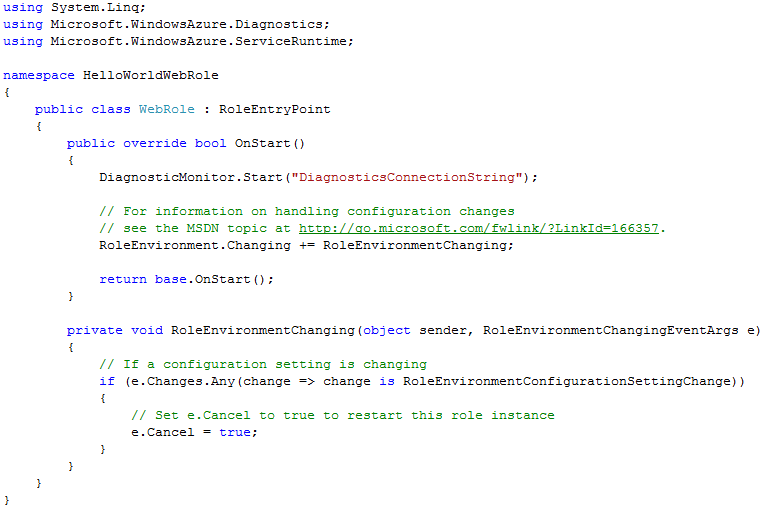
- WebRole.cs
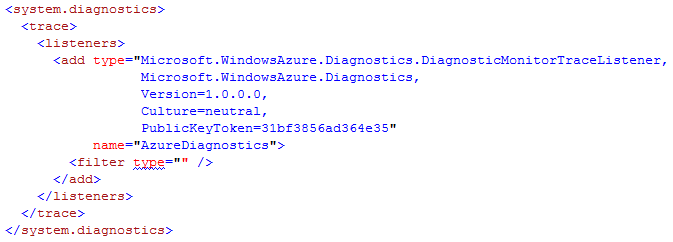
- Web.Config
We have to do the following.
- Add an Azure Storage account to the Service Configuration file.
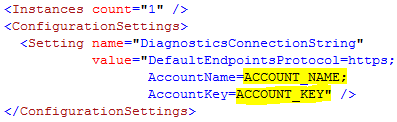
Where the ACCOUNT_NAME is the name of the blob service and ACCOUNT_KEY is the primary or secondary access key.
- Update the Diagnostic Monitor configuration to update configuration settings like the transfer period schedule from the machine to blob or the log level filter. This has to be done in the WebRole.cs before calling the Start method within OnStart.

We collect the default configuration and update the settings to start the Diagnostic Monitor with the new settings. Logs are the internal trace logs that will be saved in the WADLogsTable within the blob tables. In order to collect the event log, we will add an event log data source to it as well.

This will collect Windows Event Log entries that are within the Application channel and belong to "System Restore". The Windows Event Logs will be saved in WADWindowsEventLogsTable within the blob tables.
Additional Details on configuring the Diagnostic Monitor can be found here
- The last task is to add the code to actually trace or log the messages. The .net base classes under System.Diagnostics are supported for Windows Azure. You can use Trace class for the Logs and EventLog class for the Windows Event Logs.
Note: If you want to write an entry into the event log, you have to use an existing source. Creating a new source requires admin rights which are not supported in Azure.