Exporting and Synchronize local Database to SQL Azure
I assume that you already have a SQL Azure account with a Server name and an Administrator. Both the server name and the administrator username are written under "Server Information" on the SQL Azure Server Administration screen.
We start by establishing a connection from our SQL Server Management Studio to the SQL Azure. But for that, we must first allow our computer to be connected to SQL Azure, since SQL Azure restricts all communication as a default setting. For that, Login to your SQL Azure account.
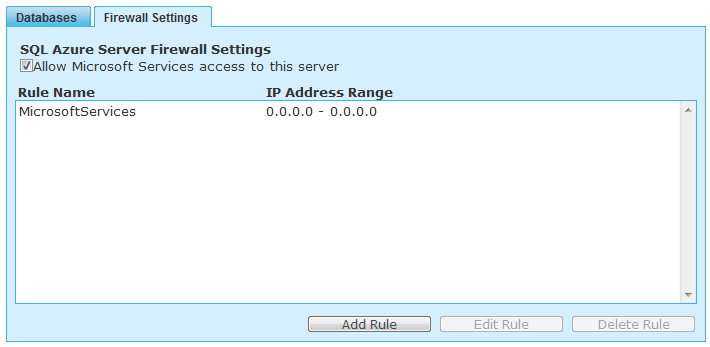
Go to Firewall Settings and check "Allow Microsoft Services access to this server. This will allow communication from Windows Azure services.
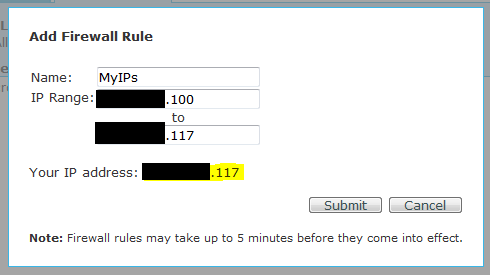
Next we want to add a rule to give access to our local machine. Click on "Add Rule" and the popup window will show up having the ip address of the local machine. Since I have 2 machines, one is 103 and one is 117, so I will give a wider limit. Once you are done, click Submit.
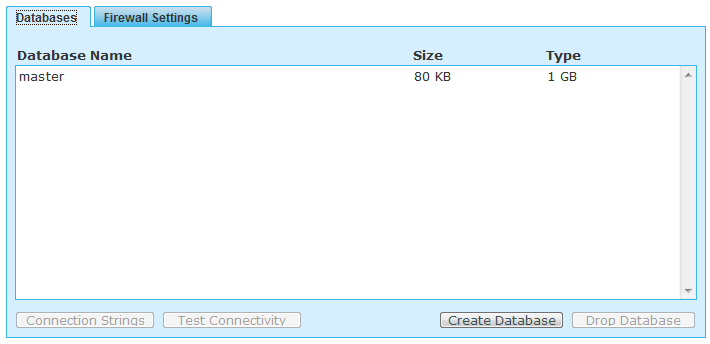
Now if you go to the "Databases" tab and select the "master" database, you can test its connectivity as well as view its connection string. I would recommend you to copy the connection string into your notepad for future reference.
Open your SQL Server 2008 R2 Management Studio and enter your SQL Azure database name (the complete name) into the Server name box and select SQL Server Authentication in Authentication. Then provide the SQL Azure Administrator username and password and click "Connect". Remember that the "Server type" has to be "Database Engine".
Note: For SQL Server 2008, you have to close the connection window and click "New Query" to connect successfully.
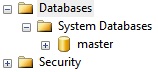
Once you are connected, you will not see any databases except for the master.
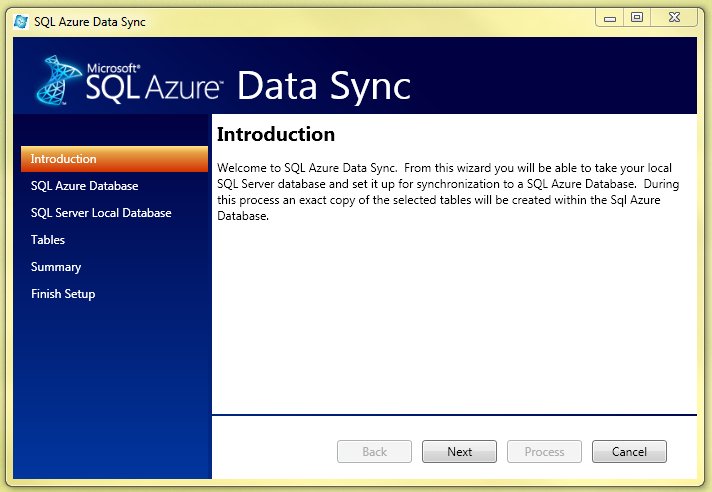
Now Launch your SQL Azure Data Sync tool to export the database schema from local to the SQL Azure database.
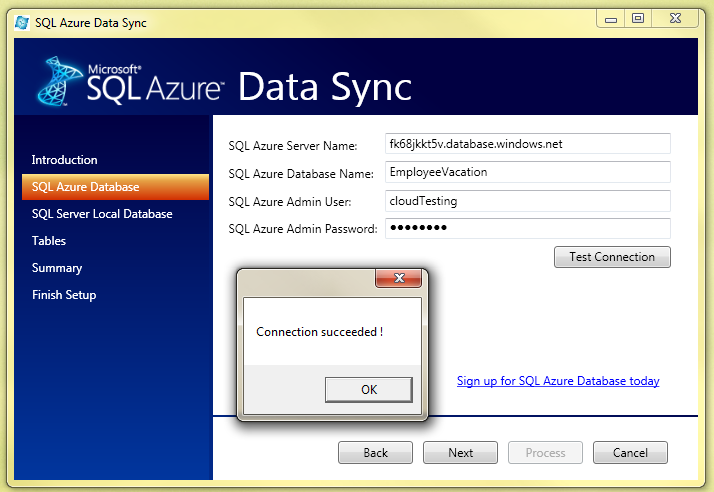
Enter the required SQL Azure Server info and test the connection. If it is succeeded, move on.
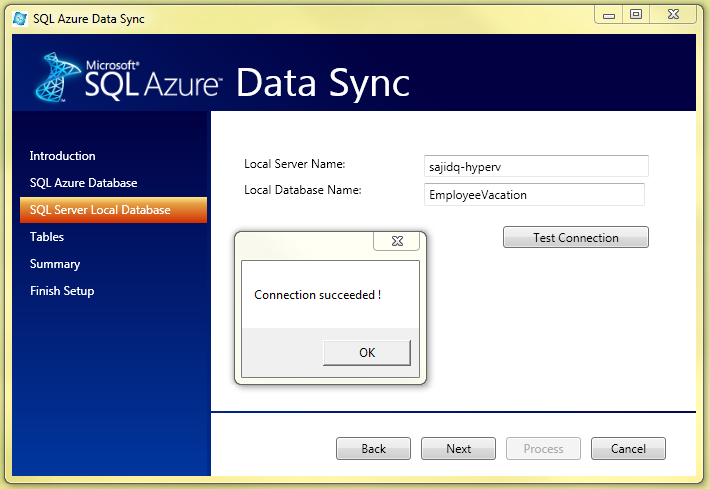
Enter the local SQL Server info and test the connection. If it is succeeded, move on.
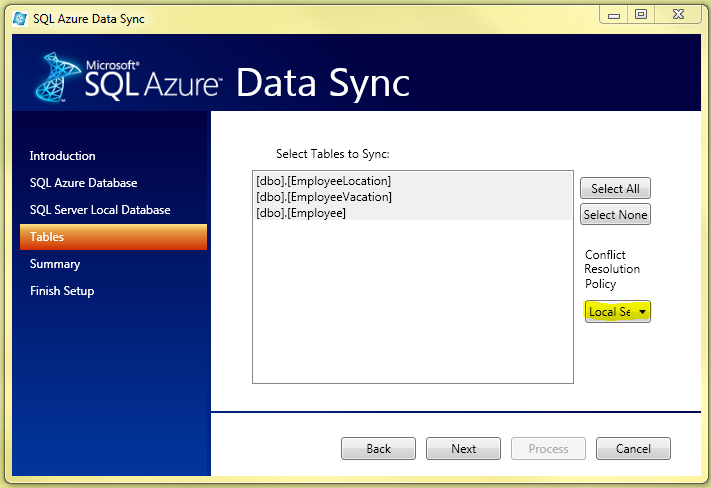
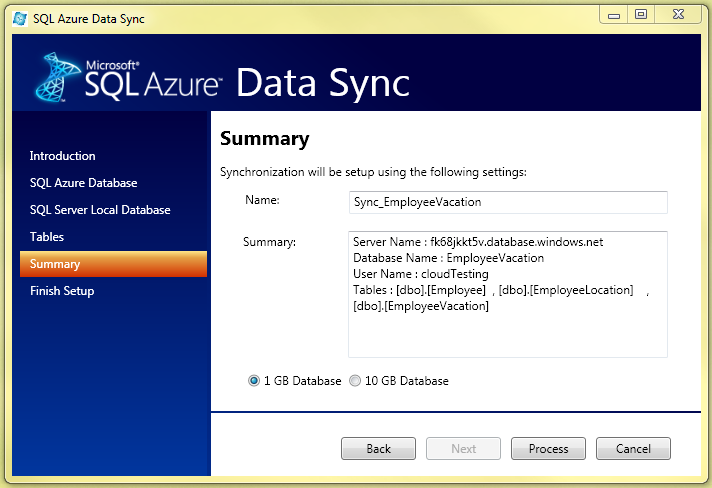
Select the tables that you want to export. Since we are exporting the database to SQL Azure for the first time, I would set the "Conflict Resolution Policy" to Local. It means that in case of conflict, the final data would be of the local database.
Rearrange the order of the tables, with the independent tables at the top, such that all the tables must have their dependent tables above them.

Review the changes and click Process to start synchronizing the two databases.

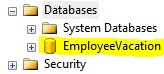
Once the synchronization is complete, go to the SQL Server Management Studio and you will see an EmployeeVacation database in SQL Azure.
The SQL Azure data sync tool created a SQL Server Agent sync job that runs once a day and synchronizes both your databases. This job is created on the SQL Server Agent of your local SQL Server containing the local database. However, in case of conflict, the data is taken from the local server. If your cloud data is your production data then you should set Azure in "Conflict Resolution Policy" in the 3rd Step of SQL Azure data sync tool.
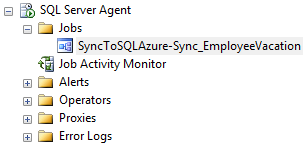
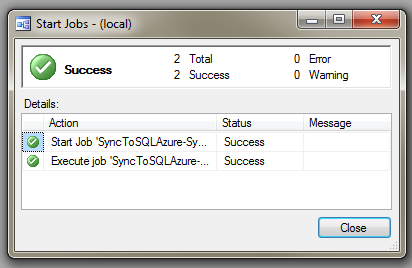
If you want to run this sync now, you can right click the job and select "Start job at Step…" and it will sync your data.
Note: At present, SQL Azure Sync Framework and Tools installation has to be 32-bit (x86), even on 64-bit machines, since x64 version creates problems while synchronizing and your job will most likely fail.
Check the data in SQL Azure database and you will see that it is synchronized with the local database.