Team Edition for Database Professionals Walkthrough
Team Edition for Database Professionals (or DB Pro for short) has two main goals:
- Manage changes to the DB
- Mitigate the risk of making those changes
To achieve #1, DB Pro extends the same ALM capabilities to database professionals that software developers have enjoyed for years, fully integrating them into the development process, as we'll see.
Key to #2 is the addition of two roles to the MSF Agile Process:
- Database Developer
- Database Administrator
These roles frequently resolve to the one person, but a major difference in the roles from DB Pro's point of view centres on access to the production database. As we'll see, the DB Dev role is isolated from the production database and works with a sandboxed database. The DB Admin role has the authority to deploy updates to the production database.
Let's take a look at how all this fits together by working through an end-to-end scenario involving
- Creating a new database project
- Adding some DB unit tests
- Making some changes and
- Deploying those changes to the production server.
Throughout we'll use the Process Guidance as an aid. The scenario is that we have an existing database (AdventureWorks) and we are going to start using DB Pro to maintain/enhance it, using the MSF Agile Process, all supported by Team Foundation Server.
Create a new Database Project
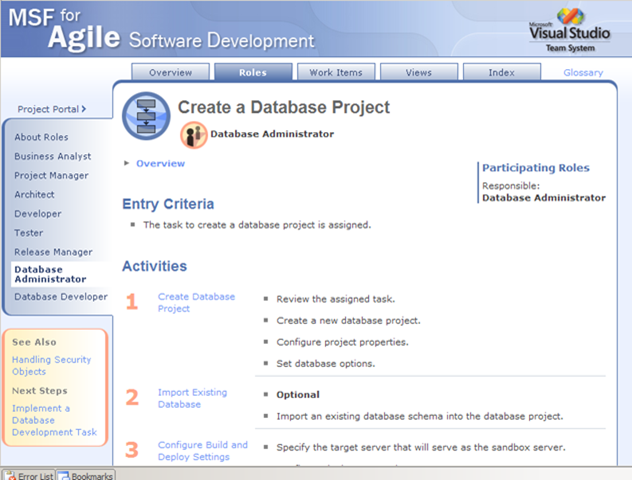
Note that detailed help on the workflows for both roles, Database Developer and Database Administrator is included in the updated Process Guidance for the MSF Agile Process. For example, below is a snapshot of the process guidance for Create a Database Project for the Database Administrator role (like all Process Guidance in Team System this appears within the IDE, so the user doesn't need to switch out of the IDE for guidance/help on a particular task.
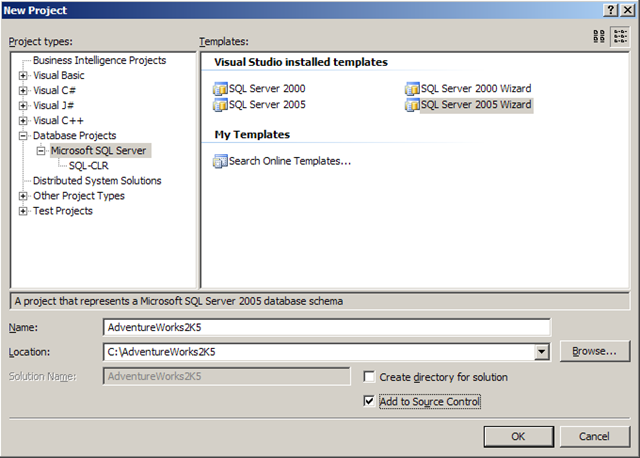
Below is the New Project dialog box - under Database Projects->Microsoft SQL Server you'll see 4 installed templates. We'll go with the SQL Server 2005 wizard, as handily enough, the steps in the wizard match the Process Guidance with steps for accepting your work item, creating the database project, setting project properties etc.
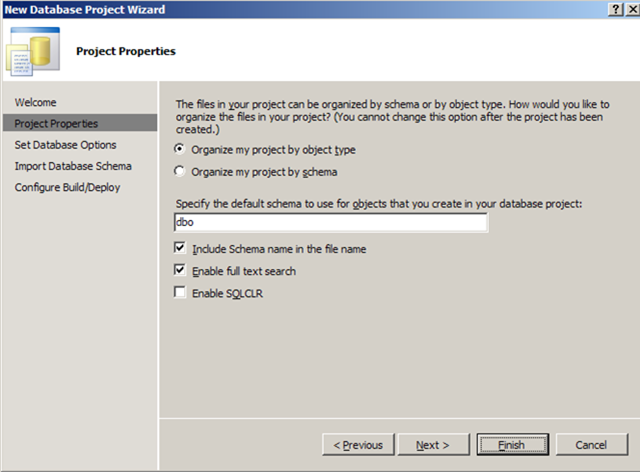
I accepted all the defaults for Project Properties and Database Options. Of note in the Project Properties here is the "Organise my project by object type" option - as we'll see, when the project is created it will have grouped items into categories such as "Stored Procedure", "Tables" etc. - each item is then a separately controlled artifact in source control with obvious benefits for concurrent changes.
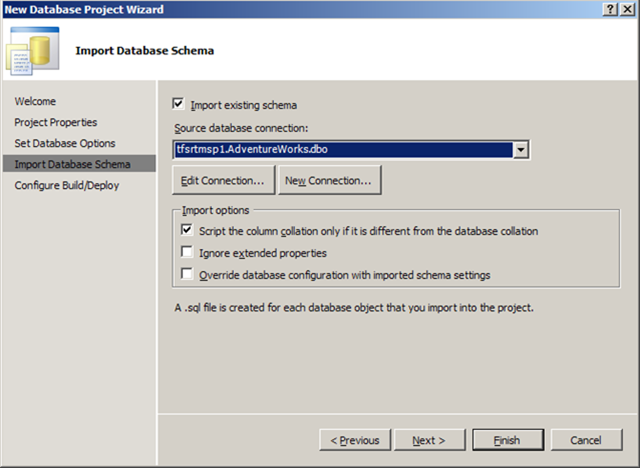
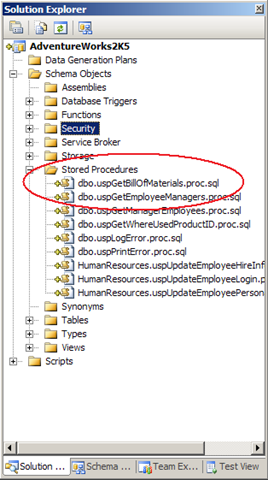
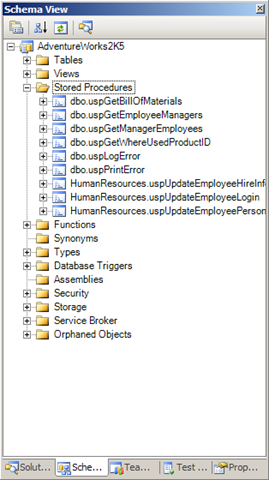
As per our scenario, we are starting from a pre-existing database - so we'll import the AdventureWorks schema and click finish (accepting defaults for Build/Deploy). The result is a new database project, which you can view using either Solution Explorer or Schema Explorer as shown below. The Solution Explorer as you'd expect gives a file-based view of your project, while Schema View is to SQL what say class view is to C# projects. Note that built into the name of each file is it's type e.g. "dbo.uspGetBillOfMaterials.proc.sql" as shown below, which is convenient.
Create a Unit Test
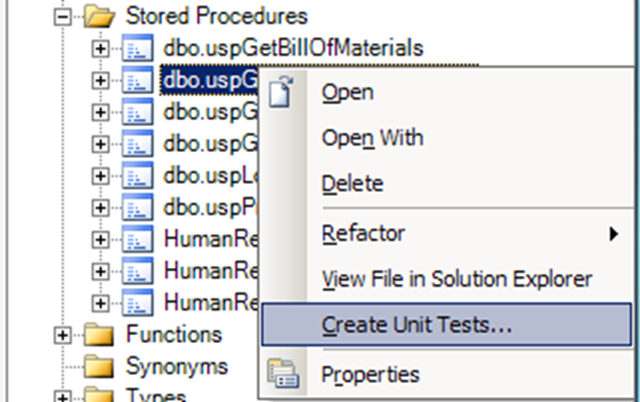
The next step in our scenario is to create a unit test (before we make any more changes, so we can be sure we haven't broken anything). In the Schema View, right-click on a stored procedure and select "Create Unit Tests" as shown below.
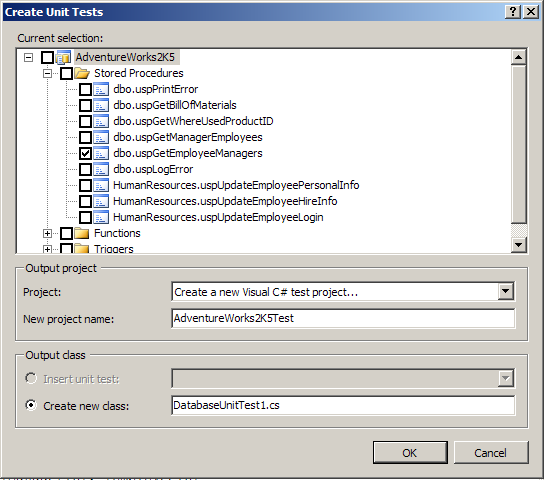
This will pop up the below dialog - note that you can create unit tests for sprocs, functions and triggers. I've selected a C# test project, but you also have the option of a VB.Net test project if you wish.
Click OK and the test project is created, along with unit test code in C# and SQL, as shown below. Note that you can specify one or more Test Conditions relating to things like execution time, row count, empty/not-empty result sets and so on. For now, I'm going to specify that the row count must be 0.
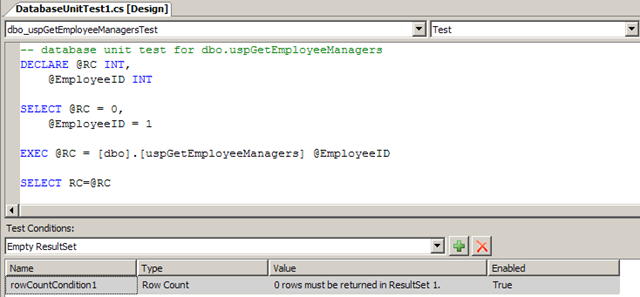
Let's run the test and see what happens! As you can see in the Test Results pane below, the test failed, because the returned rowcount was 4, not 0.

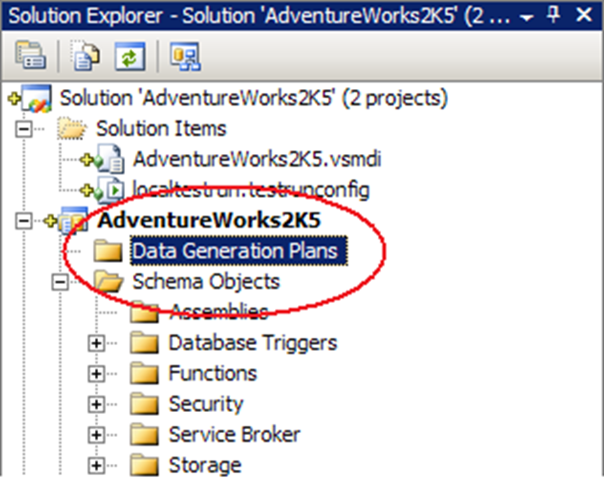
The reason for this is that I had inadvertently pointed my test at the production database (my fault!). At this point I have no test data in my sandboxed database, the result at this point for my unit test should really be 0 rows. Remember, you should be pointed at your sandboxed database - if you get a different value back here, change it in the database test configuration dialog. So how do I add test data to my sandboxed database? The answer is to add a Data Generation Plan to your database project in Visual Studio, by right clicking on the tab as shown below:
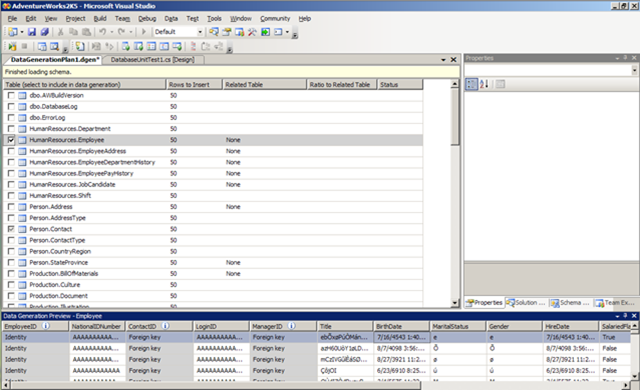
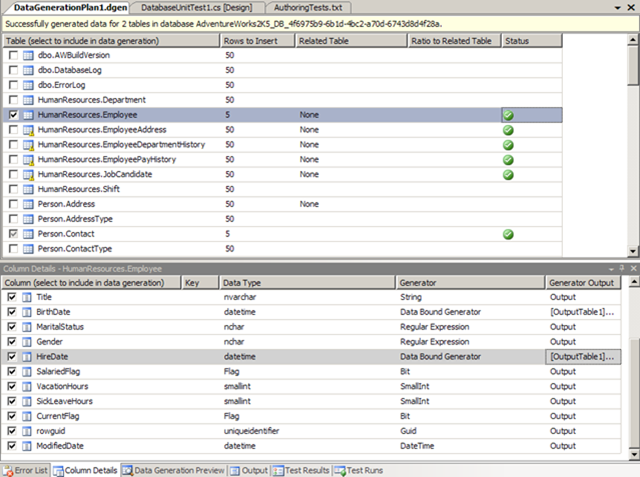
What this gives me is a list of Tables and a snapshot of sample generated data, as shown below. By default all Tables in the database are selected - I have opted to generate data only for the HumanResources.Employee table. The Person.Contact table is then selected automatically due to a FK relationship between the two tables.
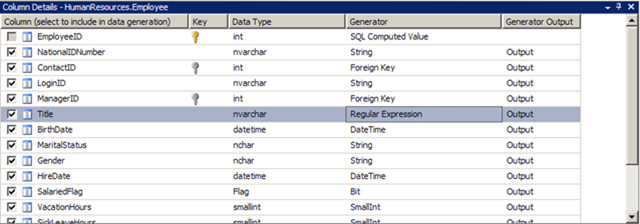
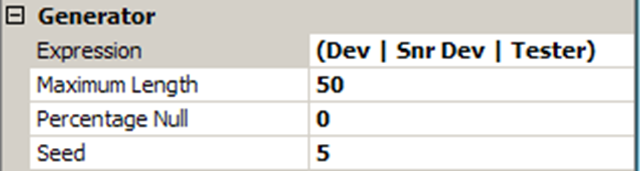
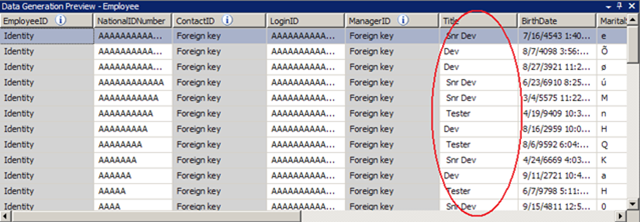
One neat feature to note here is that each column is associated with a Generator depending on the column type. You can change the default Generator (and even write your own) - for example, I've changed the generator for the Title column to use a regular expression generator, and as you can see in the snapshots below that has a knock-on effect on the generated test data. Obviously this is useful when writing your unit tests as you want the test data to be reasonably representative of what you are going to be storing in practice.
Another reason why this is important/necessary is column constraints: for example, valid Marital Status values are "S" or "M", gender values are "M" or "F". In both cases I used a regexp generator. In the case of Person.Contact.AdditionalContactInfo (which is XML) I used a databound generator to select sample data from the production database. (There were others, it's a good learning exercise!) You can test your data generation plan via the Data->Data Generator->Generate Data menu option. It will give you good diagnostic information if/when your plan fails : it's better than just running your unit test and getting an error about a failed data generation plan.
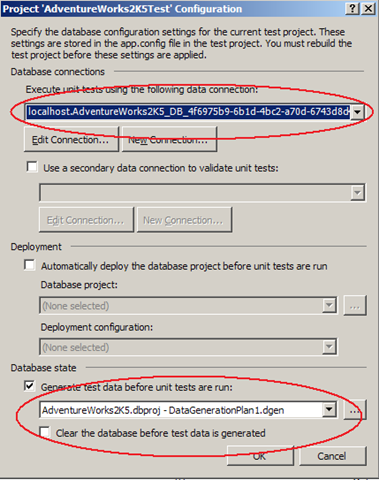
When your plan generates correctly, as shown above, you associate it with your test project via the Database Test Configuration Dialog as shown below. Note the sandboxed database!
Make some changes - refactoring
OK, so now we have a unit test for our stored procedure we can do some refactoring and be sure that we haven't broken anything. To keep it simple let's just change the name of the (only) parameter of the stored procedure.
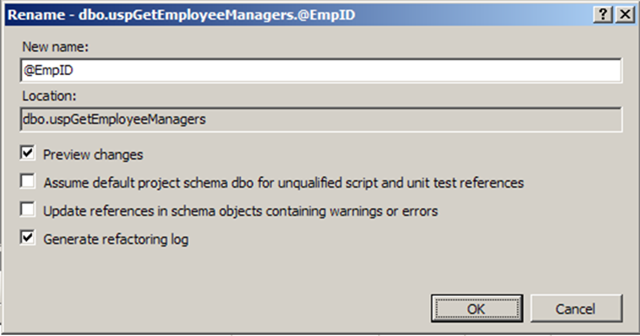
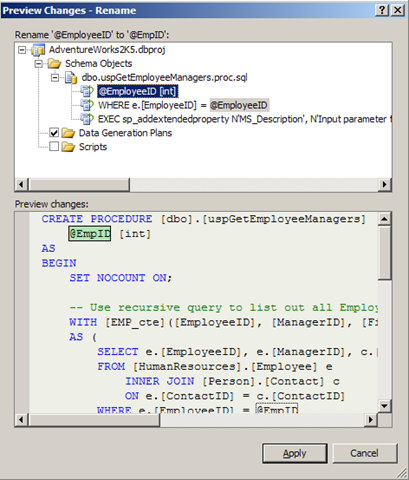
As you do when, say, refactoring in C#, you get to preview your changes, and click Apply if you're happy.
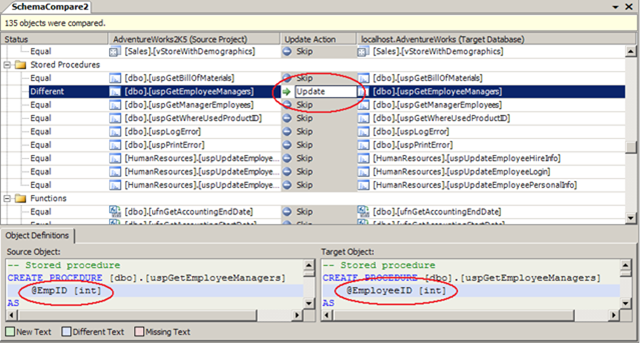
A quick re-run of our unit test shows we're good to go, so we can check everything in. At this point the DB Admin role can take over and think about deploying the solution - i.e. in our case that amounts to one change to the schema, our single refactor of the parameter name. A quick schema compare via Data->Schema Compare confirms this (note the object-based compare, much better than the old-style textual schema compare):
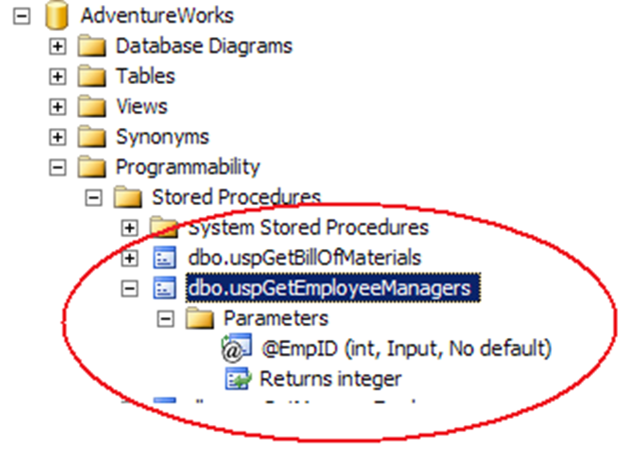
At this point the DB Admin can Deploy the changes to the production server by changing the target database name in the project, building it and finally running Deploy. Below is a snapshot from SQL Server Management studio showing the updated sproc in the AdventureWorks production database (the one from which I imported the schema originally).
Summary
DB Pro enables the DB developer / administrator with great tools for change control, testing, refactoring and applying updates to production servers. The developer works in a completely sandboxed environment, with the Admin role authorized to apply changes to the production server. Underpinning this is Team Foundation Server which provides full traceability of all changes. All in all, quite neat!