Continuous Integration with Visual Studio 2008 (“Orcas”) Team Foundation Server
I first started using Continuous Integration (CI) in 2002 when my then company started eXtreme Programming – I found it great and subsequently introduced it at every opportunity using combinations of CruiseControl / scheduled tasks and so on.
When I started using Team Foundation Server I was a little surprised(!) that CI wasn’t included in the box – it was extremely easy to create an automated build, but support for CI wasn’t included. However, this has been rectified in TFS “Orcas” and I’m glad to report that it’s a snap to set up CI. Here’s how.
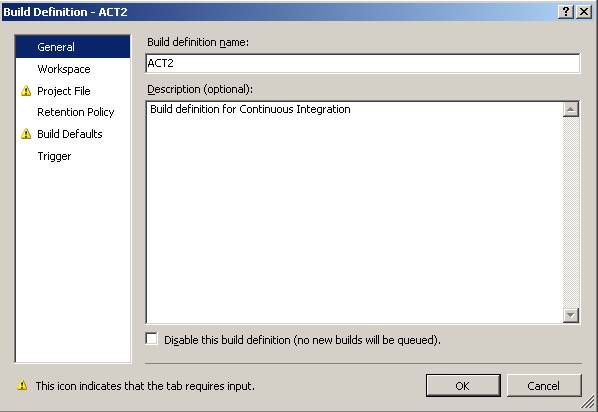
1) Create a new Build Definition from Team Explorer:
This pops up the dialog below (note that items with missing info are highlighted e.g. Build Defaults below). Enter a build definition name – ACT2 below (stands for AJAX Control Toolkit build 2 in my case), and a description of your choice.
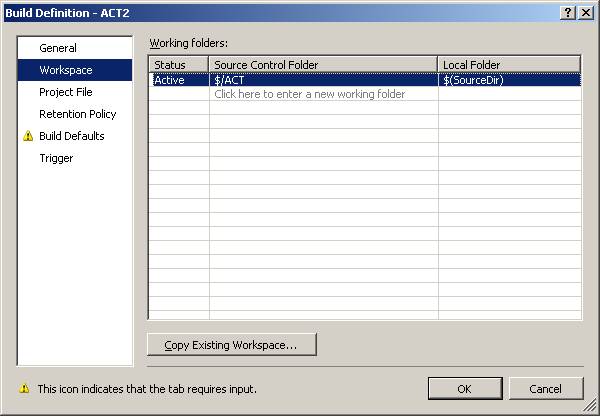
2) Set up your working folders – i.e. what’s retrieved from source control , and where it’s put on disk. For example $/ACT below is the root of the AJAX Control Toolkit snapshot in my local TFS repository.
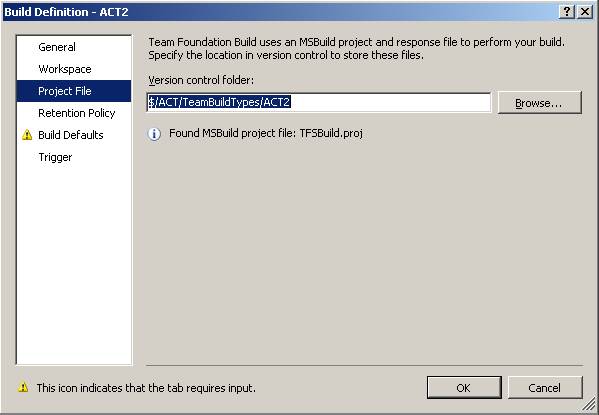
3) Specify where in source control you want your TFSBuild.proj file to live – note that you have more leeway with Orcas than in Visual Studio 2005, where it had to live under $/Projectname/TeamBuildTypes
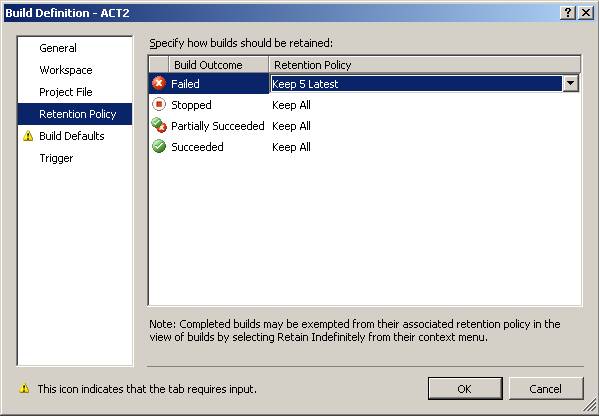
4) Specify what to do with completed builds – this is a big improvement from 2005. For example, you don’t really want to hang on to all failed builds – maybe just the most recent 5 failed builds as shown below, others will be deleted from the system. This means that you’re not needlessly using up resources on the server for failed builds. Aside: note you can also delete builds from within the IDE now, another improvement from 2005...so you can hide all the evidence of failed builds :-)
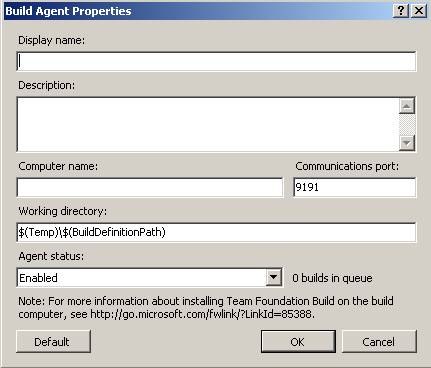
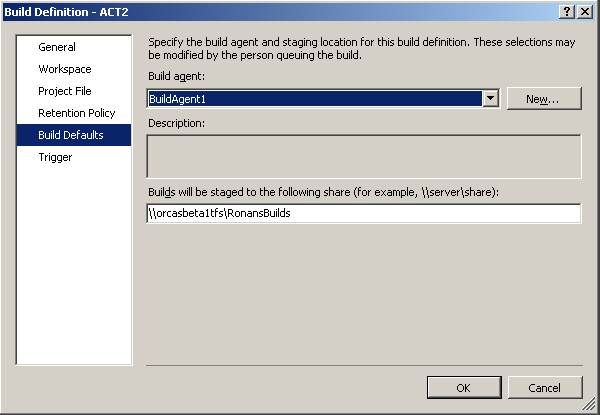
5) Set up what build agent to be used and were to put the build after completion (a network share). If this is your first Build Definition on this server you’ll need to set up some Build Agent details - I just used the default port number and machine name OrcasBeta1TFSVSTSW which was the name of my virtual PC.
6) Now the interesting bit – what kicks off a build? You have plenty of options here as shown in the dialog below:

a. Check-ins do not trigger a new build – you may want to use this for a lightweight build definition which e.g. doesn’t gather coverage figures. Very useful for when you’ve just checked in a fix (remember you can have multiple build definitions, so another could be set up to do automated builds).
b. Build each check-in – kick off a build as a result of each check-in, which is likely to result in a lot of builds. Personally I prefer
c. Accumulate check-ins- e.g. do a build no more than every 60 minutes
d. Build every week on the following days – a little like what you could do with TFS 2005 and a scheduled task, with the addition that...
(as makes sense) all of the above apply only if there have been changes since the last build. Option c seems to me to be the best for CI.
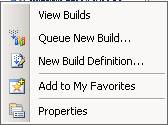
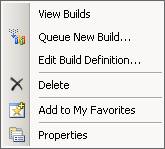
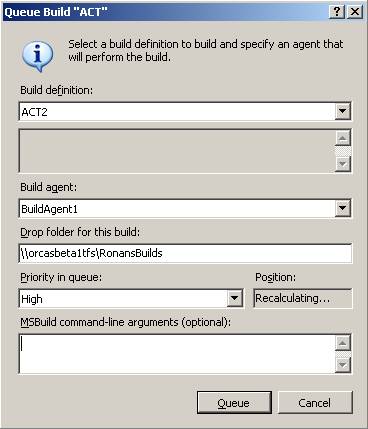
That’s it! You can add a new build to the queue by right clicking your build definition in Team Explorer which brings up the below menu, and selecting Queue New Build.
One thing of interest here is that you can supply command line args to MSBuild. This could be used to include/exclude certain long-running tests...
So that’s the support for CI from TFS Orcas. Of course just because something builds successfully doesn’t mean it won’t fall over the first time you run it...So you really need to ramp up your testing so that you can have a measure of confidence that when your build passes that the codebase is in good shape.
Also, your team need to buy into the mentality that breaking the build makes them persona non grata on the team...All of this will be familiar to those of you using agile methods. I’ve found the following sequence to be useful:
1) Accept a given work item
2) Get Latest Version of source code to your disk
3) Make sure it builds locally (and that tests pass – worth checking did the last automated build pass)
4) Start writing tests/production code
5) When ready to check-in, do another Get Latest Version to pick up recent check-ins, merge as necessary and make sure all tests still pass locally.
6) Check in
7) The CI build will kick off a build e.g. in the next 60 minutes and run all tests...
8) Rinse and repeat.