Starting a fresh Progressive Web App project from scratch with ReactJs,Redux ,Typescript ,TDD and VSCode Debugging
If you are going to start a new React Project from scratch,You may want to have many feature sets to start with e.g. Progressive Web Apps support , Typescript with a build system, how to do TDD ,How to debug,How to architect the codebase and the list goes on.So this basic skeleton will make sure everything is in order from start.
Easiest thing to do is start with a boiler plate project which will give you with lot of options out of the box.Some good ones are
- create-react-app
- React-Boilerplate
- react-redux-boilerplate
- and there are lot of starter kits to choose from
For example,following are some of the feature-sets I want in my new project
- Progressive Web Apps support
- TypeScript(Or Flow) support
- Setting up a Mock API Server
- BDD/TDD
- Debugging support in your IDE (VS Code)
- Routing Support
- use Redux(Or Mobx)
In this we are going to start a new project from scratch with Create-React-App and then add features one by one. Create-React-App is ideal just hides/expose enough details at the same time let's you add these features one by one and once you want more advanced features,you can eject and get a full power . For completed app, Please find the source code here
Starting up
Creating a new project with Create-react-app is explained here but the gist of it are couple of commands
 npm install -g create-react-app

create-react-app my-app
This will create your project called my-app but do not create your project just yet, we will do that in our next section .
Under the hood create-react-app sets up a fully functional, offline-first Progressive Web App .
Progressive Web Apps (PWAs) are web applications that use advanced modern web technologies that behave like native app e.g. load instantly, regardless of the network state or respond quickly to user interactions
PWA with TypeScript support
JavaScript's lack of static types is a major concern especially if you are used to Java/.NET. Static type checking helps you iron out a lot of bugs at compile time and also make your app from running into any Undefined errors :) .In this case we are going to use TypeScript
and alsol get following features out of the box
- PWA capabilities
- a project with React and TypeScript
- linting with TSLint
- testing with Jest and Enzyme, and
- state management with Redux
We will use create-react-app but we will have to pass the react-scripts-ts as scripts-version argument. What this will do is add react-scripts-ts as development dependency and your underlying build system can now understand typescript whenever you test/run your project:
create-react-app my-pwa-app --scripts-version=react-scripts-ts
So if you look closely ,you will see following lines in your packages.json file
  "scripts": {
 "start": "react-scripts-ts start",
 "build": "react-scripts-ts build",
 "test": "react-scripts-ts test --env=jsdom",
 "eject": "react-scripts-ts eject"
 }
Just to compare,without react-scripts-ts ,it will be
 scripts": {
 "start": "react-scripts start",
 "build": "react-scripts build",
 "test": "react-scripts test --env=jsdom",
 "eject": "react-scripts eject"
 }
So every time you run commands like npm start or npm build you are basically calling it though the react-scripts-ts.
react-scripts-ts is the magic which will make sure your project is using TypeScript at development time which is installed as development dependency
 Once you have your application created, you will have following structure


my-pwa-app
├── README.md
├── node_modules
├── package.json
├── .gitignore
├── public
│ └── favicon.ico
│ └── index.html
│ └── manifest.json
└── src
│ └── App.css
│ └── App.tsx
│ └── App.test.tsx
│ └── index.css
│ └── index.tsx
│ └── logo.svg
│ └── registerServiceWorker.ts
├── tsconfig.json
├── tsconfig.test.json
├── tslint.json
In this registerServiceWorker.ts is the script which will make use of service workers to make our application Progressive Web App.
This script registers a service worker to serve assets from local cache in production. This lets the app load faster on subsequent visits in production, and gives it offline capabilities. To learn more about the pros and cons, read this. This link also includes instructions on opting out of this behavior.
Setting up Mock API server for your backend
Normally you will be having a back-end in another project (e.g. asp.net web api ) ,Java (e.g. spring boot ) When you develop/debug/run a front end application,you have two options
- Run a backend everytime you run your frontend for debugging
- Setup a fake api which will behave like your backend but without running any of the dependent services
We will be using json-server to set up the fake API backend
You can install it as globally or locally as i use it for multiple projects,I install as globally
npm install -g json-server
json-server works with a json file which we will call db.json
 {
  "blogs": [
    { "id": 1, "title": "json-server", "author": "rohith" }
  ],
  "comments": [
    { "id": 1, "body": "some comment", "postId": 1 }
  ]
}
Once you have your db.json file,you can run command
json-server --watch db.json
Now if you go to https://localhost:3000/blogs/1, you'll get
{ "id": 1, "title": "json-server", "author": "rohith" }
Now we have to add json-server to our react project but what I need is a visual studio like experience, when I press F5 or start debugging,it should automatically start both front end and fake api backend
We will use two npm packages concurrently and cross-env and to make the job easy . concurrently can run multiple concurrent scripts (or commands ) at the same time. cross-env will make sure the command runs fine on all enviroments(whether you develop on windows or Linux or MacOS) .So to summarise,we need 3 npm packages and following configuration in our packages.json file
 "scripts": {
    "start": "concurrently --kill-others \"cross-env NODE_PATH=src react-scripts-ts start\" \"npm run server\"",
    "build": "cross-env NODE_PATH=src react-scripts-ts build",
    "test": "cross-env NODE_PATH=src react-scripts-ts test --env=jsdom",
    "eject": "cross-env NODE_PATH=src react-scripts-ts eject",
    "server": "json-server --watch --port 3001 ./src/api/db.json"
  }
So I added another another script called server where i specified the port as 3001 and also put the db.json file n the api folder
"server": "json-server --watch --port 3001 ./src/api/db.json"
and start has been modified to run two commands concurrently using concurrently
"start": "concurrently --kill-others \"cross-env NODE_PATH=src react-scripts-ts start\" \"npm run server\""
Now every time we do npm start, it will start our fake api and also start the react app
VSCode Debugging support
We will try to setup Visual Studio Code to debug our ReactJS project with following feaures
- Setting breakpoints, including in source files when source maps are enabled
- Stepping, including with the buttons on the Chrome page
- The Locals pane
- Debugging eval scripts, script tags, and scripts that are added dynamically
- Watches
- Console
First You need to install a Visual Studio Code Extension VS Code -Debugger for chrome then add the following launch.json to your project .vscode/launch.json
 {
 "version": "0.2.0",
 "configurations": [{
 "name": "Chrome",
 "type": "chrome",
 "request": "launch",
 "url": "https://localhost:3000",
 "webRoot": "${workspaceRoot}/src",
 "sourceMapPathOverrides": {
 "webpack:///src/*": "${webRoot}/*"
 }
 }]
 }
Once you have the launch.json, now
- Start your app by running
npm start - start debugging in VS Code by pressing
F5or by clicking the green debug icon
put a breakpoint in any tsx or ts file and debug to oblivion :)
How to BDD/TDD/E2E Testing
Create React App uses Jest as its test runner . To learn more follow the running tests
In our App, We will try to do 3 types of tests
- Unit Testing
- Component testing
- End to End Testing(E2E)
Unit testing
Unit Testing is used testing the smallest possible units of our code, functions. Let's work with a Hello World in a Typescript and Jest
We will create a directory called common inside src and add all common domain objects here
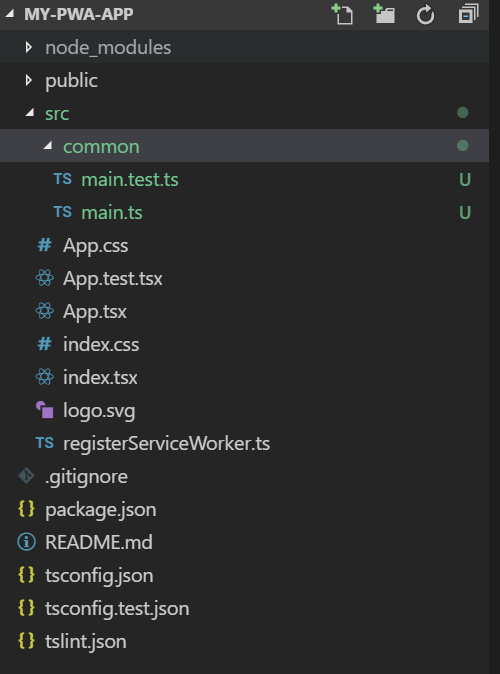
add a main.ts inside the common directory
[js]
class Greeter {
greeting: string;
constructor(message: string) {
this.greeting = message;
}
greet() {
return "Hello, " + this.greeting;
}
}
class Calculator {
add(a:number,b:number) {
return a+b;
}
sub(a:number,b:number) {
return a-b;
}
}
export {Greeter,Calculator}
[/js]
And a main.test.ts
[js]<br data-mce-bogus="1">
import { Greeter, Calculator } from './main';
it('greets the world', () => {
let greeter = new Greeter("World");
expect(greeter.greet()).toEqual("Hello, World");
});
it('add/substract two numbers', () => {
let calc = new Calculator();
expect(calc.add(2, 3)).toEqual(5);
expect(calc.sub(3, 2)).toEqual(1);
});
[/js]
When we run the test using npm test, it will give
 E:\Projects\my-pwa-app>npm test

> my-pwa-app@0.1.0 test E:\Projects\my-pwa-app
> react-scripts-ts test --env=jsdom

PASS src\common\main.test.ts
 √ greets the world (4ms)
 √ add/substract two numbers (1ms)

Test Suites: 1 passed, 1 total
Tests: 2 passed, 2 total
Snapshots: 0 total
Time: 2.234s
Ran all test suites related to changed files.
Component Testing
Component testing let's you test your components using one level deep (Shallow Rendering ) or test components and all it's children
I have a component called Header which is using Link component from react-router .But using ShallowRendering we can test just Header component
[js]
import * as React from "react";
import { Link } from 'react-router';
export interface HeaderProps {
type: string,
id?: string
}
export default class Header extends React.Component<HeaderProps, object> {
public renderLinks(): JSX.Element {
const { type } = this.props;
if (type === "merchants_index") {
return (
<ul className="nav nav-pills navbar-right">
<li style={{ paddingRight: '10px' }} role="presentation">
<Link className="text-xs-right" style={{ color: '#337ab7', fontSize: '17px' }}
to="/merchant/new">New Merchant</Link>
</li>
</ul>
);
}
else
return (
<div></div>
);
}
public render() {
return (
<div>
<nav className="navbar navbar-default navbar-static-top">
<div id="navbar" className="navbar-collapse collapse">
<div className="container">
<ul className="nav nav-pills navbar-left">
<li style={{ paddingRight: '10px' }} role="presentation">
<Link className="text-xs-right"
style={{ color: '#337ab7', fontSize: '17px' }} to="/">Home</Link>
</li>
</ul>
{this.renderLinks()}
</div>
</div>
</nav>
</div>
);
}
}
[/js]
Now lets add required packages ,we will be using Enzyme and the shallow API to test
npm install --save enzyme enzyme-adapter-react-16 react-test-renderer
[js]</div>
<pre>import * as React from 'react';
import * as enzyme from 'enzyme';
import Header from './Header';
import * as Adapter from 'enzyme-adapter-react-16';
enzyme.configure({ adapter: new Adapter() });
it("renders 'new merchant' link in the header when type is merchants_index",()=>{
const header=enzyme.render(<Header type="merchants_index"/>);
expect(header.find(".text-xs-right").text()).toContain("New Merchant")
});
[/js]
End to End (E2E) testing
for E2E testing,we will be using testcafe and also the typescript support is good. You basically have to install testcafe and testcafe-react-selectors .
You can find more details on this here or here
Support for Routing
There are many routing solution but ReactRouter is the most popular one,to add it to our project
npm install --save react-router-dom
First we have to add the require wiring up in index.tsx , you can see this in index.tsx inside the repository
[js]
<pre>import * as React from 'react';
import * as ReactDOM from 'react-dom';
import { Provider } from 'react-redux';
import { Router, browserHistory } from 'react-router';
<strong>import routes from './routes';</strong>
import registerServiceWorker from './registerServiceWorker';
import './index.css';
import 'bootstrap/dist/css/bootstrap.css';
import 'bootstrap/dist/css/bootstrap-theme.css';
import { createStore } from 'redux';
import { merchantsReducer } from './reducers/index';
import { StoreState } from './types/index';
const store = createStore<StoreState>(merchantsReducer);
ReactDOM.render(
<Provider store={store}>
<strong><Router history={browserHistory} routes={routes} /></strong>
</Provider>,
document.getElementById('root') as HTMLElement
);
registerServiceWorker();</pre>
[/js]
And we will create a our Routes in Routes.tsx file
[js]
import * as React from 'react';
import { Route,IndexRoute } from 'react-router';
import App from './App';
import MerchantIndex from './components/MerchantsIndex';
import HomePage from './components/Jumbotron';
import MerchantDetailsContainer from './containers/MerchantDetailsContainer'
export default (
<Route path="/" component={App}>
<IndexRoute component={MerchantIndex}/>
<Route path="merchants/new" component={HomePage}/>
<Route path="merchants/:id" component={MerchantDetailsContainer}/>
</Route>
)
[/js]
Using Redux (Or Mobx)
Here also you can choose to use Redux or MobX and both has it's pros and cons or checkout this comparison .But in this case we are going to use Redux .But with redux comes a bunch of other requirements :
- Defining our app's state
- Adding actions
- Adding a reducer
- How to use Presentation and container Components
We have State in TypeScript
[js]
<pre>import {Merchant} from '../common/Merchant';
export interface MerchantsList
{
merchants:Merchant[];
error:any;
loading:boolean;
}
export interface MerchantData
{
merchant:Merchant|null;
error:any;
loading:boolean;
}
export interface StoreState
{
merchantsList:MerchantsList;
newMerchant:MerchantData;
activeMerchant:MerchantData;
deletedMerchant:MerchantData;
}</pre>
Now we will have a directory named actions created and inside that I will have
<pre>import axios, { AxiosPromise } from 'axios';
import * as constants from '../constants'
import { Merchant } from '../common/Merchant';
import { ROOT_URL } from './index';
//import { RESET_ACTIVE_MERCHANT } from '../constants';
export interface FetchMerchant {
type: constants.FETCH_MERCHANT,
payload: AxiosPromise<any>
}
export interface FetchMerchantSuccess {
type: constants.FETCH_MERCHANT_SUCCESS,
payload: Merchant
}
export interface FetchMerchantFailure {
type: constants.FETCH_MERCHANT_FAILURE,
payload: any
}
export interface ResetActiveMerchant {
type: constants.RESET_ACTIVE_MERCHANT
}
export type MerchantDetailAction = FetchMerchant | FetchMerchantSuccess | FetchMerchantFailure | ResetActiveMerchant;
export function fetchMerchant(id:string): FetchMerchant {
const request = axios({
method: 'get',
url: `${ROOT_URL}/merchants/${id}`,
headers: []
});
return {
type: constants.FETCH_MERCHANT,
payload: request
};
}
export function fetchMerchantSuccess(merchant: Merchant): FetchMerchantSuccess {
return {
type: constants.FETCH_MERCHANT_SUCCESS,
payload: merchant
};
}
export function fetchMerchantFailure(error: any): FetchMerchantFailure {
return {
type: constants.FETCH_MERCHANT_FAILURE,
payload: error
};
}
export function resetActiveMerchants(): ResetActiveMerchant {
return {
type: constants.RESET_ACTIVE_MERCHANT
};
}
[/js]
I also have Presentational and Container components created and you can see all this action in github project https://github.com/rohithkrajan/react-redux-ts
Hope this helps!