Install and configure Reporting Services for SharePoint 2010 Integration
There are many ways to setup SSRS for SharePoint integration. In this post, we will describe steps to configure SSRS for SharePoint on multiple servers. In particular, when Reporting server is installed on the SharePoint server.

First computer is the SharePoint server. We will need to install Reporting services and Reporting services add-in on the SharePoint server:
- Run the SQL setup from the installation media to install the Reporting sercices feature without configuration
- Once the installer launches, click New Installation or add features to an existing installation
- Wait for the setup support files to be installed
- At the Feature Selection prompt, click on the checkbox next to Reporting Services. Click Next

- At the Instance Configuration prompt, fill in a name for the Report Server instance and specify a file path. Click Next

- When prompted for Service account, enter a service account to be used to run Reporting Services on the SharePoint server

- At the Reporting Services Configuration prompt, select "Install, but do not configure the report server."

Configure Reporting services on SharePoint server
- Launch Reporting Service Configuration Manager (Start > All programs > Microsoft SQL Server 2008 R2 > Configuration Tools > Reporting Services Configuration Manager)

- When the tool first launches, it will prompt you for the Reporting server name and the Report server instance. Ensure you enter the SharePoint server name for server name and Report server instance you have created in previous steps when you installed the reporting services feature on the sharepoint server. Click Connect.

- If the service is not already started, click on the Start button. Click Apply.
- At the Service account prompt, enter the service account the reporting service should run under. Click Apply.
- At the Web Service URL prompt, accept the default values OR enter 8080 for TCP Port. Ensure the URL is using the SHarePoint server. Click Apply.

- At the Database prompt, click Change Database to configure settings for SQL database
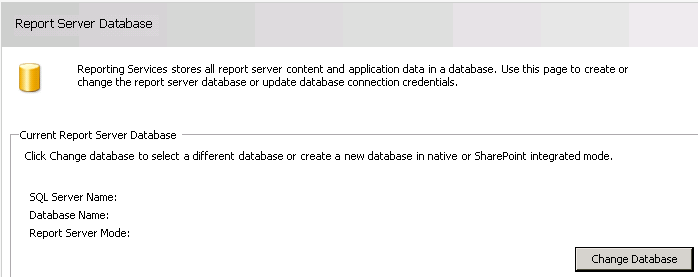
- At the Change Database prompt, select the radio button to Create a new report server database
- At the Connect to Database Server prompt
- ensure you enter the SQL instance you are running on the SQL server (not the default value given on the SharePoint server)
- Authentication type should be Current User - Integrated Security, ensure the current user has sys_admin access on the SQL server to create new databases
- Click Test Connection to ensure the information is correctly entered. Click Next

- At the Database Prompt, enter a name for the new ReportServer Database and select "SharePoint Integrated" as the Server mode for Report services. Click Next.

- At the Credentials prompt, select "Service Credentials", and enter the Service account the Report Service is running under to make sure the same account has all the necessary permission granted on the SQL server.
- Wait for the process to finish.
- At the Report Manager URL prompt, accept the default and click Apply

- At this point, we have configured most things for Reporting server. Go back to the Web Service URL, and click on the URL we have set earlier, it should launch your browser and you should be able to see information about the reporting server.
Configure SSRS add-in in SharePoint Central Admin
- Launch SharePoint Central Admin > General Application Settings > click Reporting Services Integration
- Ensure Report Server Web Service URL is the same URL was the one we set in the previous steps.
- For Authentication Mode, set it to Windows Authentication
- For Credential, specify the service account used to run Reporting Services
- For Activate the Reporting Services feature, ensure Activate feature in all existing site collections" is selected.
- Click OK

- Once all the configurations are set, you will see confirmation indicating service account has access to the Reporting service database, service account has been added to the WSS_WPG windows group, and activation of the feature has been successful.
Create Reports and publish to Reports library
- From a computer with SQL Server Business Intelligence Development Studio, launch the program from Start > Program
- Once the application is launched, File > New > Project
- From Solution Explorer, right-click Reports > Add New Report
- From Report Wizard, select an existing datasource from the Shared data source dropdown or create a new data source
- To create a new data source, click New data source radio button
- Click Edit button
- From Connection Properties, select Server Name dropdown to find the sql instance you want to connect to
- Select a database from the "Select or enter a database name"
- Click OK
- Click Next
- Click within the Query String field to enter the SQL query for this report, example: select id from Customer. Click Next
- Select Tabular or Matrix, Next
- Continue to click Next and configure the report. Lastly, enter a name for the report. Click Finish
- From a SharePoint site, you need to create two libraries
- Site Actions > More options > At the Create prompt, click Library > Select Report Library, name it Reports (for example)
- Site Actions > More options > At the Create prompt, click Library > Select Data Connection Library, name it DataConnection (for example)

- Copy these URLs
- From SQL Server Business Intelligence Development Studio project, configure settings for the project to deployment
- From Solution Explorer, right-click the Report project > Properties
- Ensure you use the URLs of the Reports and Dataconnection library we just copied from previous step
- If we are changing the credential to a service account instead of a user, we need to change OverwriteDatasources to "False" to ensure the changes we set in SharePoint does not get ovewritten.

-
- Click Apply, click OK
- Right-click on the project, click Build then Deploy
To ensure Reports run using a service account, instead of the user:
- From SharePoint, navigate to the Data connection library. Click the data source used by the report.
- Ensure to change the Credential to "Stored credentials" and specify the service account, then select "User as windows credentials". Click Test Connection to make sure it can connect to the data source.

- Because this is a change in SharePoint, we need to ensure properties of the project indicates that OverwriteDatasources is set to "False" to ensure the changes we set in the previous step does not get ovewritten.