Connect Visual Studio to TFS
- From a computer with Visual Studio installed, Start > Microsoft Visual Studio 2010
- If the program is launched for the first time, select the default programming language you would like to use
- From Visual Studio, configure connection to a TFS
- Once Visual Studio is launched, from the left, click "Connect to Team Foundation Server"

-
- From the Connect to Team Project window, click the "Servers" button to add the TFS server
- Click "Add" button
- From Add Team Foundation Server window, enter the url of the TFS you want to connect to in the "URL of Team Foundationation Server" field
- Click OK
Once the TFS connection has been added, sync with TFS Projects
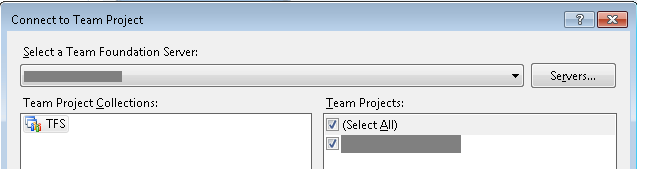
- From the Connect to Team Project window, you should see all the Team Project Collections and Team Projects you have access to
-
- From the list of Team Projects on the right, select the checkboxes next to the projects you want to sync with
- Click Connect
- From the right, you should see the project listed in the Team Explorer pane
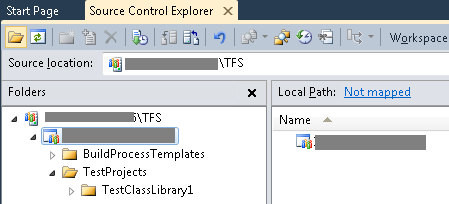
- Double-click "Source Control" to view all items in the project
- The Source Control Explorer pane should be launched, you should see all the folders and files within the project
- If you are connecting to the TFS project for the first time, configure a local path to map file sync
- click the project name under the TFS server name, to the right, note the local path value is "Not mapped"
- Click "Not mapped" and choose a local path you want to sync the files
- Once the local path is set, right-click the project name under the TFS server name, choose "Get Latest Version" to get all latest updates
- click the project name under the TFS server name, to the right, note the local path value is "Not mapped"
Once you have the latest files, add new items to the TFS project
- Right-click the project name under the TFS server name, choose "Add Items to Folder"
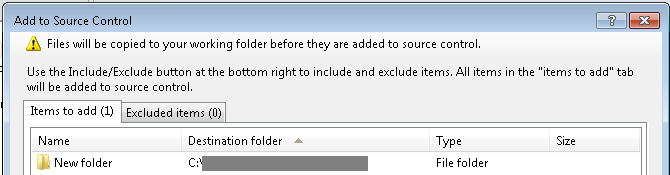
- From the "Add to Source Control" window, "Look in" dropdown will be set to the mapped local path by default. It is recommended that you move files you want to add to source control to this file location since your future updates and file sync will be done on files within this file location.
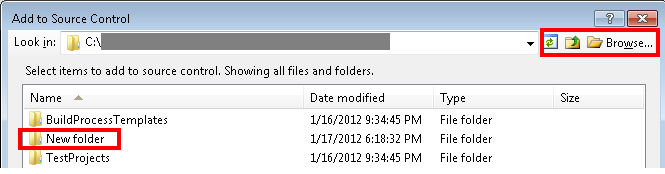
- (Optional)If you want to add files from other locations, click the Browse button at the top right of the window and select the folder/files you want to add to source control. If you want to add the whole folder, you may need to go up one level to select the whole folder. NOTE: This option will create a copy of those folders/files within the default mapped local path you have set for the project. Future updates will be made on files within the mapped local path. [If you want to map folders/files from another server/domain, click Browse and right-click Computer to "Map network drive" . ]
-
-
- Select the folder/files you want to add to source control, click Next
-
-
-
- Click Finish
Once the folders/files are added, you should see a yellow plus icon in front of new items under the TFS project
-
Check-in your latest changes (IMPORTANT: Ensure you get the latest from the server before checking in your personal changes)
- Right-click the project name under the TFS server name, choose "Check In Pending Changes"
- From the "Check In - Source Files" window, enter comments for this check-in and select/deselect items you want to check into the source control
- Click "Check In" button
Compare with previous versions
- From Source Control Explorer, navigate to the file with previous versions
- Right-click the file, from the context menu, select "View History"

-
- This will launch the History pane, you should see a list of all changesets with timestamp, status, user who checked it in, and comments. Right-click on each changeset, select "Compare" to see line by line comparision.
- If you want to revert the file back to a previous version, right-click a changeset, then select "Get this Version". NOTE: This will change your local copy to a previous version. You still need to check in the changes if you decide to keep your changes.