Windows Phone Applications - Map, Pivot and Panorama controls
Today, I'll write about three new controls in Windows Phone Applications - the Map, Pivot and Panorama controls. These controls should be in the next release of the free developer tools as they didn't make the beta.
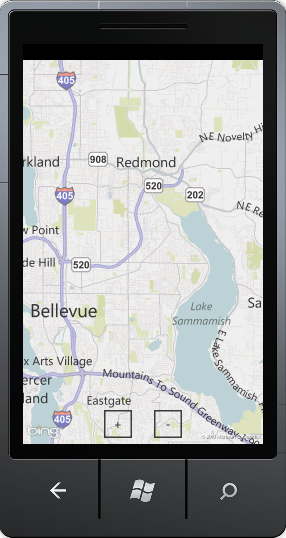
The Silverlight Bing Map control allows you to integrate an immersive mapping solution with gestures-enabled zooming and panning in your Windows Phone applications.
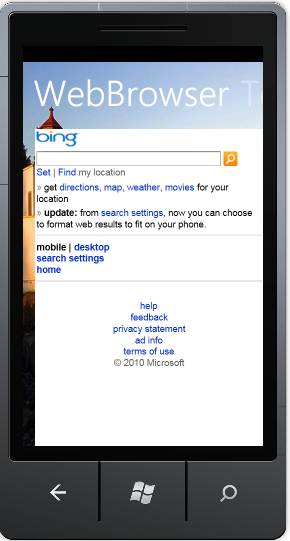
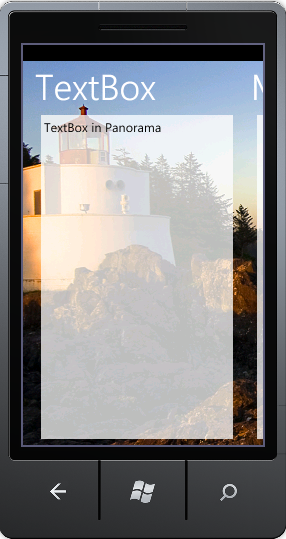
The Pivot and Panorama are the navigation controls that are used extensively on Windows Phone 7. The difference is that the Pivot is a lot like the TabControl designed for the phone, while the Panorama offers a unique way to view content by using a long horizontal canvas that extends beyond the confines of the screen.
A Map control:
A Pivot containing a WebBrowser and a TextBox:
And a Panorama containing a couple of TextBox controls:
To use these controls, right-click on References in the Solution Explorer and add reference to Microsoft.Phone.Controls and Microsoft.Phone.Controls.Maps. Then add the following xmlns declaration to your xaml:
xmlns:controls="clr-namespace:Microsoft.Phone.Controls;assembly=Microsoft.Phone.Controls"
xmlns:map="clr-namespace:Microsoft.Phone.Controls.Maps;assembly=Microsoft.Phone.Controls.Maps"
Xaml for the Map control:
<Grid x:Name="LayoutRoot" Background="Transparent">
<map:Map ZoomBarVisibility="Visible" ZoomLevel="12" Center="47.63641255621237, -122.13312149047851" />
</Grid>
Xaml for the Pivot containing a WebBrowser and a TextBox:
<controls:Pivot>
<controls:Pivot.Background>
<ImageBrush ImageSource="Lighthouse.jpg" />
</controls:Pivot.Background>
<controls:PivotItem Header="WebBrowser">
<phone:WebBrowser Name="webBrowser1" Source="https://www.bing.com" />
</controls:PivotItem>
<controls:PivotItem Header="TextBox">
<TextBox />
</controls:PivotItem>
</controls:Pivot>
Xaml for the Panorama containing a couple of TextBox controls:
<controls:Panorama>
<controls:Panorama.Background>
<ImageBrush ImageSource="Lighthouse.jpg" />
</controls:Panorama.Background>
<controls:PanoramaItem Header="TextBox">
<TextBox />
</controls:PanoramaItem>
<controls:PanoramaItem Header="More Text" >
<TextBox />
</controls:PanoramaItem>
</controls:Panorama>
Note: I've omitted the CredentialsProvider property setting on the Map control, so if you run this xaml, you'll see some text on the map to sign up for a Bing Maps developer account. You can sign up for free at https://www.bingmapsportal.com/.
Edit: I've separated the Map, Pivot and Panorama controls. Also added that these new controls will be in the next release of the free developer tools as they didn't make the beta.