Performing app-only operations on SharePoint Online through Azure AD
As all the shock and aw announcements were made this week at //build, Microsoft quietly turned on the ability to make app-only calls into SharePoint Online using Azure AD. The enables a whole new variety of scenarios that SharePoint Online and ACS couldn’t alone deliver (such as leveraging multiple services secured by Azure AD). It also provides a more secure way of performing background operations against Office 365 services (more on that later). In this post, I will provide a step-by-step outline for creating a background process that talks to SharePoint Online and can run as an Azure Web Job.
Azure AD App-only vs. ACS App-only
Before jumping into the technical gymnastics of implementation, you might wonder why not just use SharePoint and appregnew.aspx/appinv.aspx to register an app that has app-only permissions? After all, this is a popular approach and has been well documented by numerous people including myself. Well, consider the scenario where you want a background or anonymous service to leverage more than just SharePoint. Applications defined through Azure Active Directory can leverage the full breadth of the common consent framework. That is, they can connect to any service that is defined in Azure AD and offers application permissions. Secondly, these applications (are in my opinion) a little more secure since their trust is established through a certificate instead of an application secret that ACS uses.
Getting Started
Applications defined in Azure AD are allowed to make app-only calls by sharing a certificate with Azure AD. Azure AD will get the public key certificate and the app will get the private key certificate. Although a trusted certificate should be used for production deployments, makecert/self-signed certificates are fine for testing/debugging (similar to local web debugging with https). Here are the steps to generate a self-signed certificate with makecert.exe and exporting it for use with Azure AD.
Part 1: Generate a Self-signed Certificate
1. Open Visual Studio Tools Command Prompt
2. Run makecert.exe with the following syntax:
| makecert -r -pe -n "CN=MyCompanyName MyAppName Cert" -b 12/15/2014 -e 12/15/2016 -ss my -len 2048Example:makecert -r -pe -n "CN=Richdizz O365AppOnly Cert" -b 05/03/2015 -e 05/03/2017 -ss my -len 2048 |
3. Run mmc.exe and add snap-in for Certificates >> My user account
4. Locate the certificate from step 2 in the Personal certificate store
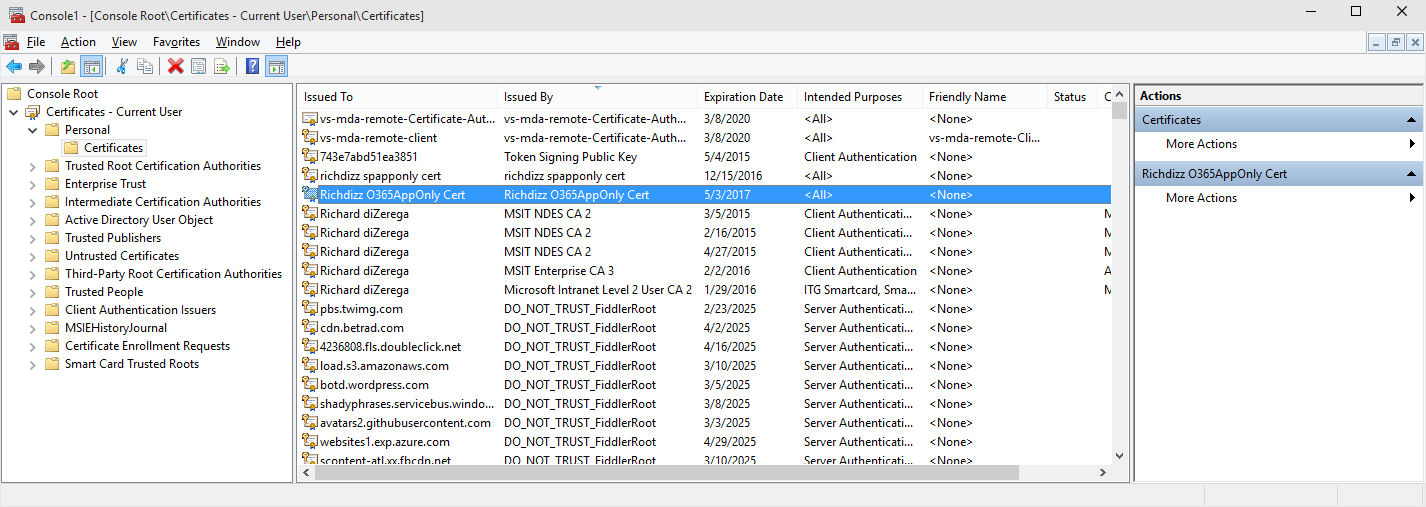
5. Right-click and select All tasks >> Export
6. Complete the Certificate Export Wizard twice…once with the private key (specify a password and save as .pfx) and once without the private key (save as .cer)
Part 2: Prepare the certificate public key for Azure AD
1. Open Windows PowerShell and run the following commands:
| $certPath = Read-Host "Enter certificate path (.cer)"$cert = New-Object System.Security.Cryptography.X509Certificates.X509Certificate2$cert.Import($certPath)$rawCert = $cert.GetRawCertData()$base64Cert = [System.Convert]::ToBase64String($rawCert)$rawCertHash = $cert.GetCertHash()$base64CertHash = [System.Convert]::ToBase64String($rawCertHash)$KeyId = [System.Guid]::NewGuid().ToString()Write-Host $base64CertWrite-Host $base64CertHashWrite-Host $KeyId |
2. Copy the values output for $base64Cert, $base64CertHash, and $KeyId for Part 3
Part 3: Create the Azure AD App
1. Log into the Azure Management Portal and go to the Azure Active Directory for your Office 365 tenant
2. Go to the Applications tab and select click the add button in the footer to manually add an Application
3. Select “Add an application my organization is developing”
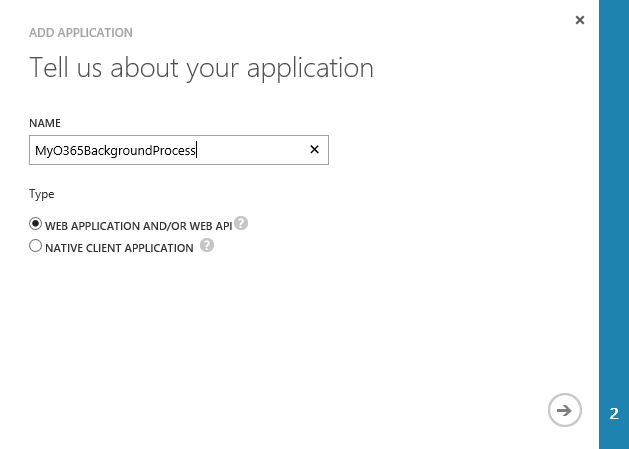
4. Give the application a name, keep the default selection of “Web Application and/or Web API” and click the next arrow
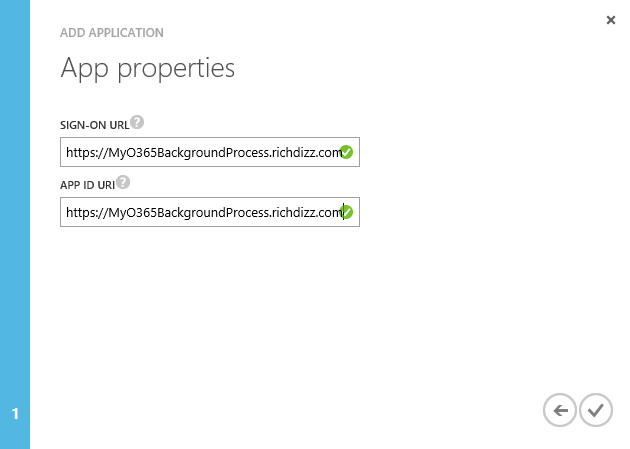
5. Enter a Sign-on URL and App ID Uri (values of these don’t really matter other than being unique) and click next to create the application
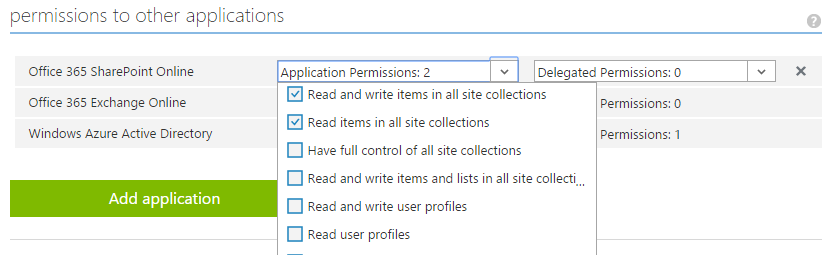
6. Click on the “Configure” tab and scroll to the bottom of the page to the section titled “Permissions to other applications”
7. Select the desired “Application Permissions” such as permissions to SharePoint Online and/or Exchange Online and click the Save button in the footer
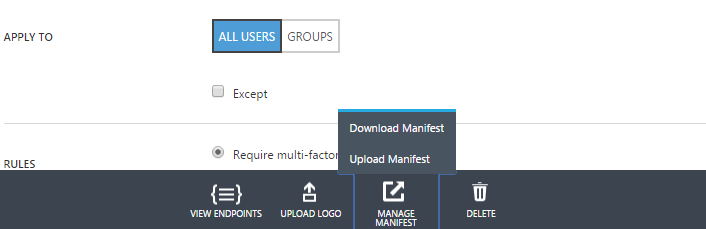
Part 4: Configure certificate public key for App
1. Click the Manage Manifest button in the footer and select “Download Manifest” to save the app manifest locally
2. Open the downloaded manifest file and locate the empty keyCredentials attribute
3. Update the keyCredentials attribute with the following settings:
Some Title
| "keyCredentials": [ { "customKeyIdentifier": "<$base64CertHash FROM ABOVE>", "keyId": "<$KeyId FROM ABOVE>", "type": "AsymmetricX509Cert", "usage": "Verify", "value": "<$base64Cert FROM ABOVE>" } ],Example: "keyCredentials": [ { "customKeyIdentifier": "r12cfITjq64d4FakvA3g3teZRQs=", "keyId": "e0c93388-695e-426b-8202-4249f8664301", "type": "AsymmetricX509Cert", "usage": "Verify", "value": "MIIDIzCCAg+gAwI…shortened…hXvgAo0ElrOgrkh" } ], |
4. Save the updated manifest and upload it back into Windows Azure using the same Manage Manifest button in the footer (select “Upload Manifest” this time)
5. Everything should now be setup in Azure AD for the app to run in the background and get app-only access tokens from Azure AD.
Building the background process
I used the Visual Studio console application template to build my background service. Just the normal template with Nuget packages for the Azure Active Directory Authentication Libraries (ADAL) and JSON.NET. In fact, most of the code is exactly like a normal .NET project that leverages ADAL and makes REST calls into Office 365. The only difference is the leverage of the certificate private key being passed into the authenticationContext.AcquireTokenAsync method using the ClientAssertionCertificate class.
A few important notes:
- Although an app-only AAD app can be multi-tenant, it cannot use the /common authority. You must determine the tenant id to tack onto the authority (ex: request id_token response on authorize end-point)
- My method for storing the certificate and private key is atrocious and only done this way for brevity. Azure Key Vault is a really good solution for security these sensitive items and is outlined HERE
Console Applications with App-only AAD Tokens
using Microsoft.IdentityModel.Clients.ActiveDirectory;using Newtonsoft.Json;using System;using System.Collections.Generic;using System.Linq;using System.Net.Http;using System.Net.Http.Headers;using System.Security.Cryptography.X509Certificates;using System.Text;using System.Threading.Tasks; namespace MyO365BackgroundProcess{ class Program { private static string CLIENT_ID = "4b7fb8dd-0b22-45a2-8248-3cc87a3560a7"; private static string PRIVATE_KEY_PASSWORD = "P@ssword"; //THIS IS BAD...USE AZURE KEY VAULT static void Main(string[] args) { doStuffInOffice365().Wait(); } private async static Task doStuffInOffice365() { //set the authentication context //you can do multi-tenant app-only, but you cannot use /common for authority...must get tenant ID string authority = "https://login.windows.net/rzna.onmicrosoft.com/"; AuthenticationContext authenticationContext = new AuthenticationContext(authority, false); //read the certificate private key from the executing location //NOTE: This is a hack...Azure Key Vault is best approach var certPath = System.Reflection.Assembly.GetExecutingAssembly().Location; certPath = certPath.Substring(0, certPath.LastIndexOf('\\')) + "\\O365AppOnly_private.pfx"; var certfile = System.IO.File.OpenRead(certPath); var certificateBytes = new byte[certfile.Length]; certfile.Read(certificateBytes, 0, (int)certfile.Length); var cert = new X509Certificate2( certificateBytes, PRIVATE_KEY_PASSWORD, X509KeyStorageFlags.Exportable | X509KeyStorageFlags.MachineKeySet | X509KeyStorageFlags.PersistKeySet); //switchest are important to work in webjob ClientAssertionCertificate cac = new ClientAssertionCertificate(CLIENT_ID, cert); //get the access token to SharePoint using the ClientAssertionCertificate Console.WriteLine("Getting app-only access token to SharePoint Online"); var authenticationResult = await authenticationContext.AcquireTokenAsync("https://rzna.sharepoint.com/", cac); var token = authenticationResult.AccessToken; Console.WriteLine("App-only access token retreived"); //perform a post using the app-only access token to add SharePoint list item in Attendee list HttpClient client = new HttpClient(); client.DefaultRequestHeaders.Add("Authorization", "Bearer " + token); client.DefaultRequestHeaders.Add("Accept", "application/json;odata=verbose"); //create the item payload for saving into SharePoint var itemPayload = new { __metadata = new { type = "SP.Data.SampleListItem" }, Title = String.Format("Created at {0} {1} from app-only AAD token", DateTime.Now.ToShortDateString(), DateTime.Now.ToShortTimeString()) }; //setup the client post HttpContent content = new StringContent(JsonConvert.SerializeObject(itemPayload)); content.Headers.ContentType = MediaTypeHeaderValue.Parse("application/json;odata=verbose"); Console.WriteLine("Posting ListItem to SharePoint Online"); using (HttpResponseMessage response = await client.PostAsync("https://rzna.sharepoint.com/_api/web/Lists/getbytitle('Sample')/items", content)) { if (!response.IsSuccessStatusCode) Console.WriteLine("ERROR: SharePoint ListItem Creation Failed!"); else Console.WriteLine("SharePoint ListItem Created!"); } } }} |
Conclusion
There you have it…performing background processing against SharePoint Online (and other Office 365 services) using app-only tokens from Azure AD. You can download the solution from the following GitHub repo: https://github.com/richdizz/MyO365BackgroundProcess