Image Overlays with Bing Maps (Native)
A while back I wrote a blog posts called Image Overlays with Bing Maps (JavaScript). In this blog post we saw a couple of different ways to overlay an image on the map and bind it to a bounding box such that it stays correctly positioned when panned and scales as you zoom the map. In this blog post we are going to look at two different methods for doing this in the Native Bing Maps SDK for Window Store Apps. The first method will consist of creating a custom control that stretches and positions an image as the map is zoomed and panned. The second method will make use of the Custom Polygon control from a recent blog post. We will overlay the image on the custom polygon using an image brush.
Full source code for this blog post can be downloaded from the MSDN Code Samples here.
Creating the Base Project
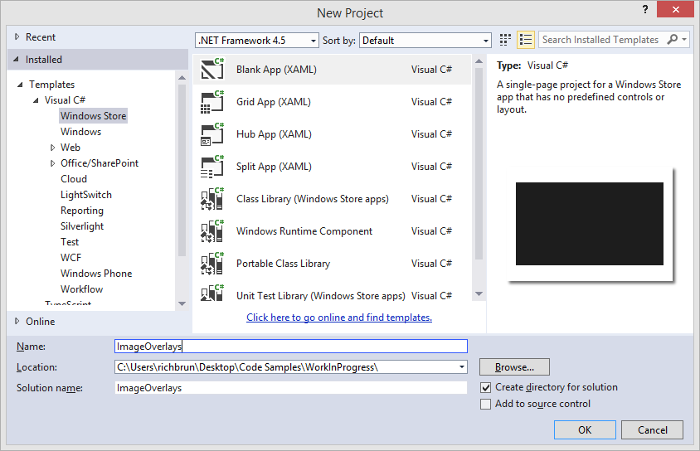
To get started open Visual Studio and create a new project in C#. Select the Blank App template, call the application ImageOverlays, and then press OK.
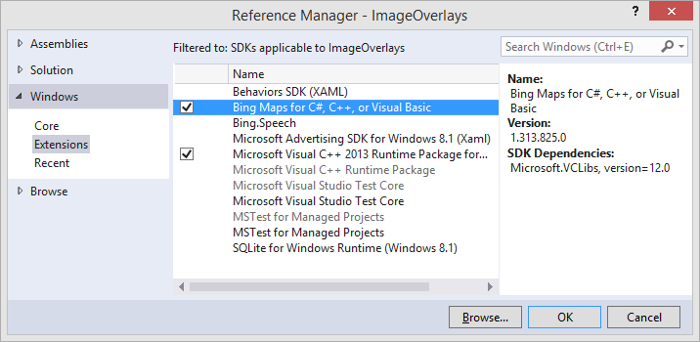
Next, add a reference to Bing Maps SDK. Right click on the References folder and press Add Reference. Select Windows → Extensions, and then select Bing Maps for C#, C++ and Visual Basic. If you do not see this option, be sure to verify that you have installed the Bing Maps SDK for Windows Store apps. While you are here, also add a reference to the Microsoft Visual C++ Runtime Package, as this is required by the Bing Maps SDK when developing using C# or Visual Basic. Press OK.
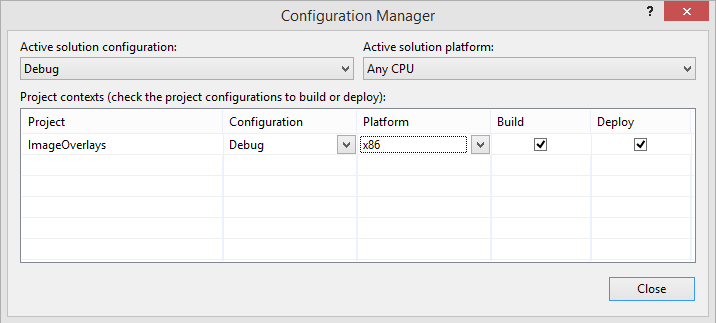
In Solution Explorer, set the Active solution platform in Visual Studio by right clicking on the Solution folder and selecting Properties. Select Configuration Properties → Configuration. Find your project and, under the Platform column, set the target platform to x86, and press OK.
Now open the MainPage.xaml file update the XAML to the following.
 <Page
    x:Class="ImageOverlays.MainPage"
    xmlns="https://schemas.microsoft.com/winfx/2006/xaml/presentation"
    xmlns:x="https://schemas.microsoft.com/winfx/2006/xaml"
    xmlns:local="using:ImageOverlays"
    xmlns:d="https://schemas.microsoft.com/expression/blend/2008"
    xmlns:mc="https://schemas.openxmlformats.org/markup-compatibility/2006"
    xmlns:m="using:Bing.Maps">

    <Grid Background="{ThemeResource ApplicationPageBackgroundThemeBrush}">
        <m:Map Name="MyMap" Credentials="YOUR_BING_MAPS_KEY"/>

        <StackPanel HorizontalAlignment="Right" VerticalAlignment="Top" Margin="100" Background="Black">
            <Button Content="Add BoundedImage" Tapped="BoundedImageBtn_Tapped"/>
            <Button Content="Add Polygon Image" Tapped="PolygonImageBtn_Tapped"/>
        </StackPanel>
    </Grid>
</Page>
This will add a map and two buttons to the app for overlaying an image using one of the two methods. Next open the MainPage.xaml.cs file and update it with the following code. This code contains the event handlers for the buttons without any logic in them yet. I’ve also included a URL to a test image and a bounding box to bind it to. You can get the test image from the code samples.
 using Bing.Maps;
using System;
using Windows.UI.Xaml.Controls;
using Windows.UI.Xaml.Input;
using Windows.UI.Xaml.Media;
using Windows.UI.Xaml.Media.Imaging;

namespace ImageOverlays
{
    public sealed partial class MainPage : Page
    {
        private Uri imgSource = new Uri("ms-appx:///Assets/topographicMap.gif");
        private LocationRect bounds = new LocationRect(new Location(40.5, -123.5), new Location(40.25, -123));

        public MainPage()
        {
            this.InitializeComponent();
        }

        private void BoundedImageBtn_Tapped(object sender, TappedRoutedEventArgs e)
        {
        }

        private void PolygonImageBtn_Tapped(object sender, TappedRoutedEventArgs e)
        {
        }
    }
}
Method 1: Custom Control
In this method we will create a custom control that will stretch and position an image as the map moves to keep it aligned with the specified bounding box. This is similar to approach used in the JavaScript version of the blog. To get started create a new class file called BoundedImage.cs. This class will take in a reference to the map and a URI to the image to render. We will also give this class a property called Bounds, which we will use to specify the bounding box of the image. Whenever the map moves we will calculate the pixel coordinates of the top left and bottom right corners of the bounding box and use these values to calculate the dimensions and position of the image. Update the BoundedImage.cs file with the following code.
 using Bing.Maps;
using System;
using Windows.Foundation;
using Windows.UI.Xaml.Controls;
using Windows.UI.Xaml.Media;
using Windows.UI.Xaml.Media.Imaging;

namespace ImageOverlays
{
    public class BoundedImage : Panel
    {
        private Map _map;
        private Image _img;
        private LocationRect _boundingBox;

        public BoundedImage(Map map, Uri imageUri)
        {
            _map = map;

            _img = new Image();
            _img.Stretch = Stretch.Fill;
            _img.Source = new BitmapImage(imageUri);
            this.Children.Add(_img);

            this.Width = _map.ActualWidth;
            this.Height = _map.ActualHeight;

            _map.ViewChanged += (s, a) =>
            {
                UpdatePosition();
            };

            _map.SizeChanged += (s, a) =>
            {
                this.Width = _map.ActualWidth;
                this.Height = _map.ActualHeight;

                UpdatePosition();
            };
        }

        public LocationRect Bounds
        {
            get
            {
                return _boundingBox;
            }
            set
            {
                _boundingBox = value;
                UpdatePosition();
            }
        }

        private void UpdatePosition()
        {
            if (_boundingBox != null)
            {
                Point topLeftPixel;
                _map.TryLocationToPixel(_boundingBox.Northwest, out topLeftPixel);

                Point bottomRightPixel;
                _map.TryLocationToPixel(_boundingBox.Southeast, out bottomRightPixel);

                double left = topLeftPixel.X, right = bottomRightPixel.X;

                //Compensate for world wrap of map
                if (left > right)
                {
                    double mapWidth = 256 * Math.Pow(2, _map.ZoomLevel);

                    if(right < 0)
                    {
                        right += mapWidth;
                    }
                    else
                    {
                        left -= mapWidth;
                    }
                }

                Canvas.SetLeft(_img, left);
                Canvas.SetTop(_img, topLeftPixel.Y);

                _img.Width = Math.Abs(right - left);
                _img.Height = Math.Abs(bottomRightPixel.Y - topLeftPixel.Y);
            }
        }
     }
}
To implement this new custom control open the MainPage.xaml.cs file and update the BoundedImageBtn_Tapped event handler with the following code.
 private void BoundedImageBtn_Tapped(object sender, TappedRoutedEventArgs e)
{
    MyMap.Children.Clear();

    var img = new BoundedImage(MyMap, imgSource);
    img.Bounds = bounds;
    img.Opacity = 0.5;
    MyMap.Children.Add(img);

    MyMap.SetView(img.Bounds);
}
This code will clear the map, create a BoundedImage object for our image and give it an opacity then add it to the map. It will then set the view of the map to be over this location.
Method 2: Polygon ImageBrush
This method makes use of the Custom Polygon class from a previous blog post by generating a polygon from the bounding box and overlaying the image using an ImageBrush. There are a couple of benefits to this approach, one is that you can easily outline your image by setting the Stroke property of the polygon. In addition to this you are not restricted to generating a rectangular shape, alternative coordinates can be used to form any kind of polygon and the image will be clipped accordingly. However, this might not be the useful if you are trying to position the image so that it is spatially accurate. To get started create a class file called CustomMapPolygon.cs and update it with the following code.
 using Bing.Maps;
using System.Collections.Generic;
using Windows.Foundation;
using Windows.UI.Xaml.Controls;
using Windows.UI.Xaml.Media;
using Windows.UI.Xaml.Shapes;

namespace ImageOverlays
{
    public class CustomMapPolygon : Panel
    {
        private Map _map;
        private LocationCollection _locations;
        private Polygon _basePolygon;

        public CustomMapPolygon(Map map)
        {
            _map = map;

            this.Width = _map.ActualWidth;
            this.Height = _map.ActualHeight;

            //Create a base polygon object to add to the map
            _basePolygon = new Polygon();
            _basePolygon.StrokeDashCap = PenLineCap.Round;
            this.Children.Add(_basePolygon);

            _locations = new LocationCollection();

            //Update position when map view or size changes
            _map.ViewChanged += (s, e) =>
            {
                UpdatePosition();
            };

            _map.SizeChanged += (s, e) =>
            {
                this.Width = _map.ActualWidth;
                this.Height = _map.ActualHeight;

                UpdatePosition();
            };
        }

        public LocationCollection Locations
        {
            get { return _locations; }
            set
            {
                _locations = value;
                UpdatePosition();
            }
        }

        public Brush Fill
        {
            get { return _basePolygon.Fill; }
            set { _basePolygon.Fill = value; }
        }

        public Brush Stroke
        {
            get { return _basePolygon.Stroke; }
            set { _basePolygon.Stroke = value; }
        }

        public DoubleCollection StrokeDashArray
        {
            get { return _basePolygon.StrokeDashArray; }
            set { _basePolygon.StrokeDashArray = value; }
        }

        public double StrokeThickness
        {
            get { return _basePolygon.StrokeThickness; }
            set { _basePolygon.StrokeThickness = value; }
        }

        private void UpdatePosition()
        {
            IList<Point> pixels = new List<Point>();

            //Convert Locations into pixels
            if (_map.TryLocationsToPixels(_locations, pixels))
            {
                var points = new PointCollection();

                foreach (var p in pixels)
                {
                    points.Add(p);
                }

                _basePolygon.Points = points;
            }
        }
    }
}
To implement this method open the MainPage.xaml.cs file and update the PolygonImageBtn_Tapped event handler with the following code.
 private void PolygonImageBtn_Tapped(object sender, TappedRoutedEventArgs e)
{
    MyMap.Children.Clear();

    var polygon = new CustomMapPolygon(MyMap);
    polygon.Locations = new LocationCollection()
    {
        bounds.Northwest,
        new Location(bounds.North, bounds.East),
        bounds.Southeast,
        new Location(bounds.South, bounds.West)
    };

    var imgBrush = new ImageBrush();
    imgBrush.Stretch = Stretch.Fill;
    imgBrush.ImageSource = new BitmapImage(imgSource);

    polygon.Fill = imgBrush;
    polygon.Opacity = 0.5;

    MyMap.Children.Add(polygon);

    MyMap.SetView(bounds);
}
This code will clear the map, create a CustomMapPolygon object, create an image brush and pass it to the Fill property of the polygon and an opacity then add it to the map. It will then set the view of the map to be over this location.
Testing the App
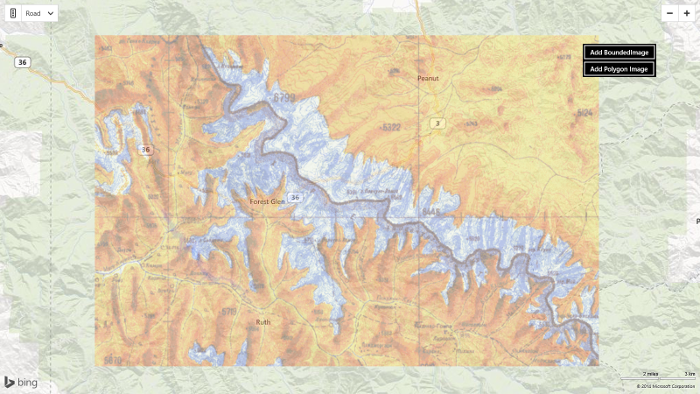
At this point the application is complete. Run it by pressing F5 or by pressing the Debug button. When you press either button the image will be drawn on the map like in the screenshot below. If you pan or zoom the map you will notice that the corners of the image stay bounded to their relative location on the map.
You can also find a similar Windows Phone 8 code sample here. If you are looking for some other great resources on Bing Maps for Windows Store apps, look through this blog or check out all the Bing Maps MSDN code samples.