Create Windows Live Writer plugin using Visual Basic.NET
Windows Live Writer is cool! I use it to create my blog posts and of late, I wanted to make my blog a little more colorful. I was looking for the plugin which could do what I want (just too many things in life!) but couldn't find it. That's why, I decided to write a plugin for myself. I guess that's one of the real big benefits if you come from a developer background :o)
The first step is usually the toughest one and mine was no exception. The SDK for Windows Live Writer uses C# and I code much faster in VB.NET, so I thought that I should first create a sample in VB.NET and then write the plugins that I want. Hence this post!
So let's start from the beginning...
1. Create a new Project in VB.NET (of type Class Library) and give a name to this Library.
2. Delete the class called Class1.vb and create a new Class called MySample.vb
3. Create a folder called "Images" and you need to create a PNG file which is 20 x 18 pixels.
For this demo you can use this PNG > 
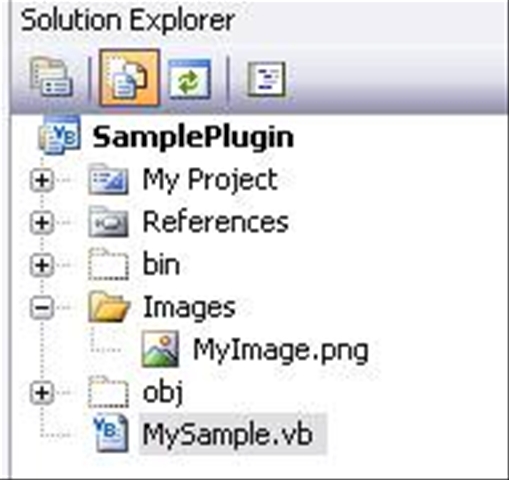
4. Right click MyImage.png and Click Properties. In the Build Action, select Embedded Resource
5. Add the following references to this project...
System.Drawing
System.Windows.Forms
WindowsLive.Writer.Api
6. Open MySample.vb and paste the following...
Imports System.Windows.Forms
Imports WindowsLive.Writer.Api
<WriterPluginAttribute("700371b3-9023-41f4-bf32-d3f25dfa2abb", _
"Insert image in WLW", _
Description:="Insert image in WLW", _
ImagePath:="MyImage.png", _
HasEditableOptions:=False, _
PublisherUrl:="https://blogs.msdn.com/rahulso"), _
InsertableContentSourceAttribute("image in WLW")> _
Public Class MySample
Inherits ContentSource
Public Overrides Function CreateContent( _
ByVal dialogOwner As IWin32Window, _
ByRef newContent As String) As DialogResult
Try
newContent = "Woo hoo... <br><image src='https://www.mountaineermusing.com/uploaded_images/woohoo-772131.gif'>"
Return DialogResult.OK
Catch ex As Exception
'Do some error handling here!
End Try
End Function
End Class
7. Build the Project and copy the dll to your Windows Live Writer plugin location. By default it is... C:\Program Files\Windows Live Writer\Plugins
8. Close your Windows Live Writer and re-open it so that the Plugin is loaded. It should look like...
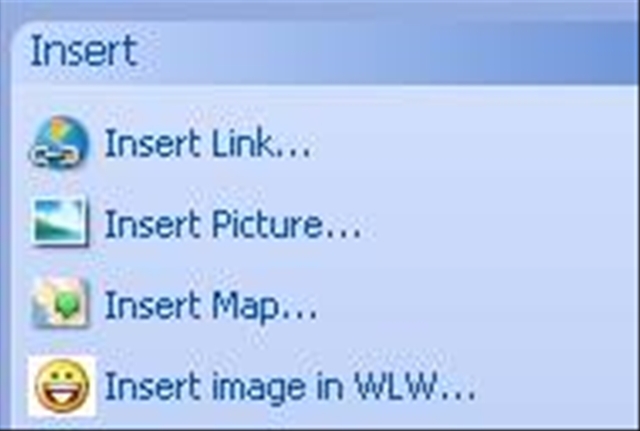
9. If you click on Insert image in WLW you should see the following...
Woo hoo...
Write some cool Plug-Ins for you and enjoy!
Cheers,
Rahul
| Share this post : | email it! | bookmark it! | digg it! | reddit! | kick it! | live it! |