Creating web pages using WebMatrix - Tutorial 3: Dynamic Content (Basics: Syntax)
In this article, you are going to be introduced to the basics of the code that allows you to create dynamic content on your web pages using WebMatrix. You will soon get familiar with ASP.NET’s Razor Syntax, and start developing useful web applications in no time! The adventure starts below…
Download complete CSHTML Project
Step # 1: First of all create a new empty site. To do this, follow: 1) run WebMatrix, 2) navigate to "Quick Start" window, 3) select "Site From Template", 4) select "Empty Site", 5) name it: "BasicsSyntax" and click “OK”.
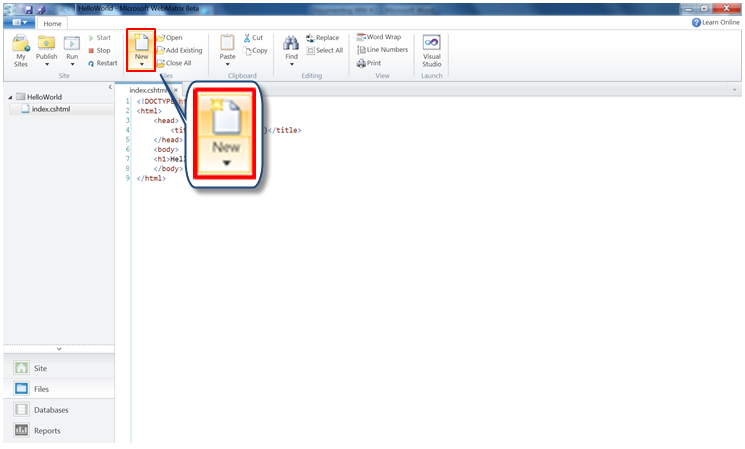
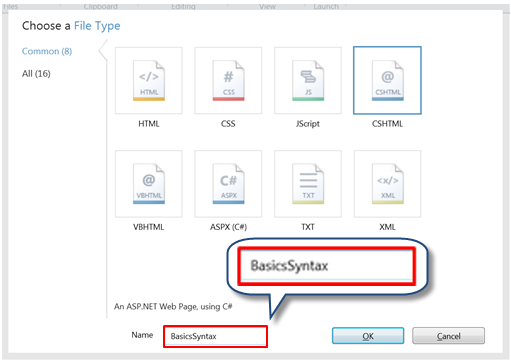
If you wish, you could also use the previously created “HelloWorld” site and add an empty page there instead. To do this, follow: 1) locate and click on the “New” option from the standard toolbar, 2) select “CSHTML” as the file type, 3) finally name the page: “BasicsSyntax” and click “OK” (please refer to images shown below).
Step # 2: Once you’ve done this – you’ll automatically be presented with the contents of the newly created page. To continue, replace the existing markup with the following (we’ll be referring to it as you go):
1234567891011121314151617181920212223242526272829303132333435363738394041 |
@{ // That's how you specify a single line of comment in code /* You can also specify a comment that spans several lines */}<!DOCTYPE html><html> <head> <title>Basics: Syntax</title> </head> <body> <!-- That's how you specify a single line of comment in HTML markup --> <!-- You can also specify a comment that spans several lines --> <!-- That's how you declare and initialise a variable (single statement block) --> @{var VariableOne = "Hello World! :-)";} <!-- That's how you display the contents of a variable --> The contents of the "VariableOne" variable are: @VariableOne <!-- That's how you declare and initialise a variable using the contents of another variable, a string literal and a helper (multi statement block) --> @{ string VariableTwo = VariableOne + " Today is: " + @DateTime.Now; } <!-- That's how you display the contents of a variable --> <p>The contents of the "VariableTwo" variable are: @VariableTwo </body></html> |
Step # 3: When you’re finished, it’s now time to see your web page in action! Click on the “Run” option from the standard toolbar to launch the page in a browser – what you’ll see should correspond to the image shown below.

Step # 4: Let’s now take a closer look on the underlying code. As you’ve probably noticed, your page consists of the two components, namely – the HTML/CSS markup and the ASP.NET Razor Syntax (please see above).
Embedding Code
You can embed the code in any of the three ways: as an inline expression – lines # 25 & 35 (by preceding the code with a single “@” character, notice that there is no requirement for a semicolon this time), a single statement block – line #23 (similar like before but with an opening and closing curly bracket embracing the code, notice the semicolon at the end of each statement), or a multi statement block – lines # 31-33 (similar like before but now with the code placed vertically between the opening and closing bracket, again you need a semicolon ending each statement).
Comments
As you work with code and it grows in size, it’s essential that you know how to comment certain parts so that it can remind you (or others) exactly what it does – should it be necessary. In WebMatrix, when commenting markup you can make use of both single-line (lines # 16, 23, 25, 35) and multiple-line (lines # 18-21, 27-30) comments. The same applies to code; for single-line (line # 2) and multiple-line (lines # 4-7) comments.
Variables
When working with variables, you declare them by preceding with an optional word “var” (for implicit type) – line # 23 or a predefined type (for explicit type) – line # 32 which can be one of the commonly known data types including: int, float, double, string, bool, DateTime; initialisation is as simple as using an assignment operator: “=” and a value (for numerical data) followed by a semicolon/double quotes (for textual data).
Displaying Variable’s Contents
In order to display the contents of a variable you simply precede its name with a “@” character (lines # 25, 35). You can combine the contents of several variables by placing a “+” character between them (line # 32).
Step # 5: Congratulations! You have now completed all the activities related to this article.
What have we done?
In this tutorial, you have been introduced to basics of the code that allows you to create dynamic content on your web pages using WebMatrix. In the following articles, you’ll learn more on how to use variables to store predefined data as well as data input by the user – which can then in turn be used to make certain decisions. It’s all yet to come, please stay tuned! :-)