Reserving Your Universal Windows App Name
Reserving Your Universal Windows App Name in the store ensures that no one else can publish an app with the same name. For this reason, it is helpful to reserve your app name as soon as possible, potentially even before your start developing your app. It would be really unfortunate to be prepared to submit an app with an awesome name, only to find out that someone else has already used that name! Therefore, my recommendation is to reserve your app name as soon as possible. However, regardless of when your decide to Reserve Your Universal Windows App Name, whether it be months before you begin development or right before your submit, here is how you do it.
The first thing to understand is how a Universal App connects the Windows 8.1 and Windows Phone 8.1 app. With Universal Apps you can reserve the same name on Windows 8.1 and Windows Phone 8.1. These apps will then be connected in a couple of different ways. For instance, if you charge for your Windows version, the user can then also get the Windows Phone version, meaning they pay once and get the app on both platforms. Behind the scenes, the development process for a Universal App minimizes the amount of rewritten code that you have to maintain by sharing code between the two projects. Additionally, Universal Apps are the future of Windows App Development, so I recommend taking advantage of Universal Apps now!
The idea behind reserving your app names pretty simple. Reserve an app name in Windows and then choose that existing name as the app name for your Windows Phone version. The Dev Center will then let you know that you are choosing to connect the two apps as a Universal App, which is what we want. We could theoretically reserve the Windows Phone name first, and then choose the existing name for the Windows App. Either way works, but for now, I will reserve Windows first and then connect the Windows Phone App.
To reserve your Windows App name, you can follow my post, Reserving Your Windows App Name. I reserved “My Newest App Test” as my name (obviously not something I am going to actually publish). After you have reserved your Windows App Name, let’s navigate over to the Windows Phone Dev Center to connect that app.
Open up the Developer Portal at https://dev.windows.com/, and then click Sign In the top right
")
Log in with your Developer Account
")
Now click on Dashboard in the top left.
")
Choose Windows Phone Store.
")
Choose Submit App in the top left.

Click App Info.

Notice that although the Name input is blank, there is a dropdown arrow.

Click on the dropdown and you should see the name that reserved in the Windows Store. I’' have a lot of App Names here, but you can see “My Newest App Test” listed there.

Select that app name. Notice that the Dev Center gives a warning letting us know they we are connecting this app as a Universal App, exactly as we want.

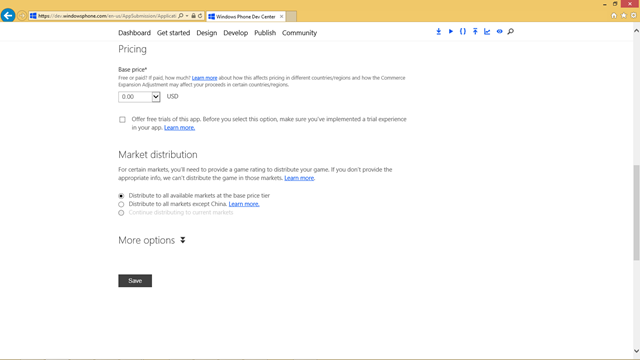
Click Associate App. Then scroll down to fill in your App Category and Pricing. This info can be changed later on so don’t worry too much about what you choose for now.

After you have filled out that info, scroll down to the bottom and click Save.After you have filled out that info, scroll down to the bottom and click Save.

You should then see a checkmark next to App Info confirming that your app name has been reserved for Windows Phone and connected to the Windows app as a Universal App!