Your First Azure Mobile Service
Alright, so I will be starting a series of blog posts covering different aspects of using Azure Mobile Services. In the short term, I will be focusing on creating and leveraging Azure Mobile Service tables, and will branch out from there. Therefore, this first blog post will simply show you how to create an Azure Mobile Service, a database and server, and a high score table. Along the way, you will learn some of the basics of navigating the Azure Portal as well! So, let’s get started!
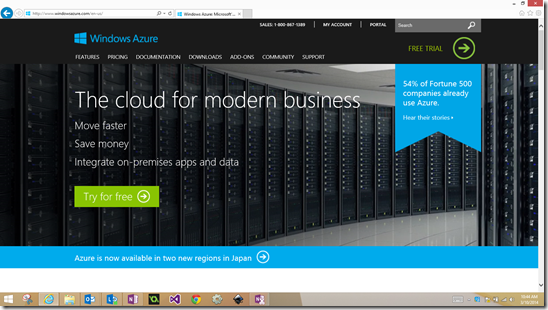
The first thing we want to do is go to the Azure Portal. It will look like this.
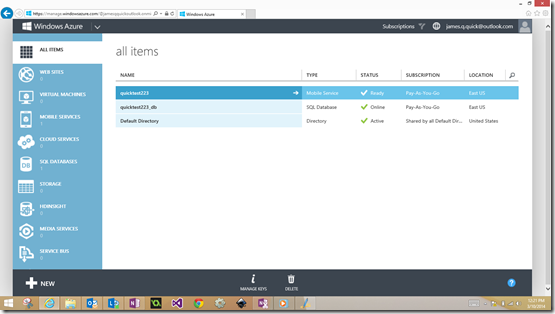
Click on portal at the top, and login if you need to. You will be then arrive at the Azure Portal. It will look like this.
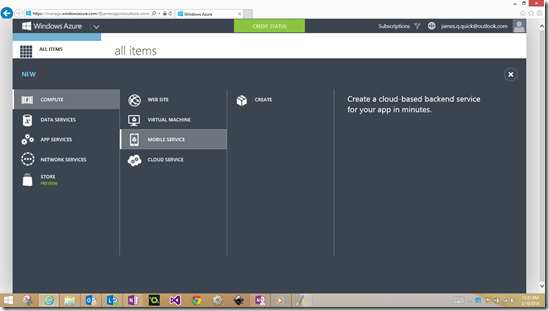
Notice on the left, we have a list of different things that we can create in the Azure Portal such as an Azure Mobile Service and SQL databases (both of which we will use today). We want to create an Azure Mobile Service, so click the “New” button at the bottom left, then “Compute”, then “Mobile Service”, then “Create”.
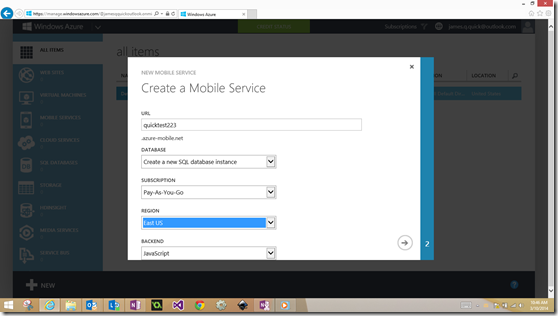
Go ahead and give your AWM (Azure Mobile Service) a name. I am using “quicktest223” as you can see below. You can choose to use an existing database if you have one or create one. Here, I am creating one and then choosing East US as my region, but obviously choose region based on where you are located. Once you have that info, click the next arrow in the bottom right.
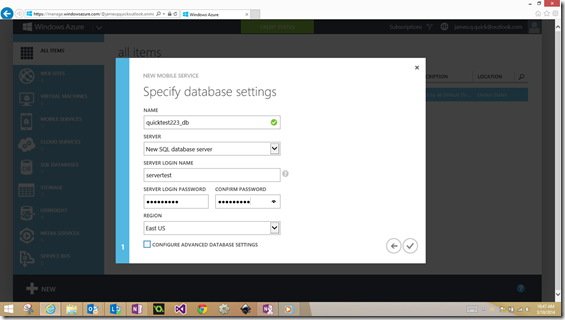
Since I am creating a new database, I need to add some additional information. I will leave the name as the default that it provides, create a new SQL database server, give it a name and a password, and then click the check mark in bottom right. MAKE SURE YOU REMEMBER THE SERVER LOGIN NAME AND THE PASSWORD, YOU WILL NEED IT AGAIN!
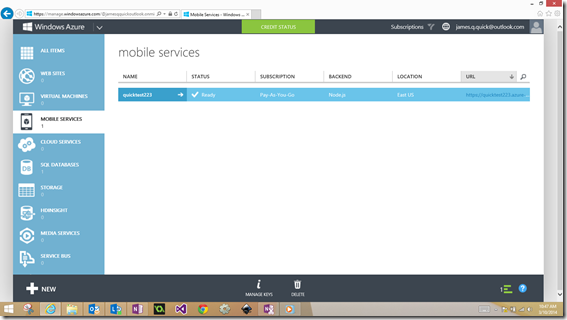
After clicking the check mark, you should see that your AMS is being created, and after a few seconds see this.
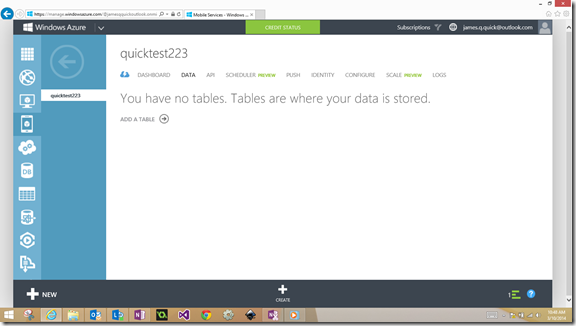
Now that we have our AMS created, we need to add our table. Go ahead and click on the name of the AMS, and on the next screen click on data. You should see a screen like below saying that we don't have any tables yet.
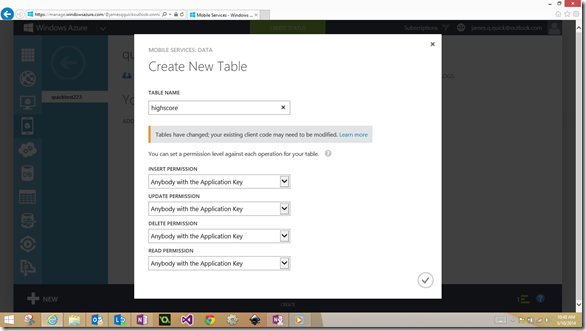
Go ahead and click on add a table and we should see these options. My plan is to create a simple high score table with a username and score, so I will call mine high score as you can see. I will leave the permissions as they are. Just for reference, each AMS that you create will have an “Application Key” (we will see where in a minute) associated, and that is what we are using for verification of permission for the Insert, Update, Delete, and Read operations. Go ahead and click the checkmark.
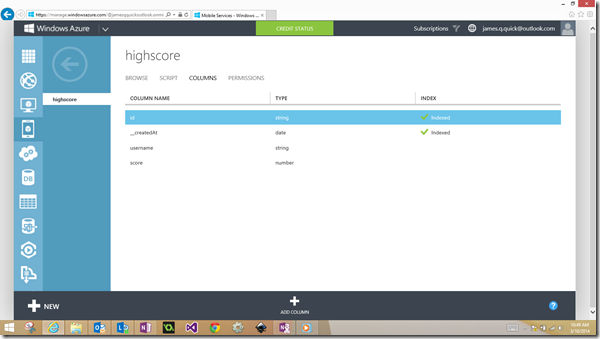
Now we should be taken to our new highscore table. At the top, click on “Columns”. Now, here we want customize the columns to represent our high scores with username and score. We don't need the bottom two columns listed there, so go ahead and delete those. Now, we want to add two columns, a string data type for username and a number data type for the score. After you have done both of those, you should see columns as below.
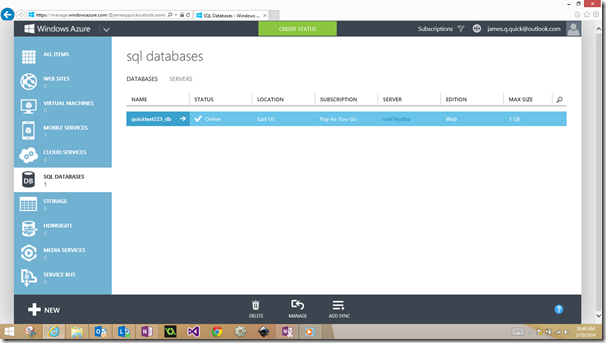
Now that we have our table created, let’s go ahead and add a couple of records to it. On the left hand side of the screen click on “SQL Databases”, and you should see the database that contains your table that you created initially with your AMS. At the bottom of your screen, click on “Manage”.
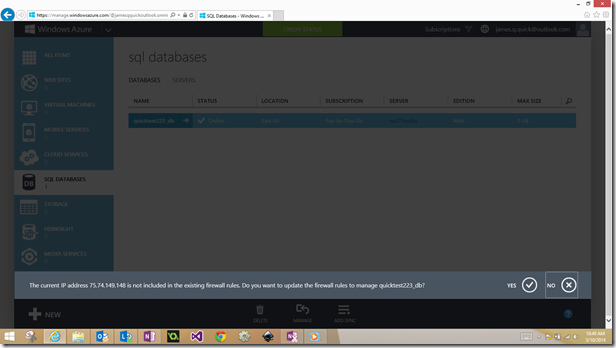
You will have to update your firewall so go ahead and click yes below.
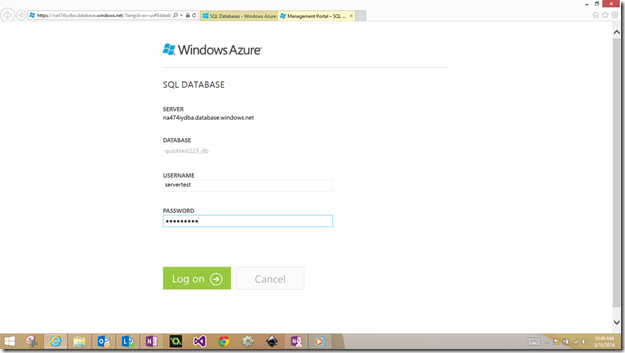
Now, we need login to our database. You will need your server username (that we created initially) as well as the corresponding password (remember my message in ALL CAPS from earlier :) )
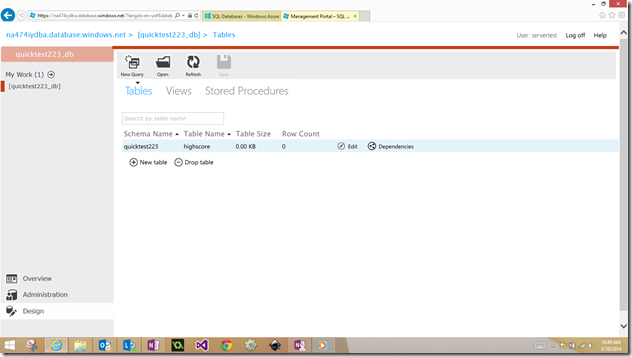
Once you have logged in click on design in the bottom left, and you should see your table listed like this. Select your table and then click “Edit”.
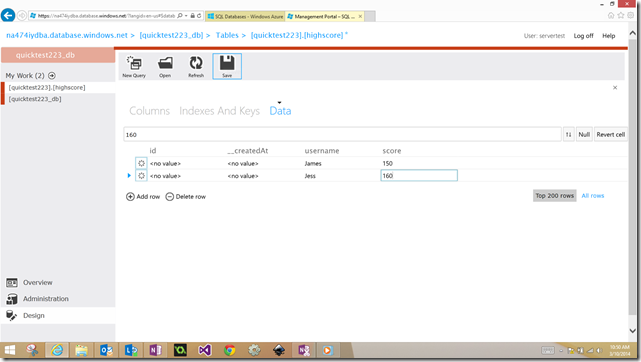
Click on the Data tab, and you will be taken the screen where you enter records for your database by clicking “New Row”. My two records are “James 150” and “Jess 150”, as you can see below. After you have a couple of records here, you can click save at the top.
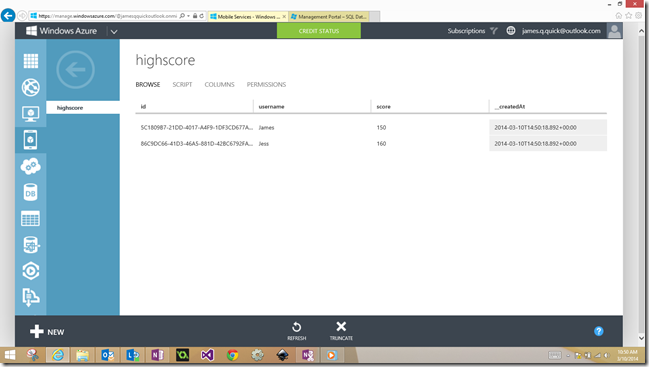
Now, if you go back to your portal and click on your AMS, then your highscore table, you should see that it has updated the records to reflect the high scores that we just added!
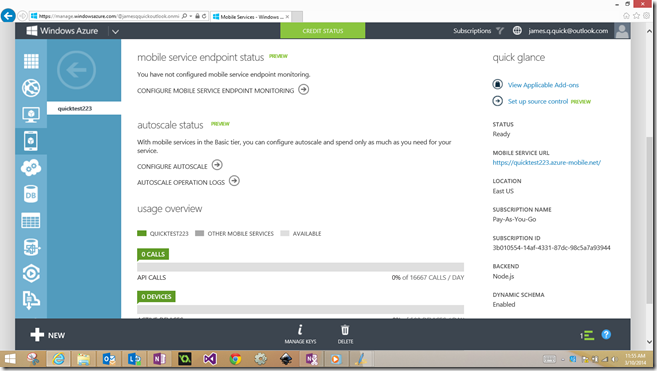
So, we have created our AMS, our database, a high score table, and even inputted a couple of records to our database. I just want to show you a couple of more things. One of which is the url for your azure mobile service, and the second is where to find the application key that I mentioned before. To find these, navigate back to your AMS. If you scroll down just a little bit, you should see a screen like below and “Mobile Service URL.
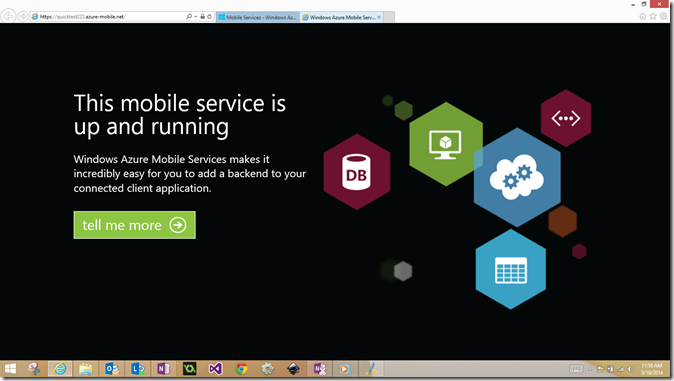
If you go ahead and click on that link, you can test whether your AMS is up and running. Hopefully you see this screen :).
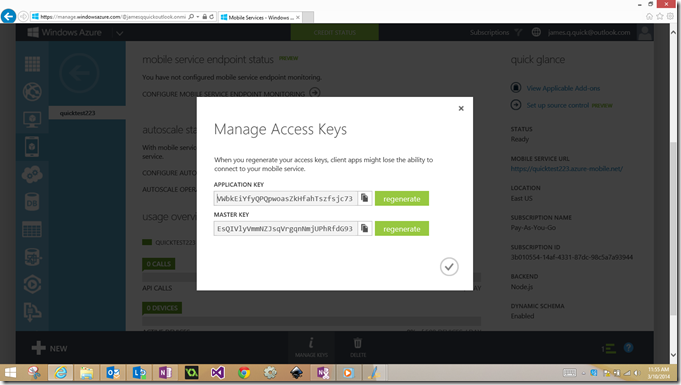
Now go back to the portal where we were. If you look down at the bottom of the screen you should see a button that says “Manage Keys”, and this is where you can find your application key. If you click on that button you should see below. Don't bother taking my application key. I’ve already changed it :
So, there it is. How to set up an Azure Mobile Service, a database and server, and input some records into your table. I will be following up this post with how to incorporate this data into your Project Siena application, Gamemaker, and then in your C# code as well! Stay tuned!
