Your First Windows Phone App
I recently have been able to spend some time really digging in to making some Windows Phone Apps, and I know there are people out there looking to get started. So, following the motto, “As I learn, you learn”, I want to try to share all of the stuff that I have learned in the last couple of weeks starting with your first Widows Phone App. However, instead of simply doing a “Hello World” app, I am going to show you how to make a Username Generator app. Coincidentally, I just published a very simple one to the store, and you can find it here. It’s not overly impressive, but it does get the point across.
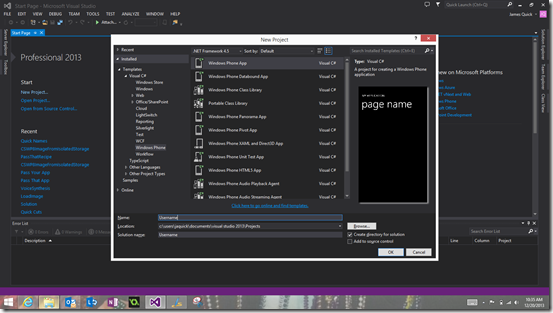
Anyways, let’s go ahead and get started. First thing you want to do is create a Windows Phone App project in Visual Studio. I am using Visual Studio 2013, so if you are using a previous version, it might look a little different. However, you should be presented with options similar to the picture below.
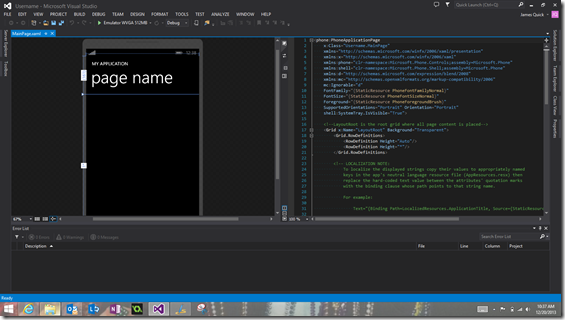
After creating this project, you will be taken to your MainPage.xaml, and you will see your basic empty page in the visual designer and then the corresponding code.
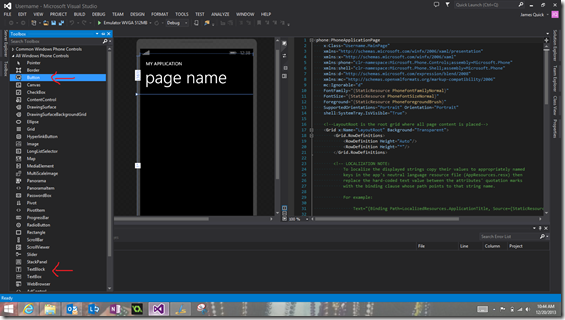
Now that we have our empty page, we just need to add a couple of controls, a button for generating the username and a textblock to display it. There a couple of different options here, we could either use the visual editor by dragging in each control from the toolbox (mine is tabbed on the left but you might have to go to view->toolbox) or we can actually write the xaml code. In the picture below, you can see the toolbox and the arrows pointing at the button control and the textblock control.
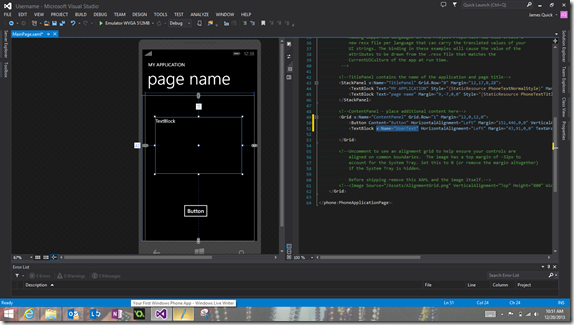
Once you find those controls, simply click and drag them onto the visual editor, and you can then see the results in the xaml code, I am only going to add one thing to the xaml code, a name for the textblock. You can add a name to the textblock with this…
x:Name="UserText"
After you do so, you should see something similar to below, a textblock and button somewhere on the visual editor and then the corresponding code.
So now we have our layout. Although it isn't perfect or super pretty, you get the idea. Now we need to add the code to generate and display the username. We need to open up the code behind page now for our MainPage.xaml and we also need to create a “Click Handler” for our button where we can add the actual generating code. Luckily, we can do both of these things in one step, simply double click on your button in the visual editor, and it will not only take you to code behind page, but it will also create the click handler method.
Now, lets talk about how we actually generate our username. The general logic here is to use a couple of string arrays, one to store a list of adjectives, and one to store a list of animals. Then when we click the generate button, we want to choose a random adjective, a random animal, and a random number, and concatenate them all together. So, what does that look like? You can see the key three pieces below.
Array of adjectives
String[] adjectives_array = new string[5] {"silly", "smart", "nice", "athletic", “funny”}
Array of animals
String [] animals_array=new string[5] {“dog”, “cat”, “mouse”, “bird”, “fish”}
Random Number Generator
Random r= new Random();
int random_number= r.Next(5); //creates a random number from 0 to 4
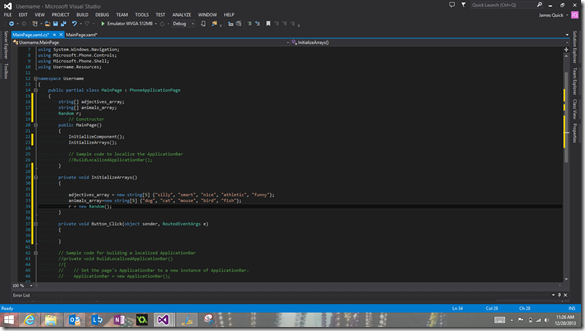
I am going to create a method to initialize our arrays and call it from the MainPage contsructor. You can see that in the screenshot below.
So how do you put all of these things together. We have our two arrays and we know how to get a random number. So, we will create three random numbers, one for the index of the adjectives array, one for the index of the animals array, and one to add to the end of our username. Lastly, we will fill out our button click handler. Again, we want to get the random adjective, animal, and number, put them together, and then set our textblock to that username string. Should look like the following.
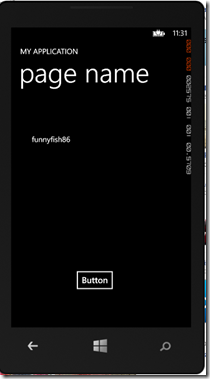
Now, run your app, push the button, and you should see something like this.
Awesome. So if you are feeling creative, then come up with a different list of names and create your own custom usrename generator!
