Presentation Mode in Visual Studio
One of the things I hate is to watch a Visual Studio presentation where the presenter hasn’t set the font size correctly. Sitting any distance from the screen makes it impossible to read the code or see the menus. Also now many sessions are recorded. So if you are watching the video at any resolution other that HD, good luck.
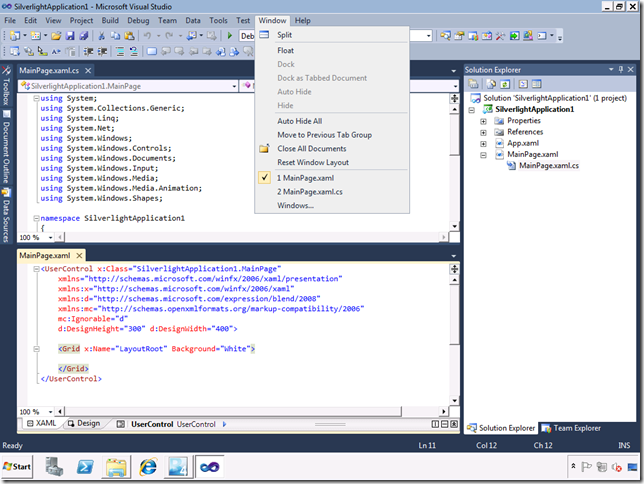
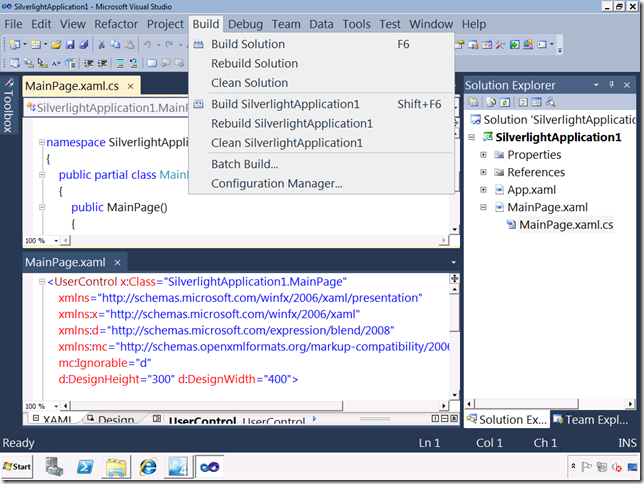
The problem is not that presenters don’t want to change, it is that it is time consuming to switch back and forth from working mode to presenting mode and understanding all of the options is daunting. Thankfully Visual Studio has a solution to this problem. It’s the vssesstings file. By default Visual Studio settings look like the picture below. This is great if you are working on a large high resolution monitor at 2 feet away but not so much on the big screen across the room. In fact this sample is at 1024x768 which is resolution that a real developer would lose his or her mind. But since most projectors use this resolution this is what I wanted to compare.
Change the Fonts
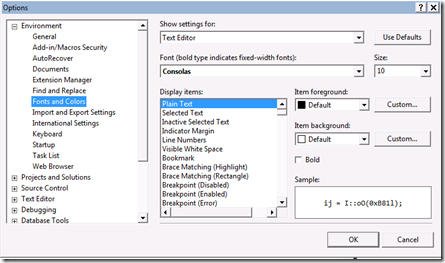
To change the fonts in Visual Studio you open the Option dialog from the Tools Menu and select Fonts and Colors from the Environment node.
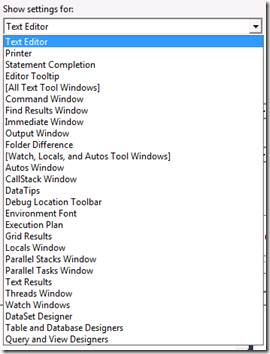
There are a ton of combinations of settings here. It is a little bit of a black art to figure out what changes what. First start with the Show Settings for: drop down. The most common one is the Text Editor. If you get caught in a presentation without bumping up the fonts this is the one you want to do on the fly. There is a doc page on MSDN but it only covers the very basics: https://msdn.microsoft.com/en-us/library/kw7t0545(v=VS.71).aspx
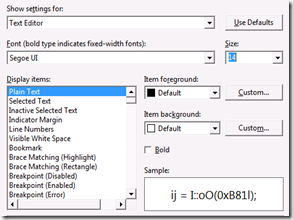
For each Setting item, such as Text Editor, there is a huge list of possible values to set. again if you only change one value change the “Plain Text” value to Segoe UI 14. This is the minimum for a presentation.
Import / Export Settings
Visual Studio provides a way for you to import and export settings. This allows you to get your environment setup just the way you like it and then save the settings to a file that you can easily load any time. In most cases this is good when you are working on multiple machines or are rebuilding frequently. But this is also good for saving your “Presentation Mode” settings.
I have done this for you already. You just need to create a new text file called PresentationMode.vssettings and save to your settings folder in you user folder C:UsersAdministratorDocumentsVisual Studio 2010Settings. Copy the following text into your vssettings file.
PresentationMode.vssettings
 <UserSettings>
    <ApplicationIdentity version="10.0"/>
    <ToolsOptions>
        <ToolsOptionsCategory name="Environment" RegisteredName="Environment"/>
    </ToolsOptions>
    <Category name="Environment_Group" RegisteredName="Environment_Group">
        <Category name="Environment_FontsAndColors"
              Category="{1EDA5DD4-927A-43a7-810E-7FD247D0DA1D}"
              Package="{DA9FB551-C724-11d0-AE1F-00A0C90FFFC3}"
              RegisteredName="Environment_FontsAndColors"
              PackageName="Visual Studio Environment Package">
            <PropertyValue name="Version">2</PropertyValue>
            <FontsAndColors Version="2.0">
                <Categories>
                    <Category GUID="{1F987C00-E7C4-4869-8A17-23FD602268B0}"
                    FontName="Segoe UI" FontSize="14" CharSet="0" FontIsDefault="No"/>
                    <Category GUID="{5C48B2CB-0366-4FBF-9786-0BB37E945687}"
                    FontName="Segoe UI" FontSize="14" CharSet="0" FontIsDefault="No"/>
                    <Category GUID="{6BB65C5A-2F31-4BDE-9F48-8A38DC0C63E7}"
                    FontName="Segoe UI" FontSize="14" CharSet="0" FontIsDefault="No"/>
                    <Category GUID="{9973EFDF-317D-431C-8BC1-5E88CBFD4F7F}"
                    FontName="Segoe UI" FontSize="14" CharSet="0" FontIsDefault="No"/>
                    <Category GUID="{A27B4E24-A735-4D1D-B8E7-9716E1E3D8E0}"
                    FontName="Segoe UI" FontSize="14" CharSet="0" FontIsDefault="No"/>
                    <Category GUID="{A9A5637F-B2A8-422E-8FB5-DFB4625F0111}"
                    FontName="Segoe UI" FontSize="14" CharSet="1" FontIsDefault="No"/>
                    <Category GUID="{C1614BB1-734F-4A31-BD42-5AE6275E16D2}"
                    FontName="Segoe UI" FontSize="14" CharSet="1" FontIsDefault="No"/>
                    <Category GUID="{EE1BE240-4E81-4BEB-8EEA-54322B6B1BF5}"
                    FontName="Segoe UI" FontSize="14" CharSet="0" FontIsDefault="No"/>
                </Categories>
            </FontsAndColors>
        </Category>
    </Category>
</UserSettings>
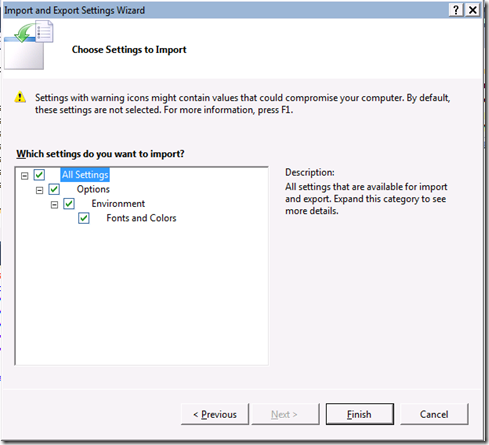
Now just import this into Visual Studio using the Import and Export Settings dialog from the Tools menu. Choose Import selected environment settings from the first step of the wizard. On the next step you can choose to save your current settings first. Next select the PresentationMode.vssettings file from the My Settings node. On the last step of the wizard you can actually choose which settings to import. Since I have already stripped down the settings file to the bare minimum just select everything. click Finish to apply the settings.
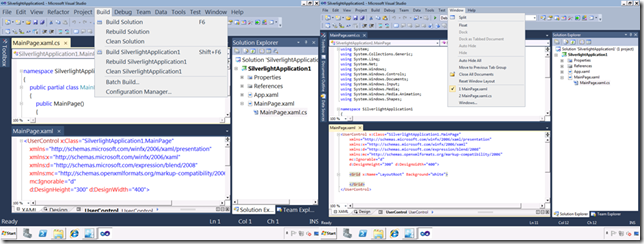
After the import you will now be ready to present and the audience will be able to follow along with what you are demonstrating. Once you are done presenting you can either reset Visual Studio back to the default settings or import your saved settings. Here is what it will look like. You can see that everything is much more readable but so big that stuff starts flowing off the screen or getting weird. Also note that this changes the correct menu fonts and the fonts in the Solution Explorer window.
Here they are side by side. click the image to view larger size.
