How to fix your SQL Server 2008 Setup before you run setup (Part II)....
NOTE: Now updated for SQL Server 2008 SP1 RTM.
Last year you might have read my post where I showed you how to patch setup for RTM for SQL Server 2008 before you launch setup. This processing involved installing a Cumulative Update to apply fixes for the SQL Server 2008 Setup Support Files. Well, we now have expanded this capability with the release of SQL Server 2008 Service Pack 1 to be able to fix other areas of setup with a new method. This feature, called slipstream setup, actually provides much more. You will now be able to apply the setup of SQL Server 2008 and include fixes (such as service packs, or cumulative updates) for all components all in one execution of running setup. Peter Saddow, a Senior Program Manager in the SQL product team, has recently posted a blog post on how to do this at:
There is also another way to perform a slipstream setup that can be simpler but not as “automated”. Peter has also documented this procedure at:
https://blogs.msdn.com/petersad/archive/2009/03/02/sql-server-2008-basic-slipstream-steps.aspx
As I've done with other experiences in setup I thought I'd try this myself using SQL Server 2008 SP1 and show you the experience along the way. But to make this real, I chose to first use this feature to "pre-fix" a known problem with SQL Server 2008 upgrade. The problem, involving the rename of the 'sa' account prior to upgrade, was chronicled in our blog at:
The process here is very manual with several file copies. Peter's blog uses the cmd shell and robocopy. I've been trying to force myself to use Powershell more these days, so all of my commands below are done using Powershell 1.0 on Windows Sever 2003. That is the server where I'm going to "build" my slipstream shared setup location.
But first I wanted to set the stage for the machine I need to upgrade. So the first thing I did on one of my servers at work running Windows Server 2008 was install SQL Server 2005, 2005 SP2, and then renamed sa like this:
sqlcmd -E -A -Q"alter login sa with name = [sys-admin]"
This is on the server where I'm going to run the slipstream setup (A Windows Server 2008 machine). I'll be running the setup from a network share mapped back to my Windows Server 2003 machine.
Back to my "build" server. So following Peter's steps, I first need to take my SQL Server 2008 media and copy it to a folder on a computer where I want to launch setup. This is on the Windows Server 2003 server where I'm running Powershell 1.0. On this server on the d:\ I already have a share of various builds of SQL Server including SQL Server 2008 RTM. So I took this folder and duplicated it, calling it d:\sql2008_builds\2008+SP1. Inside this folder is a subtree to reach the actual RTM bits: releases\editions\developer. So when you see the developer folder is the "root" of my RTM media.
Now I need to download the SP1 packages (you must download all architectures even if just running setup for one of them). So I copied them to another location on my share (called d:\sql2008_builds\SP1 but be prepared they are big and this could take some time) and then executed these packages using a command line option to "just extract" the files into a directory rather than running the actual SP1 setup. As Peter instructed I extracted these into a directory under my new media share called PCU (just in case you were wondering what PCU stands for internally we call it Public Cumulative Update) using the following commands (order no longer matters as in CTP1):
.\SQLServer2008SP1-KB968369-IA64-ENU.exe /x:d:\sql2008_builds\2008+SP1\PCU
.\SQLServer2008SP1-KB968369-x64-ENU.exe /x:d:\sql2008_builds\2008+SP1\PCU
.\SQLServer2008SP1-KB968369-x86-ENU.exe /x:d:\sql2008_builds\2008+SP1PCU
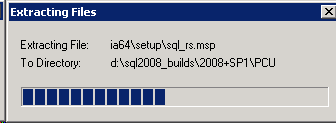
When you run each of these, you should get a dialog box that pops-up like this:
and when done
You can also add the /Q parameter to the commands above to not show any UI during the extraction.
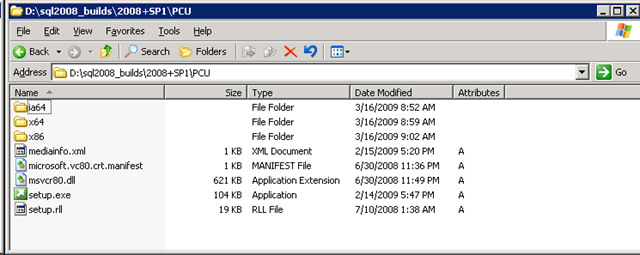
Note the PCU folder reference. Using these commands will first create that directory and then extract in the contents. So when, I finished the extraction the PCU directory looks something like this:
Now to Step 4 (if you read this post for CTP1 we have been able to remove a step) on Peter's blog. Copy over the updated setup.exe and setup.rll files (I did a shortcut of one command because in the PCU directory, the only two files that startup with setup are the ones we want):
copy D:\sql2008_builds\2008+SP1\PCU\setup.* D:\sql2008_builds\2008+SP1\release\editions\developer
You need this step because the setup.exe from SP1 has the new logic to perform a slipstream setup.
Step 5 involves copying over other updated files from the PCU directory under each architecture directory but only selected files (all files but not subfolders and NOT the Microsoft.SQL.Chainer.PackageData.dll file). The reason you don't want the subfolders or this specific DLL is because they are actually different for RTM and the service pack (PCU) and are required to be different to make this all work. Let's use the -exclude parameter of copy in Powershell (Powershell tip: Use the -whatif parameter of copy to see what copy will do before it actually does the copy)
copy d:\sql2008_builds\2008+sp1\pcu\ia64\*.* d:\sql2008_builds\2008+sp1\release\editions\developer\ia64 -exclude Microsoft.SQL.Chainer.PackageData.dll
copy d:\sql2008_builds\2008+sp1\pcu\x64\*.* d:\sql2008_builds\2008+sp1\release\editions\developer\x64 -exclude Microsoft.SQL.Chainer.PackageData.dll
copy d:\sql2008_builds\2008+sp1\pcu\x86\*.* d:\sql2008_builds\2008+sp1\release\editions\developer\x86 -exclude Microsoft.SQL.Chainer.PackageData.dll
In Peter's blog he shows you how to build a default.ini in Step 6. Instead, I'll show you an alternate way to run setup using a new parameter called /PCUSource. On my windows 2003 server where I "built" my slipstream setup, I created a share called 2008sp1_slipstream which maps to d:\sql2008_builds\2008+sp1. But notice the developer folder is still my media "root".
Now I'll go over to my Windows Server 2008 machine and run setup with this new parameter like the following:
\\bigtroy\2008sp1_slipstream\release\editions\developer\setup /PCUSource=\\bigtroy\2008sp1_slipstream\pcu
I now get a series of the standard installation screens. Peter mentions in his blog that one way to tell you are using the slipstream version of setup is at the Installation Rules screen. Since I'm doing an upgrade, it is a screen called Upgrade Rules where I see a new rule that was not in RTM:
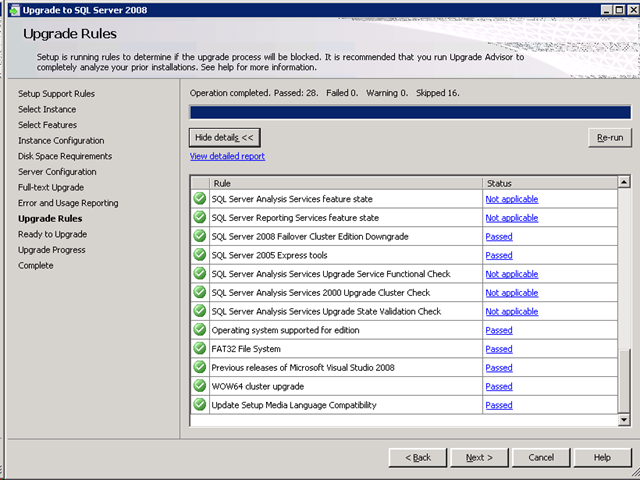
This new rule "Upgrade Setup Media Language Compatibility" is used to ensure the language of the SP1 media is the same as the RTM language media.
I also see the term (Slipstream) and the new PCUSource location on the Ready to Upgrade screen:

Notice the new "CU source directory" as well. I'll talk about this at the end of the blog post.. Now I'm ready to see if this slipstream approach will avoid the upgrade failure due the rename of 'sa' so I selected Upgrade.

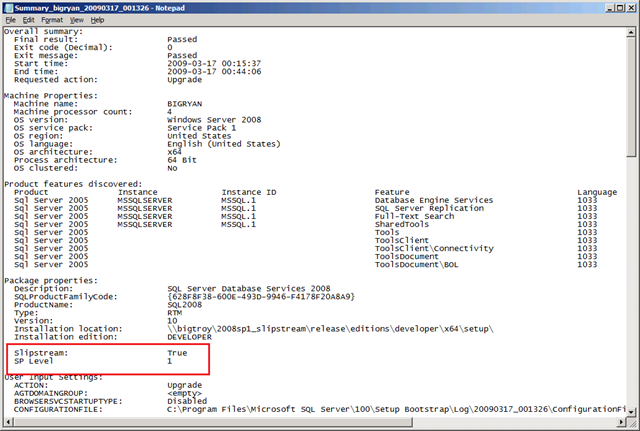
Ah success. If you look at the Summary log you can see information to confirm we used a slipstream based setup:
So now that SQL Server 2008 SP1 has released you will be able to run a single setup that incorporates fixes for Service Pack 1 into RTM. This not only applies to setup as seen in this blog but to all SP1 fixes.
When happens when the first Cumulative Update comes out after SP1? That is what the /CUSource parameter is for. If you have already applied SP1 (using the stlipstream approach here or by just installing SP1), then of course you just install the CU build. But if you have never installed SQL Server 2008, you can use the same approach as in this article to extract out SP1 and then also extract out the CU into another directory and run setup with both /PCUSource and /CUSource.
So when we release the first Cumulative Update, I'll be creating a Part III to our story to show you that experience.
Bob Ward
Microsoft