Using a Consolidated Project for What-If Analysis
This post is based on a technique presented in an Ed Hanna e-mail and is augmented with items that we are using internally to manage our own efforts. This technique can work, to a certain extent, in Project Server 2003 and will definitely work in Project Server 2007.
There are times where you need to look at several projects at once and you need to gauge the impact of a change to all of the projects at once. In this post, we will use the consolidated project function to create a combined view across multiple projects to re-allocate resources so that any overallocations are addressed.
Notes
1. This solution assumes you use leveling. The solution is much less time consuming if you use leveling to move around your resources.
2. In Project Server 2003, you should not save this consolidated project to the server. You can save it locally so that you can access it as needed.
3. This solution works best with enterprise resources. Some parts will work with Project Standard, but not all.
4. This solution also works better if you have leveled the individual plans first. Otherwise, you'll see changes caused by conditions within the individual project as well as across the combined projects. This might make it very difficult to see what changed.
Scenario
There are several resources who are overallocated as they are shared resources across three projects. As such, adjustments need to be made find and fix the overallocations while determining impact to overall project timelines.
Setup
NOTE: I would strongly suggest you (a) backup all of the files involved or (b) make copies/versions of the files which are expressly dedicated for modeling purposes if you are doing this in a production environment.
For this scenario, I created three projects based on the New Product template. I substituted names for resources that were already assigned to tasks. For this illustration, three enterprise projects will be used. However, more projects can be added to broaden the analysis.
Create the Consolidated Project
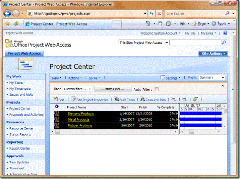
From Project Web Access, navigate to Project Center. Select the projects that you want to analyze.
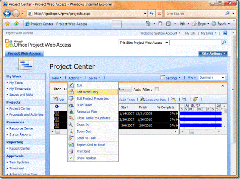
Then select Actions, Edit Read-Only. (You can choose Edit, but then all of your changes are live. We'll discuss that later.)
This will create a new master project containing the selected projects.
Now, we need some additional columns.
- Insert the Priority field, so we can adjust the relative priorities of the projects (default priority is 500—on a scale of 0 to 1000).
- Insert the Subproject Read only column. We'll discuss that in more detail below. If you selected Edit Read Only above, the Subproject Read only column should say Yes.
To insert a column, select Insert, Column from the menu bar in Project Professional. As we will be switching views a bit in Project Professional, I would also turn on the View Bar (View, View Bar).
Setting up for the Analysis
In this case, it is assumed that the resource allocation issue is known on these projects. However, it may be necessary to see a consolidated view of resource usage across projects. To do this, do the following.
- In Project Professional, open the Resource Usage View (View, Resource Usage)
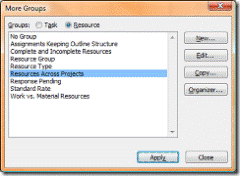
- Create a new group called Resources Across Projects
- To do this, select Project, Group By, More Groups
- Then click the New button
- Set the Group by Name and check the Group Assignments, not Resources box.
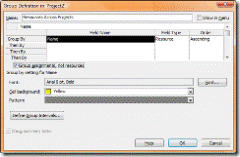
- Click OK.
- You will see the following screen, verify that Resources Across Projects is selected and select Apply.
- When the grid appears, add the Project and Start columns to the grid view.
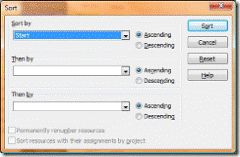
- Sort the grid by Start Date.
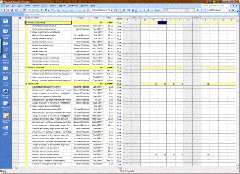
- Now you can see an aggregation by Resource across all projects in the consolidated project
Looking for Resource Over Allocations
As these are enterprise resources, the work will be aggregated. In order to find overallocations, switch to the Resource Graph view. My own personal preference is to switch the displayed units to hours rather than look at the percentages. Sometimes, you see overallocations even though the person is only working 6 hours on a given day.
To change the units, right click on the graph and select hours rather than peak units. I also zoom out to the weekly level as I figure that if I give people 40 hours of work, they will manage it on the day by day basis to get it done. There are several views you can use here so I would recommend taking a look at all of them to get a feel for their potential uses.
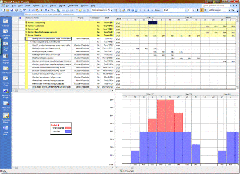
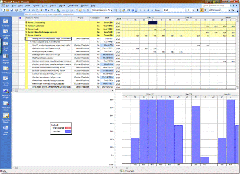
From the graph below, we see that Razvan is very overallocated with a peak in June. As he is a key resource, we need to change how he is scheduled and judge the impact to the projects. Since there is such a large number of tasks, we will use Leveling to adjust the assignments.
You can combine the two above views by doing the following:
- Select Window, Split
- Click on the bottom pane somewhere. (It needs to have focus for this to work)
- Click Resource Graph on the View Bar
- You should see the screen below. As you scroll across, the graph and grid will stay positioned in the same timeframe.
Adjusting the Plans
Now, the priorities on the plans will be changed to gauge impact on the schedules. To do this, switch to the Gantt view again.
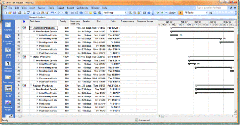
First, change the Diamond Products priority to a higher priority (i.e. 600).
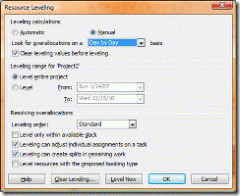
Now, we will level the consolidated project. Select Tools, Level Resources and the Resources Leveling dialogue will be displayed.
Select Level Now. Immediately the impact of the leveling is seen. As a result, the Metal and Rubber projects have been delayed since they are at a lower priority.
The leveling action is now undone so that another what-if can be executed. From the menu bar, select Edit/Undo Level.
Raise Metal Products to the highest priority (i.e. 999) and perform the Level action again. Now, Diamond and Rubber's tasks are delayed as they now have a lower priority.
Why Not Priority = 1000? 1000 is a special value where leveling doesn't move anything. If you use 999, you are at the highest priority but it allows tasks to still be moved.
Continue the What-If activity in the consolidated project until a satisfactory outcome is found. You may use deadlines for key tasks to monitor impact to key dates.
If you want a full before and after representation, you can use baselines. However, you will need to make a copy of the inserted projects to do this since you will have to open the inserted projects in edit mode to save the baselines. After you build the consolidated file, baseline it and save it (at this point it becomes a master file). Then make your what-if modifications to the master file and then view the before/after comparison in the Tracking Gantt view.
Leveling a Specific Resource. If you wanted to only level a given resource, you can switch back to the Resource Usage view, select a given resource and select Leveling. In that case, it will only level the selected resource, if you choose that option. This can come in handy if you only want to level named resources.
The Resource Graph view can be checked to make sure that none of the resources remain overallocated—even after leveling has taken place. This is possible as Project cannot always resolve all overallocations.
In the example below, it is confirmed that Patrick is not over-allocated. To scroll through the resources, select different resource assignments above. (i.e. resource names will appear in red letters if the resource is overallocated).
Saving the Consolidated Project
WORD OF CAUTION: To this point, this project has been a playground as you have not actually changed the underlying files. This was the purpose of opening these project plans in a read-only mode.
Making It Real. If you change the Subproject read only field to No, the linkage becomes two way. (i.e. changes in the consolidated/master file will change the inserted projects and changes in the inserted projects will change the master file). So as you play in the consolidated/master file, there is the possibility of saving unwanted changes to the inserted projects.
Play Friendly. If you choose to make changes to the inserted projects, you will want to coordinate this with the individual project managers as you will be impacting their schedules and you will have their projects locked for editing.
Taking care of your master. If you are using Project Server 2003, you can save the consolidated file locally (do not save/publish to server)—at which point it becomes a local master file. In Project Server 2007, you can safely save/publish these master files on the server.
You Must Choose. If you do not like what the comparison reflects, close the master file and do not save the changes. If you do like what the comparison reflects, of course, you may (optionally) want to write another baseline (i.e. Baseline 1) and save the master file and all the inserted projects.
If there are satisfied with the results, do the following.
- If you are effecting the change in the inserted projects, change the value of the Subproject Read Only field to No. In this instance, we are not changing the inserted projects.
- Decide if you are keeping the master file.
- If you want to keep the Master, select File, Close to end the session. Project will prompt us—for each open project schedule—to determine whether we wish to keep the changes.
- You will be prompted to Save and Check in the master project, type in a name and select Save.


- If you want to change the underlying projects under another name, select Yes when prompted. Otherwise, select No.
I hope this is helpful in showing how What-If analysis in a consolidated project can help in determining the impact that new projects/proposals will have on existing projects. This is a powerful capability and should be used cautiously—ideally by an appointed Portfolio Manager who has visibility and authority above the level of individual projects.
Technorati Tags: Microsoft , Project Server 2007 , Best Practice , What If , Impact Analysis


