Accessing WCF Data Services from WP7 CTP.
The current version of the WP7 tools doesn't allow you to use the WCF Data Services by just adding service a from the VS environment. This workthrough will show you how you can still use OData services from the WP7.
(Disclaimer: Even though I work for Microsoft, I am not a part of the WP7 product or tools team and I am discovering things as everybody else :))
1. Download OData Client library
The same day when the WP7 development story was announced at MIX10, the OData team has released the CTP of the client library for Windows Phone 7 series. So, you can go ahead download it and extract the contents into some known location.
2. Create Data Service
For this workthrough I have decided to use the local service on my machine. So I've just followed the steps from Creating the Data Service (WCF Data Services Quickstart) workthrough. As a result I've got the Northiwnd data service running on my laptop:
3. Create client data services classes
The next steps is to generate client data services classes against our data service. For this you'd need to open the command prompt and execute the following command:
"%windir%\Microsoft.NET\Framework\v3.5\DataSvcUtil.exe" /language:CSharp /out:C:\Temp\Northwind.cs /uri:https://localhost:31594/Northwind.svc
Make sure to modify the output location and the url name/port that correspond to your environment. The result of this execution is going to be the Northwind.cs file with all appropriate implementations of the DataServiceContext and entities from the Northwind database.
4. Create WP7 application that consumes the Northwind Data Service
Now we are ready to create the WP7 application that displays the list of the customers. I've started from creation the Windows Phone List Application in the Visual Studio Exress for Windows Phone:
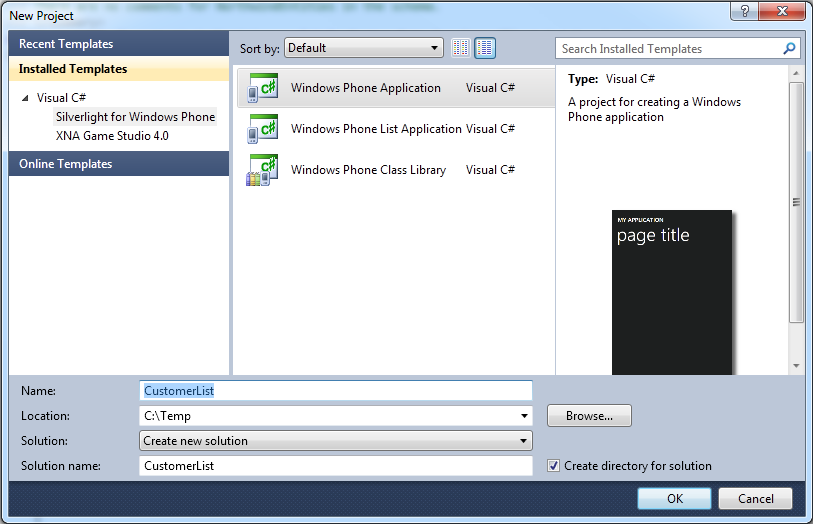
The Visual Studio generated the sample application that displays a list of some items with a detailed view. Let's add the Northwind.cs file to the project that we generated in the previous steps and re-compile the project. Since the generated code is using the ViewModel classes to databind to the data, I've added the CustomersModelView class to the project:
public class CustomersViewModel : INotifyPropertyChanged
{
public CustomersViewModel()
{
}
public CustomersViewModel(IEnumerable<Customers> customers)
{
Items = new ObservableCollection<Customers>();
// Populate the collection
foreach(Customers customer in customers)
{
Items.Add(customer);
}
}
public ObservableCollection<Customers> Items { get; private set; }
public event PropertyChangedEventHandler PropertyChanged;
}
Next, I've added the following code to the constructor of the MainPage.xaml.cs class:
// Initialize the context
NorthwindEntities northwind = new NorthwindEntities(new
Uri("https://localhost:31594/Northwind.svc/"));
// Get the query
var customersQuery = northwind.Customers;
// Execute the query
customersQuery.BeginExecute(
delegate(IAsyncResult asyncResult)
{
Dispatcher.BeginInvoke(
() =>
{
DataServiceQuery<Customers> query = asyncResult.AsyncState as
DataServiceQuery<Customers>;
if (query != null)
{
// Get the customers from the result of the asynchronous query.
var customers = query.EndExecute(asyncResult);
// Set the items source of the grid to the CustomersViewModel of customers.
this.DataContext = new CustomersViewModel(customers);
}
}
);
},
customersQuery
);
This code execute the query against the data context asyncronously and assigns the CustomerViewModel to the DataContext of the page. All what's left for us do is to change the data binding in the xaml for MainPage.xaml
mpc:ListViewItem Layout="TextAndDetailsWithIcon" Text="{Binding CompanyName}" Details="{Binding CustomerID}" Style="{StaticResource PhoneListBoxItemLayout}"/>
and the DetailsPage.xaml:
<!--TitleGrid is the name of the application and page title-->
<Grid x:Name="TitleGrid" Grid.Row="0">
<Grid.Projection>
<PlaneProjection/>
</Grid.Projection>
<TextBlock Text="DATA SERVICES APP" Style="{StaticResource PhoneTextPageTitle1Style}"/>
<TextBlock Text="{Binding CompanyName}" Style="{StaticResource PhoneTextPageTitle2Style}" Height="141" Margin="7,43,0,0" VerticalAlignment="Top" />
</Grid>
<!--ContentGrid contains the details-->
<Grid x:Name="ContentGrid" Grid.Row="1">
<Grid.ColumnDefinitions>
<ColumnDefinition Width="244*" />
<ColumnDefinition Width="39*" />
<ColumnDefinition Width="197*" />
</Grid.ColumnDefinitions>
<Grid.Projection>
<PlaneProjection/>
</Grid.Projection>
<TextBlock Text="{Binding ContactName}" Style="{StaticResource PhoneTextBodyTextStyle}" Margin="10,0,7,562" Height="33" VerticalAlignment="Bottom" Grid.ColumnSpan="3" />
<TextBlock Text="{Binding ContactTitle}" Grid.ColumnSpan="3" Height="33" Margin="9,0,8,506" Style="{StaticResource PhoneTextBodyTextStyle}" TextWrapping="Wrap" VerticalAlignment="Bottom" />
<TextBlock Text="{Binding Address}" Grid.ColumnSpan="3" Height="33" Margin="7,0,10,450" Style="{StaticResource PhoneTextBodyTextStyle}" TextWrapping="Wrap" VerticalAlignment="Bottom" />
</Grid>
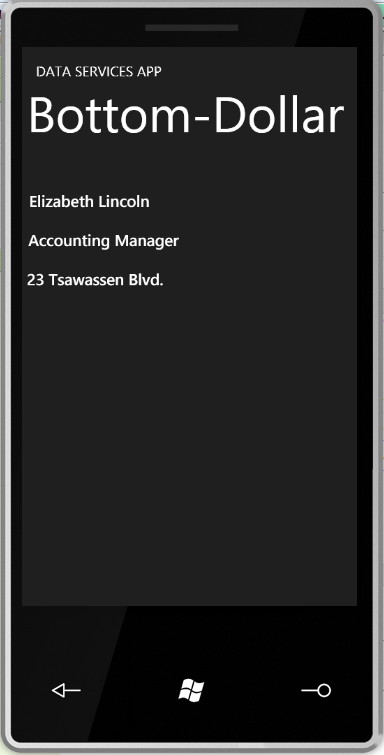
And here's the result of execution:

You can download the full source of the demo project from here:
https://blogs.msdn.com/priozersk/attachment/9982056.ashx