Run Jupyter Notebook on Cloudera
In a previous blog, we demonstrated how to enable Hue Spark notebook with Livy on CDH. Here we will provide instructions on how to run a Jupyter notebook on a CDH cluster.
These steps have been verified on a default deployment of Cloudera CDH cluster on Azure. At the time of this writing, the deployed CDH is at version 5.7 and Jupyter notebook server 4.1.0 running on Python 2.7 and Anaconda 4.0.0. The steps should be similar for any CDH cluster deployed with Cloudera Manager.
1. Go to Cloudera Manager, click the Parcels icon on the top navigation bar, then Configurations, Remote Parcel Repository URLs, add the Anaconda parcel URL "https://repo.continuum.io/pkgs/misc/parcels/" and Save Changes.
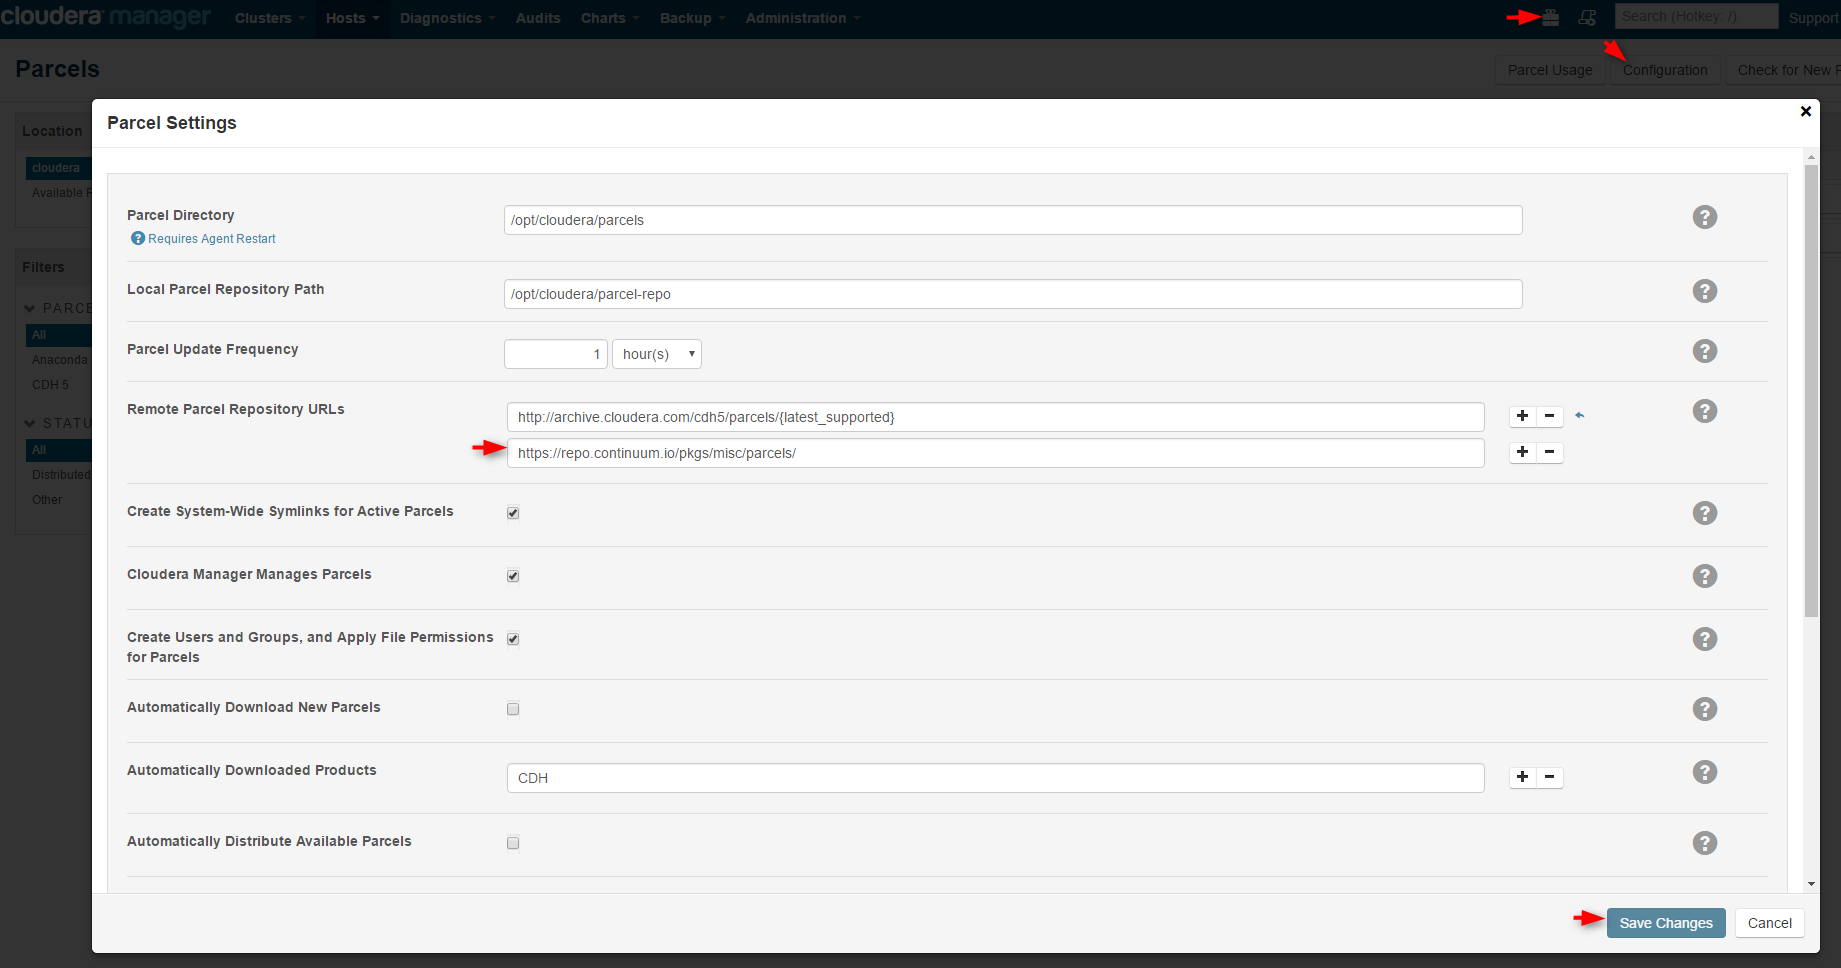
Follow the Cloudera Manager's Parcels wizard to Download, Distribute, and Activate the Anaconda parcel.
2. SSH into the Spark driver. If you deployed the CDH cluster on Azure, this is typically the first master node with a host name ending with "-mn0". For simplicity, we will run the following commands with sudo or as root user.
 # install the packages
pip install Jinja2
yum install gcc-c++
yum install python-devel
pip install pyzmq
pip install tornado
pip install jupyter

# set environment variables for pyspark
export PYSPARK_DRIVER_PYTHON=/opt/cloudera/parcels/Anaconda/bin/jupyter
export PYSPARK_DRIVER_PYTHON_OPTS="notebook --NotebookApp.open_browser=False --NotebookApp.ip='*' --NotebookApp.port=8880"
export PYSPARK_PYTHON=/opt/cloudera/parcels/Anaconda/bin/python
export PATH=/opt/cloudera/parcels/Anaconda/bin:$PATH

# create a notebook directory, make sure it's accessible by a hadoop user with sufficient priviledge to hdfs, for example, the hadoop superuser hdfs.
mkdir /<your_notebook_dir>
chown hdfs:hdfs /<your_notebook_dir>

# run pyspark as a hadoop user with sufficient privilege, such as the superuser hdfs.
su hdfs
pyspark
3. SSH into the Spark executors. These are typically the data nodes in your cluster. Set the following environment variable on each executor. Instead of setting it in the console, you want to permanently set it by, for example, adding your custom file under /etc/profile.d.
export PYSPARK_PYTHON=/opt/cloudera/parcels/Anaconda/bin/python
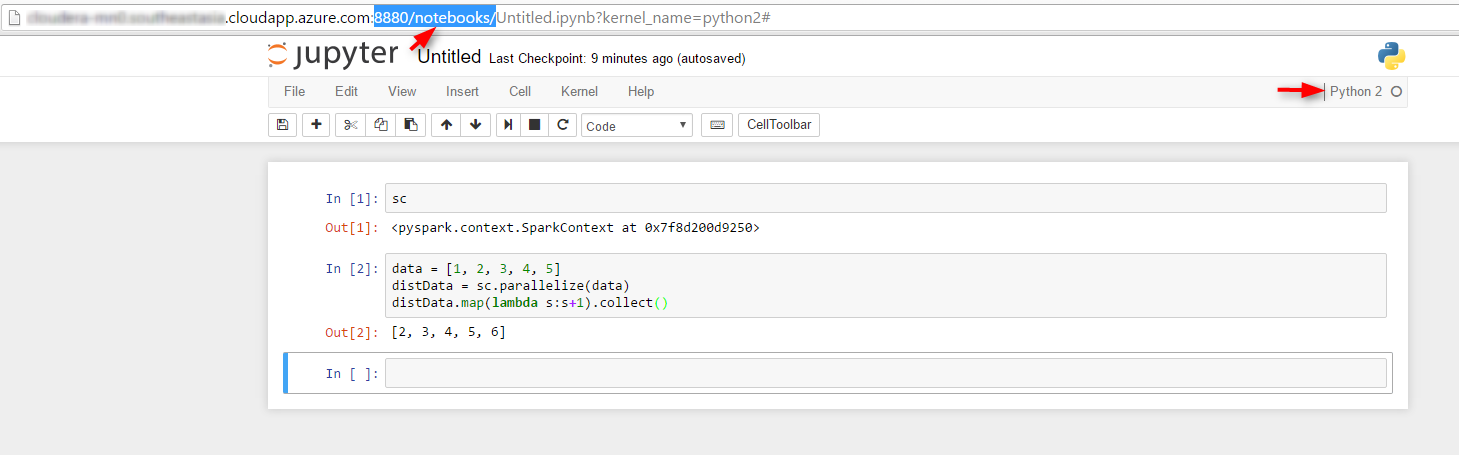
4. Now go to the Jupyter notebook URL: https://<your_spark_driver>:8880/notebooks, and New a Python2 notebook.
(If your cluster is deployed with the default configuration in Azure, then port 8880 may be blocked, and you won't be able to access the notebook URL from the Internet. You can open this port by going to the Azure portal, find the Network Security Groups for the VNet and the master nodes of the CDH cluster, and open this port in their inbound security rules. )
For more information about running Jupyter notebook on Cloudera, please see this documentation.