Custom Probe for IaaS Load Balanced sets in Windows Azure and ACL – Part 2
In a previous post (Part 1), assorted facts about LB sets with Custom probes and ACLs were discussed. This second part takes a specific example scenario to provide a walkthrough.
Scenario
Two IaaS VMs will be configured as web servers and put in a Load Balanced set. Custom HTTP probe will be configured on a non-standard port. A custom ASP.Net MVC application will be deployed on each VM that will listen on the probe-port and simulate the process of monitoring the health of the VM. It will respond either with HTTP status 200 indicating good health, or with HTTP status 404, in case of errors etc. Finally, ACL will be specified on the public load-balanced endpoint to accept traffic only from designated remote address space.
Walkthrough
For the example scenario, the following steps were carried out.
Provision VMs in Cloud Service
Two IaaS VM’s named as vmlbcustprobe1 and vmlbcustprobe2 were provisioned in a Cloud Service named as cslbcustprobe.cloudapp.net. These used the Azure gallery images for Windows Server 2012 R2 Operating System.
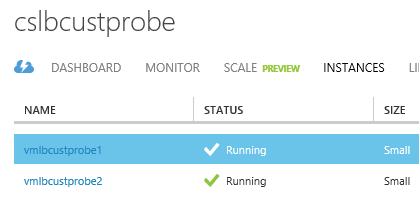
Figure 1: IaaS VM’s provisioned in a Cloud Service
Create LB set with Custom probes
From the Azure portal UI, navigate to the page for Endpoints on the first VM (vmlbcustprobe1), and add a “Stand-alone endpoint” for HTTP on port 80. Also, select the option for Custom probes and supply the parameters as:
- Probe protocol: HTTP
- Probe path: “/”
- Probe port: “1001”. The portal UI will give a warning about port mismatch which can be ignored.
- Probe interval: 15 and Number of probes: 2
To complete the LB set configuration, navigate to the Endpoints screen on the second VM (vmlbcustprobe2) and select the option for “Add an endpoint to an Existing Load balanced set”. Once configured, the endpoint configuration screens should look as in Figure 2.
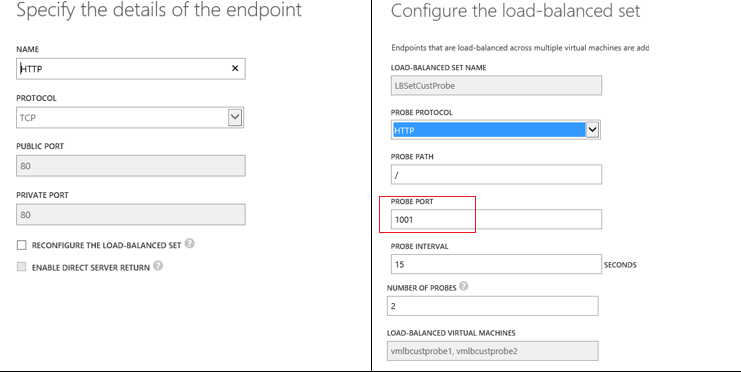
Figure 2: LB set with custom probes defined
Prepare individual VM’s for probe
The VM’s in this example will be used as members of a web farm. Also, the custom probe for the LB set is using HTTP. Both of these will use IIS. Connect to each VM using RDP and from Server Manager --> Role and Features, install IIS. Make sure the “Application Development” features are selected. See Figure 3.
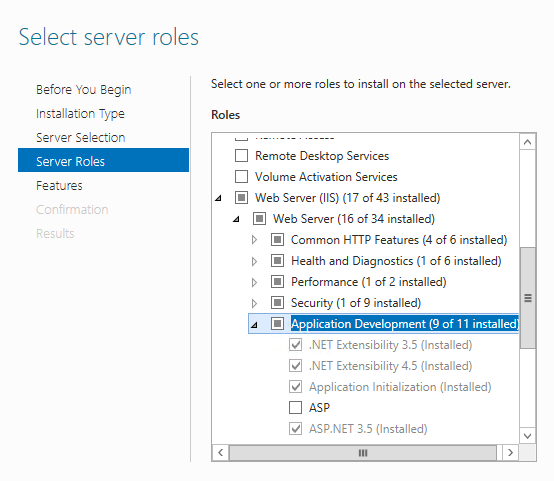
Figure 3: Install IIS from Role and Features on each VM
Create a file with name “Default.htm” and drop it into the “c:\inetpub\wwwroot” folder of each VM. The contents of the Default.htm file will simply display the name of the VM that is being accessed; see Figure 4.
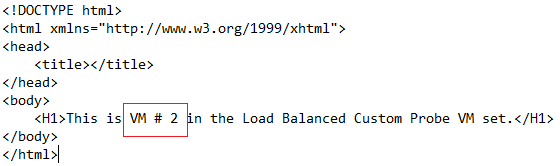
Figure 4: Default.htm on each VM displays the local hostname
In a real deployment, there will be full blown web application deployed on the Default web site (HTTP port 80)..
Create a custom application for Custom Probe
For the present example, the Probe protocol is HTTP and the Probe-port is 1001 – note that this is different from the port 80. The web site for the actual application will be deployed on the port 80, whereas port 1001 will be used for custom probing of VM for health check. I prefer to keep the two functionalities separate.
For the custom HTTP probing, an ASP.Net MVC application is used in the present example, as that is convenient, but strictly speaking one could have any custom process listening for HTTP requests on port 1001. Using Visual Studio in your development environment, create a new ASP.Net MVC project and select all default options.
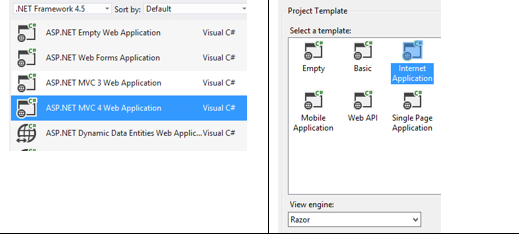
Figure 5: Create a custom application for custom probing
Edit the code for HomeController to simulate some custom error checking. In the present case, one VM raises a 404 exception if the minutes in the current timestamp are even and the other VM raises exception if the minutes are odd; see Figure 6.
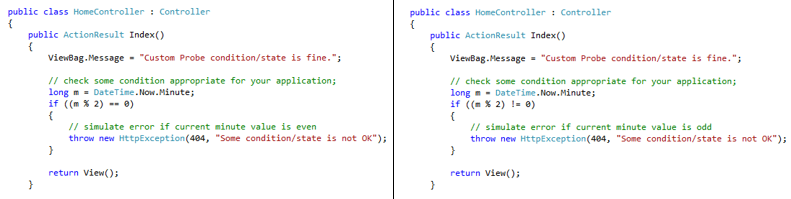
Figure 6: HomeController code modified to simulate custom health check
The code has been modified to force only one VM to return HTTP status 200 at a time, so that one can see the web farm responding from different VM’s at different times. The custom application, when tested in the development environment should show the default Welcome page when indicating a healthy VM, and should show 404 error message when simulating some issue; see Figure 7.
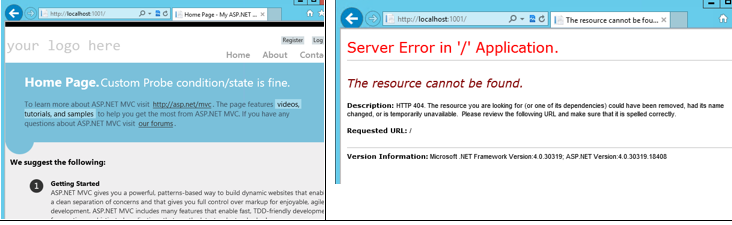
Figure 7: Custom health check application in normal and error states
Deploy custom probe application to VM
The custom application for the present example is ready to be deployed to the VM’s in the web farm. The next set of steps outlines the process.
Copy the custom health check application
Copy the application binaries and other relevant files to some convenient folder on each VM; for the present example, the files were copied to “C:\web\MvcProbeApp”.
Create New web site for Custom probe
Using Remote Desktop connect to each IaaS VM in the web farm, and launch IIS Manager. Right-click the Sites node and select “Add Website” to create a new web site; see Figure 8.
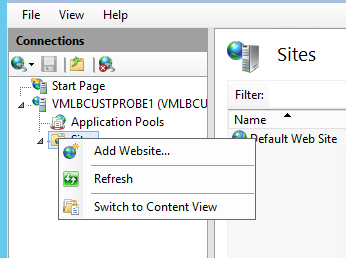
Figure 8: Create a new Web Site for the custom probe application
The new site creation form will gather the configuration information as in Figure 9. Notice that port 1001 is specified to distinguish this site from the main web site which would be on port 80. The Physical path points to the location where the custom application binaries were copied.
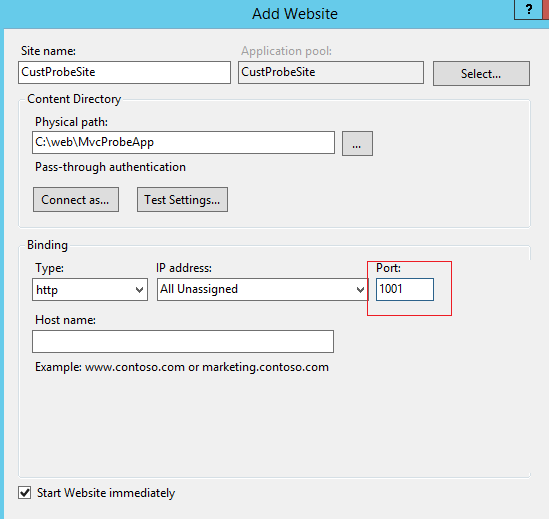
Figure 9: Configuration information for Custom probe Web site
The site by itself can be tested from within the VM itself by browsing the Url https://localhost:1001/.
Open Probe-port in Firewall
The port 1001 chosen as the Probe-port for the present example needs to be opened in the firewall on each VM. This port is not part of the load balanced endpoint; rather it is used by the host agent internally on the private IP address. Opening this port does not pose any risks as it is not exposed through the Cloud Service public IP address.
The web farm should now be fully operational and accessible through Url https://cslbcustprobe.cloudapp.net . The way the custom probe has been defined, only one VM at a time will return a healthy status (200). Thus, the web site page should cycle between VM1 and VM2 on repeated hits.
Protect LB set Endpoint with ACL
The public endpoint exposed through the LB set can be restricted for access from a few designated address spaces, if necessary. It will depend upon whether the hosted web site is intended to be accessed by everyone on the internet, or only from a restricted pool of remote IP addresses. For the purpose of illustration, 175.1.0.3 was designated as the only remote IP address authorized to access the web site. ACL can be applied using Powershell (see the blog sites mentioned before) or using UI from the Azure portal. To use the Azure portal, navigate to any one of the VM instances in the LB set; for example vmlbcustprobe1 in the present example. Go to the page for Endpoints and after selecting the load balanced endpoint, click on “Manage ACL” at the bottom of the page. This will bring up the UI for specifying ACL as shown in Figure 10.
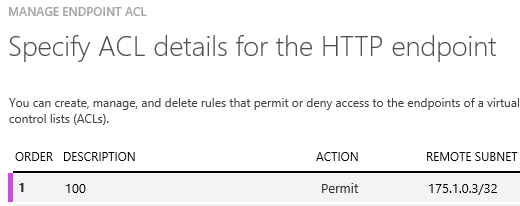
Figure 10: Specify ACL on LB set endpoint
Note that since this is an endpoint on a LB set, the ACL needs to be specified precisely once, on any one of the VM’s in the set. The endpoint on other VM’s will automatically reflect the ACL.