ADFS OpenID Connect custom ID_token
Hi Guys! In this article I will show you in detail what is necessary to do to generate custom ID_tokens Using ADFS 4.0 and OpenID Connect.
If you would like to reproduce this lab I'm going to use exactly the same environment described at the following article:
In my environment I extended the users class attributes too to push them in my id_token via claims.
Please take note of the client_id and shared secret generated during the setup process of the lab.
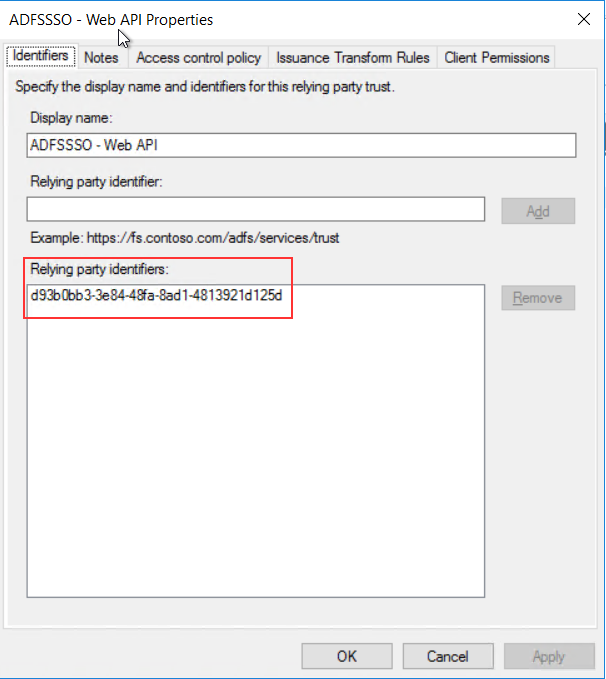
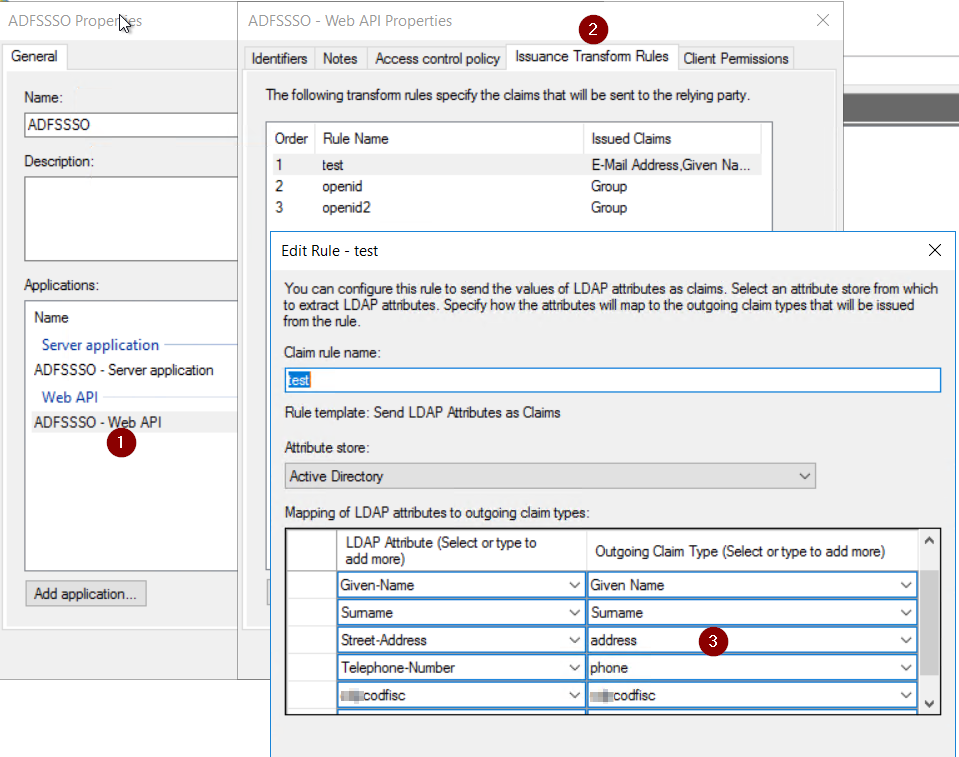
Make sure that the Client_ID of the server application and the Relying party identifier of the web api are matching.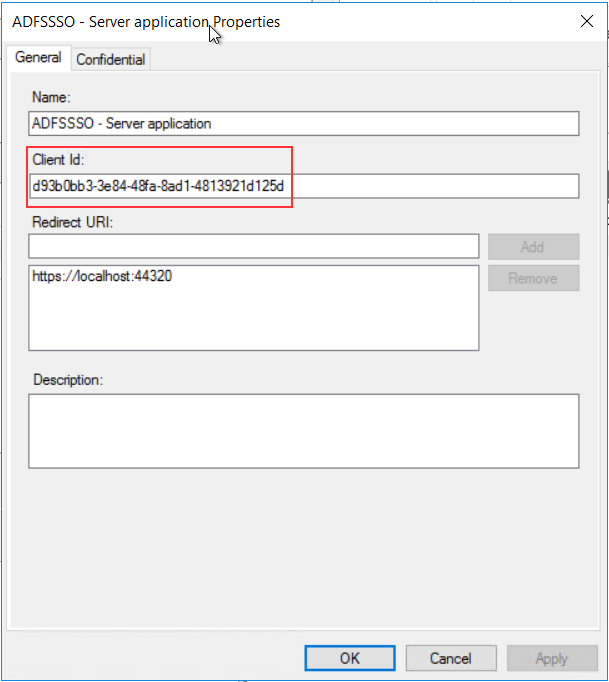
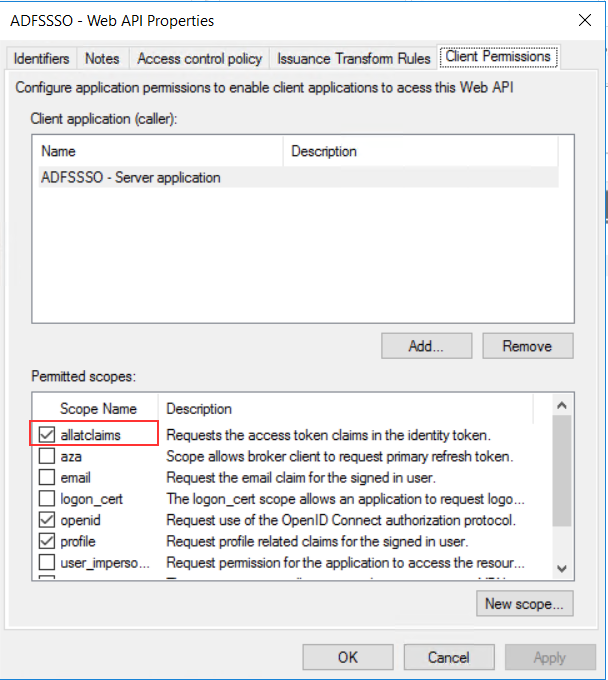
Next in the web api properties select Client Permission and make sure that “allatclaims” is enabled.
Now for reproducing the authentication using openid I used Postman. You can use Fiddler too, they can do the same things.
Parameters recap:
Client_id = d93b0bb3-3e84-48fa-8ad1-4813921d125d
Redirect_uri = https://localhost:44320
Response_type= code
Scope = openid
Response_mode = form_post
Even if response_mode is an optional parameter we need to declare it as “form_post” to get the full id_token. In this way we tell the browser to use the POST method for passing the authorization code to ADFS!
This will be my authorization request in Postman:
By pressing send I will obtain my authorization code (copy and put it somewhere in notepad). 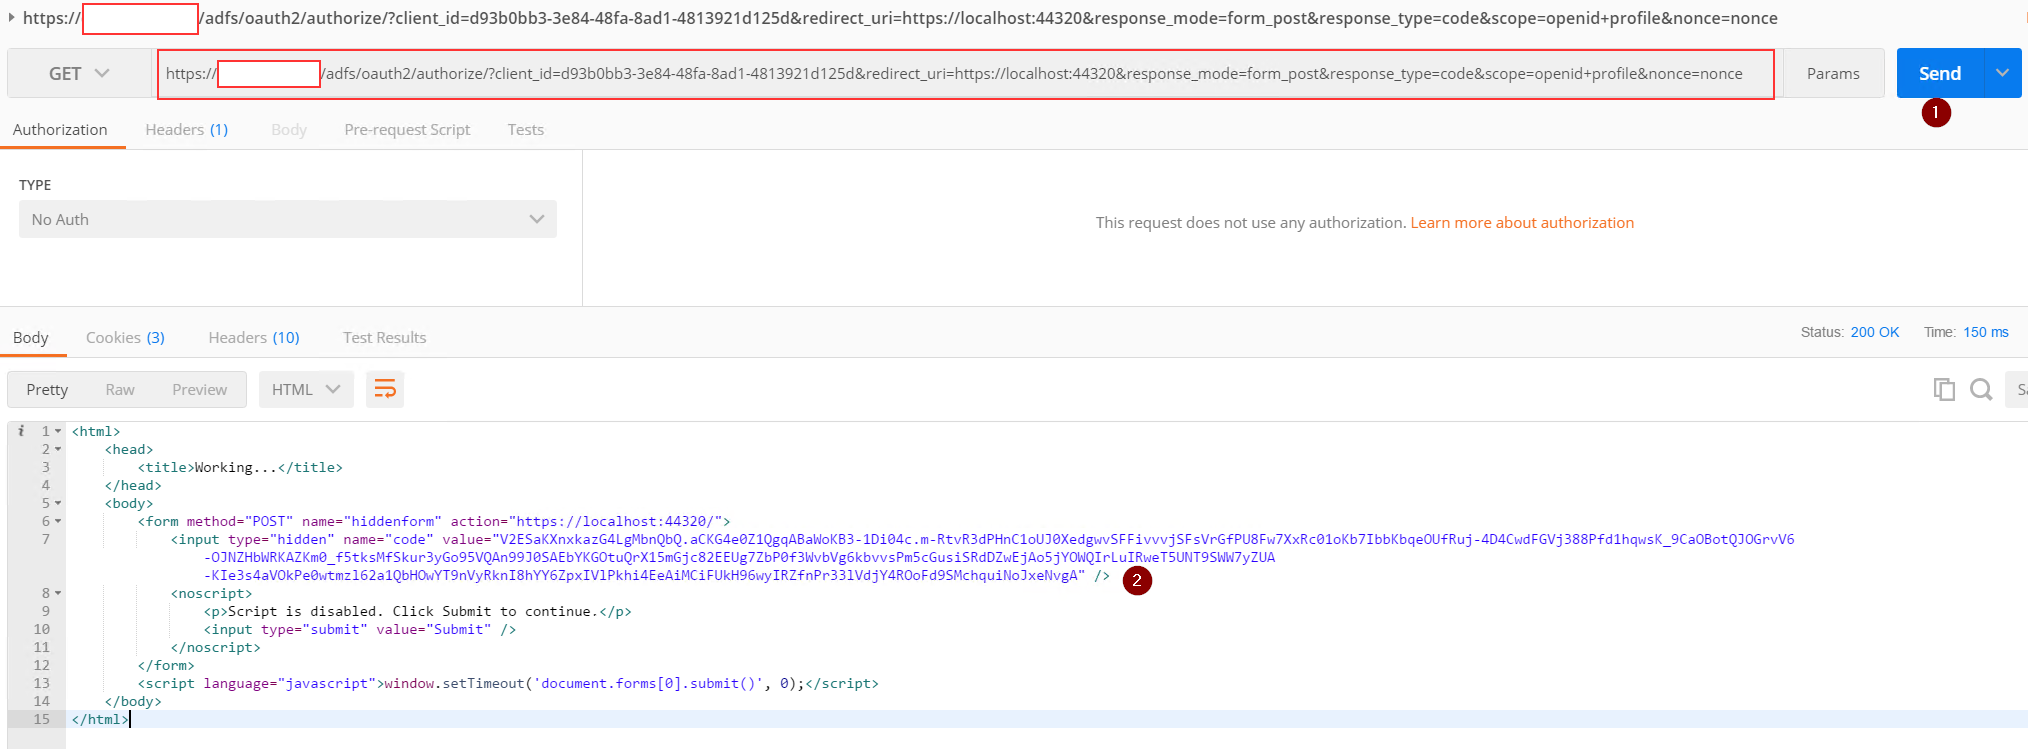
Next we need to POST the authorization code to the ADFS token endpoint.
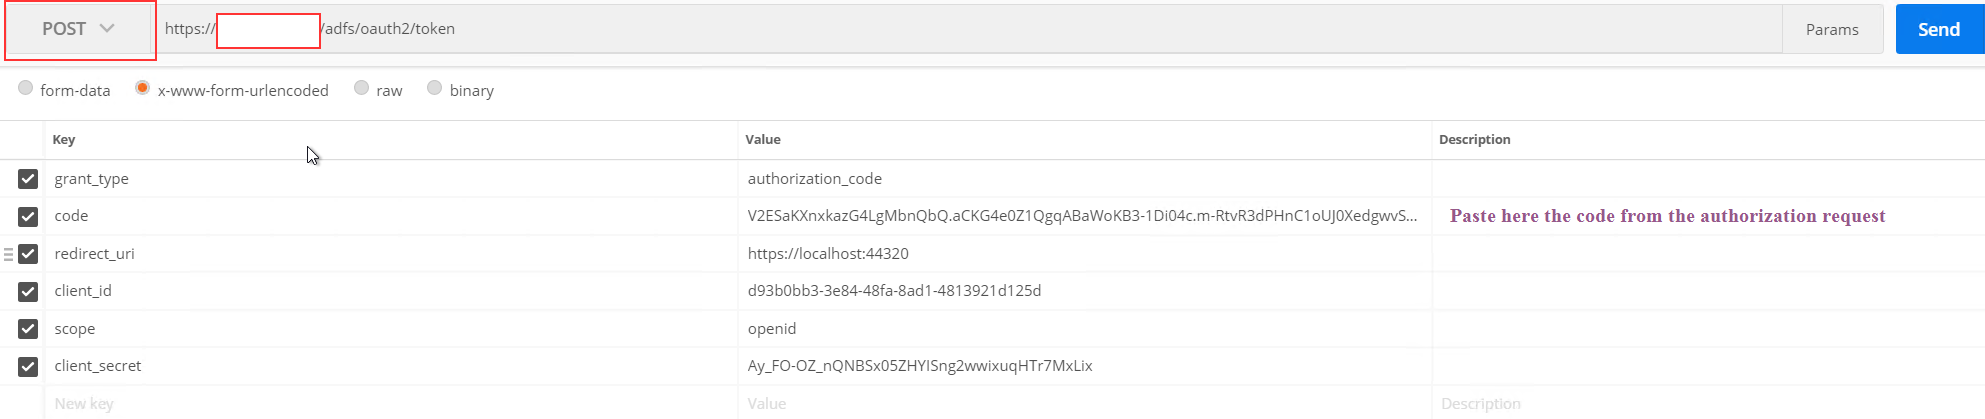
As you can see I created a new tab in Postman and I selected the POST method.
Than I selected x-www-form-urlencoded and added the following values:
Grant_type = authorization_code
Code = the authorization code from the previous request
Redirect_uri = https://localhost:44320
Client_id = d93b0bb3-3e84-48fa-8ad1-4813921d125d
Scope = openid
Client_secret = the client secret obtained from the setup process
Next I click on send to obtain my tokens:
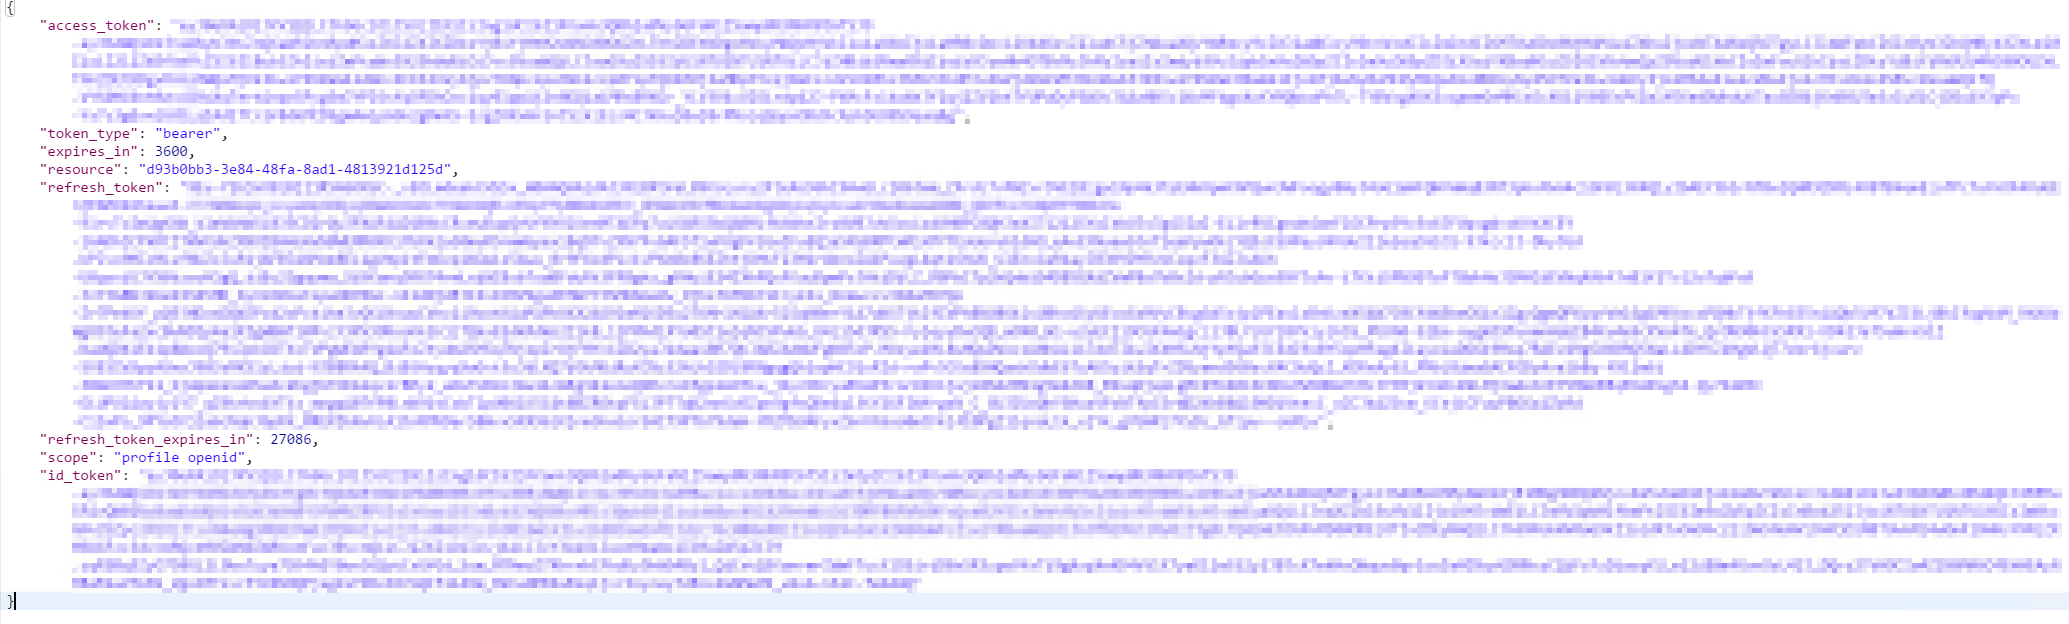
If we copy the id_token value and paste it on jwt.io we are able to decode and see our custom id_token with the custom claims.
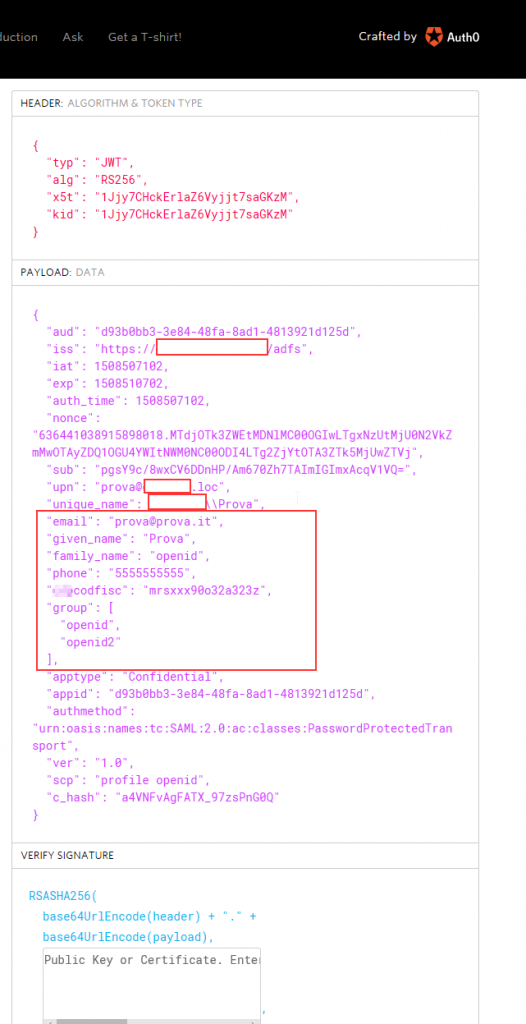
Here you can see my custom claims. (codfisc is a custom attribute that I added to the user class in AD).
Hope that this post helps you implementing custom ID_tokens for your web api applications!